Aglaonema Care Made Easy: Your Friendly Guide to Happy Plants

The Ultimate Guide to Aglaonema Care (Chinese Evergreen): From Newbie to Pro
Bringing home your first Aglaonema—known affectionately as the Chinese Evergreen—can feel a little like adopting a quirky new roommate. Low-maintenance, sure, but if you want those gorgeous, jewel-patterned leaves thriving (not just surviving), you'll need more than “just water it sometimes.” This isn’t another generic list; it’s your personal roadmap, built from six years of trial and error—including more than a few “oops” moments I’ll gladly share so you don’t have to repeat them.
Ready? Let’s grow together from the roots up!
Speaking of which, 1. Foundations: Understand Your Aglaonema Before You Even Unpot It
Where Does It Come From? Why Should You Care?
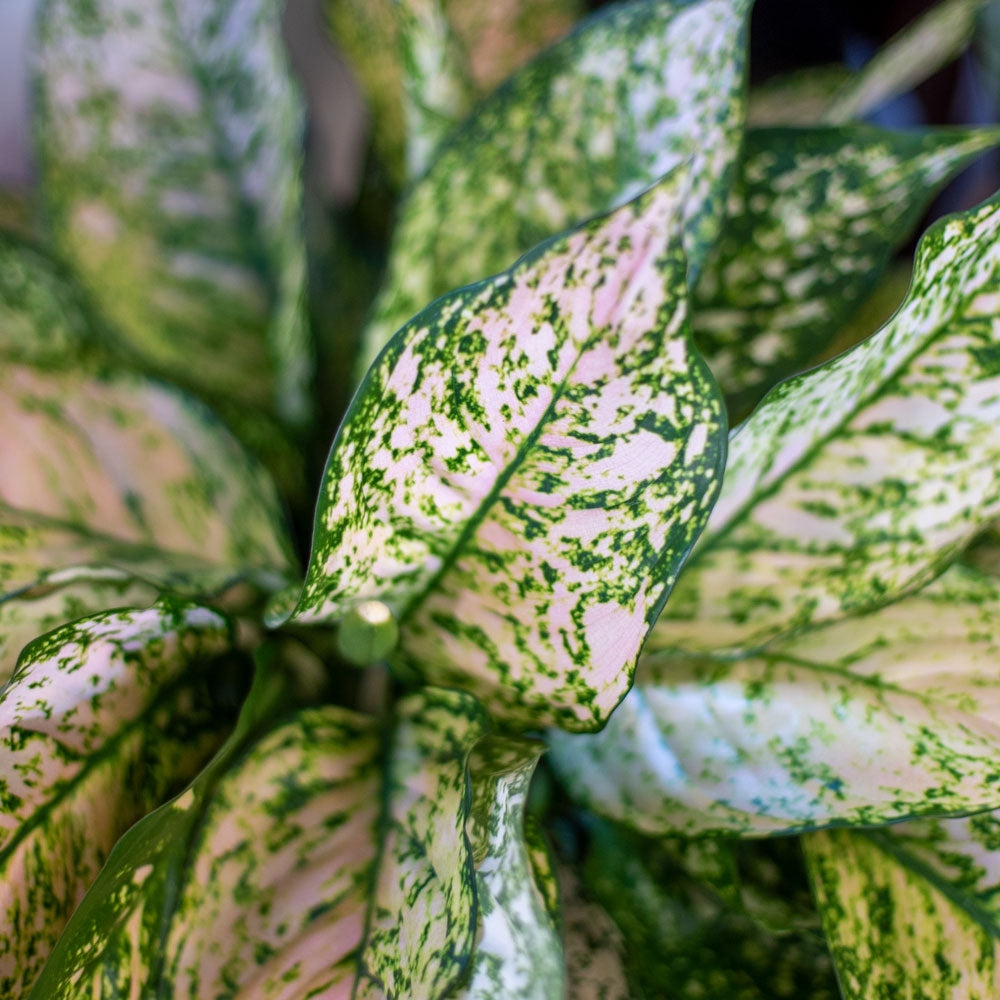
Aglaonemas are native to the lush, shaded understory of Southeast Asian rainforests. Picture this: filtered sunlight peeking through impossibly tall trees, warm air heavy with humidity, and soil that’s damp—but never flooded. That is the natural setting they crave.
So, what does this mean for your apartment?
- Skip the harsh midday sun; think gentle light.
- Keep things cozy and humid (but not sauna-level).
- Remember, these plants expect a break from extremes—they grew up in moderation!
I learned this lesson the hard way. My first ‘Red Valentine’ was practically sunbathing in a south window. Result? Crispy brown edges after four days. Sometimes it hurts to be enthusiastic! Trust me on this one.
The Light Dance—Finding That Sweet Spot
Aglaonemas are famous for tolerating lower light, but “tolerate” isn’t the same as “love.” If you want that striking leaf pattern to pop, shoot for bright, indirect light.
Here’s how you nail it:
- Best bets: Next to north or east windows. Sheer curtains are your friend!
- Got darker corners? Go for darker-leaf varieties (‘Emerald Beauty,’ ‘Maria’)—they’ll forgive you more.
- Absolute avoid: Intense sunbeams, especially between 10am–4pm.
After I moved my ‘Siam Aurora’ just three feet further from a west-facing window (and behind sheer drapes), its faded reds returned so vibrantly that friends asked if I'd bought a new plant!
Water: Not Too Much, Not Too Little
Here’s where everyone messes up—including me (twice). It’s easy to drown your Aglaonema in love… literally.
How do you get watering right?
- Use the “one-inch test”: Stick your finger an inch into the soil. Dry? Water it. Still moist? Wait.
- Room temperature water only—icy shocks aren’t fun for anyone.
- Always use pots with drainage holes.
- Water thoroughly until excess drains out, then leave it alone till next time.
I once used a snazzy self-watering planter without checking enough drainage. Root rot city! Now I swear by simple terracotta pots and cheap moisture meters (the Dr.meter one has never let me down).
Temperature & Humidity: Everyday Tweaks = Happy Plant
Aglaonemas like homey vibes:
- Ideal temp: 65–80°F (18–27°C)
- Never lower: 60°F (16°C). Drafty winter windowsills? Big mistake.
- Average humidity works, but dry winter air can stress them out.
My go-to low-effort tricks:
- Place pot on a pebble tray half-filled with water.
- Mist leaves lightly every couple days in winter—not soaking wet!
- Cluster plants together for a mini-jungle effect (plants raise ambient humidity).
Trust me: dry air = brown tips. When I started running a humidifier nearby last January, those crispy leaf tips disappeared like magic.
2. Your Step-by-Step Path to Aglaonema Mastery
No guessing games here! Let's break this down layer by layer—from unboxing to boss-level care.
Step 1: Find That Goldilocks Spot
Walk around at different times of day with your phone flashlight or hand mirror—see where sunlight hits without being harsh. Those bright-but-not-scorching pockets are prime real estate for Aglaonemas.
Aim for:
- Consistent temps (no wild swings near radiators or AC vents)
- Indirect light most of the day
- Air movement is good—but avoid breezy drafts
One friend put her aglao in her bathroom (with bright frosted windows), and it exploded with growth—proof that creativity pays off!
Step 2: Potting Up Like a Pro
Forget those plastic sleeves from the store—your plant deserves better breathing room!
Choose:
- Pots with multiple drainage holes.
- Terracotta is safest—it lets soil “breathe,” reducing overwatering risk.
Best soil mix:
Mix equal parts peat moss or coco coir with perlite and some chunky orchid bark if you've got it (3:1:1 works wonders). Avoid anything super dense or soggy-feeling—that's root rot territory.
Real talk: I once tried using straight garden soil (“eh, dirt is dirt?”). The plant sulked all month! Aeration matters way more than you think.
Step 3: Gentle Planting & Settling In
Pulling your Aglaonema out and seeing tangled roots can feel intimidating—I still get nervous! But be gentle:
- Loosen roots softly—don’t rip or force them.
- Position so crown sits just above soil line.
- Backfill with airy mix; tap pot gently to settle things (no Hulk-smashing).
- Water lightly initially.
- Let it chill out undisturbed for about three days before resuming normal care routines—a mini-honeymoon phase!
This gives roots time to recover from shock—a step I skipped once and ended up with wilted leaves almost overnight.
Step 4: Build Your Watering Rhythm
No set schedule works for everyone—your home climate is unique! Track moisture for a few weeks; soon you'll know when it's time just by look/feel alone.
Water deeply, letting excess drain out fully each time—but let the top inch dry out between drinks.
A tip: If leaves droop downward but aren’t yellow, check dryness first—it might just need a drink! Wilting plus yellowing usually signals overwatering/root issues instead.
Step 5: Smart Feeding Without Overdoing It
During spring/summer:
- Use liquid balanced fertilizer (like 20-20-20) at half-strength once per month.
Skip feedings when:
- It's cold/dark outside and growth has slowed,
- You see any burn marks on tips,
I’ve hit both extremes—overfeeding led to white salt crust on my old ‘Maria’; skipping fertilizer stalled new leaf growth completely one year!
3. Navigating Real-Life Pitfalls & Blunders
We all trip up sometimes—the key is learning fast and tweaking along the way!
| Mistake | What Happens | Fix This Fast |
|---|---|---|
| Overwatering | Yellow mushy stems/leaves | Repot in dry mix; trim dead roots |
| Direct Sunburn | Scorched brown spots | Move away from direct rays |
| Underlighting | Sparse pale foliage | Bring closer to brighter spot |
| Pest Ignorance | Sticky dots/webs/holes | Wipe leaves; try neem oil/spray |
| Dust Neglect | Dull dirty leaves | Wipe monthly w/ damp cloth |
Case Study – The Great July Sunburn
My friend Sarah placed her shiny new ‘Red Siam’ smack against her southwest window during Florida’s brutal July sun (“for best light!”). Within two days those brilliant reds looked toasted—and she nearly gave up hope! Shifting behind an airy curtain plus smart watering brought dramatic recovery within three weeks.
Quick Story – Propagation Win
Elena tried stem cuttings over summer using glass jars of tap water on her kitchen shelf—not fancy at all! Roots showed up after about two and half weeks; she potted them once they hit ~2 inches long…and now has three happy baby ‘Silver Bays.’ Her top tip? “Don’t give up too soon; roots sneak up overnight!”
4. Level-Up Moves – Going Beyond Basics
Ready for that next level? Once daily care feels effortless, challenge yourself with these pro techniques:
Advanced Propagation Techniques
Division Method:
Best done during spring re-potting season:
- Gently remove entire root ball from pot.
- Find natural clusters/babies (“pups”) emerging around main stem.
- Untangle slowly so each section keeps decent root mass—don’t force it!
- Repot in new containers using fresh airy mix.
- Hold off fertilizer ~1 month until new growth appears—you want roots first, not leafy drama.
It took me three tries before finally getting divisions established without one half sulking or rotting away…I still get nervous every time but wow is it rewarding!
Stem Cuttings:
For bushier plants:
- Snip healthy stem just below node with sharp sterilized scissors/shears.
- Place directly into damp soil OR stand upright in jar of clean water indoors.
- Change water every three days if rooting hydroponically—watch for roots after ~2–4 weeks!
Cuttings planted directly in soil often take longer to root but skip transplant shock altogether—pick whichever suits your patience level best!
Creative Displays & Groupings
Try clustering different cultivars together (“Red Valentine” beside “Silver Bay”) for mini indoor jungles—they thrive sharing humid microclimates!
Experiment:
- Tall Aglaos at back of sideboard
- Shorter ones flanking desk lamp
- Hanging baskets near kitchen windows
The possibilities are endless—and seriously fun.
Tailoring Soil Mixes & Pot Sizes
For large mature plants (>18” tall), size up pots gradually—a jump too soon can make soil stay soggy way too long between waterings! Add extra coarse sand or orchid bark chunks for increased airflow if you notice slow drain rates after watering.
5. Troubleshooting Deep Dive – Addressing Tricky Scenarios
Let’s unpack edge cases even seasoned hobbyists run into (yep—I’ve met them all):
Yellow Leaves Falling Off Rapidly
Usually too much water OR poor drainage:
- Slide plant out of pot; gently check roots for black/mushy bits—trim these away cleanly!
- Replace tired old soil with fluffy new mix.
You might lose some older leaves regardless—it happens! Focus on future growth bouncing back strong rather than resuscitating every struggling leaf (a hard lesson I resisted learning…).
Brown Leaf Tips or Crispy Edges
Often dry air + salt buildup:
- Increase humidity around plant
- Flush pot thoroughly under slowly running tap every few months
Don’t worry if occasional tips still crisp—the rest of the leaf will keep working!
Leaves Pale Despite Good Lighting
If routine seems perfect but color fades:
- Try moving even closer to indirect natural light
- Resume gentle feeding after winter lull
Sometimes genetics play a role too—some cultivars fade as they age regardless of care.
Plant Suddenly Wilts After Repotting
Repot shock strikes especially if roots got roughed up:
- Keep watering minimal at first (~every 7–10 days max) until perk-up starts
- Hold off fertilizing till obvious new growth resumes
I've lost exactly one plant this way—sometimes less is genuinely more during recovery!
Mysterious Sticky Residue
Classic sign of pests like spider mites or soft scale:
- Isolate affected plant immediately!
- Wipe every leaf/stem carefully using soft cloth dipped in dilute soapy water
- Follow-up weekly sprayings w/ neem oil until all signs vanish
Persistence wins here—the first time my collection got spider mites I nearly panicked…but steady weekly cleaning turned things around!
6. Real Stories – Plant Parent Adventures
Mark’s Pest Panic To Victory
Mark ignored sticky patches (“just dust?”) until webbing crept onto his prized ‘Siam Aurora.’ A full Saturday later—with every leaf wiped down twice and neem oil sprayed liberally—the invasion finally turned around within two months…now he checks weekly via flashlight behind every leaf cluster religiously.
Sarah's Dramatic Recovery
Daily watering plus sunny window seemed loving until her aglao started wilting/yellowing faster than she could Google “why.” Moving behind frosted glass AND waiting till topsoil dried before watering reversed everything within four weeks—she swears she talks encouragingly aloud whenever she passes by now.
Elena's Propagation Party
Starting nervously (“what if they ALL die?!”), Elena cut two stems last summer and rooted them inside jam jars beside her laundry room sink—which oddly turned out perfect due to steady moisture/no direct sun! Four adorable babies later she celebrates by gifting extras each year.
7. Tools & Tricks That Make Life Easier
Why struggle when gear makes things simpler?
| Tool | Why Bother? | Specific Faves |
|---|---|---|
| Soil Moisture Meter | Confidence in watering decisions | Dr.meter Digital Moisture Meter |
| Pruning Shears | Clean cuts prevent spreading disease | Fiskars Micro-Tip Snips |
| Spray Bottle | Easy misting/humidity boosts | Any sturdy plastic mister |
| Liquid Fertilizer | Balanced nutrition | Miracle-Gro Indoor Formula |
| Neem Oil/Spray Soap | Fast pest control/prevention | Bonide Neem Oil |
Bonus tech tip: Apps like Planta track reminders based on YOUR conditions—I resisted at first (“do I really need an app?”) but now they save me when work gets crazy busy.
8. Quick Start Reference Checklist
Feeling overwhelmed? Don’t be! Here’s your lightning round cheat sheet:
- Scout For Bright Indirect Light: North/east windows or filtered curtains = gold standard.
- Pot With Drainage + Airy Soil Mix: Terracotta + peat/perlite blend avoids heavy muddy roots!
- Finger Test For Water Needs Weekly: Only water if top inch bone dry—not by calendar dates!
- Mist Or Tray For Humidity In Winter: Brown edges beg for extra moisture boost!
- Feed Monthly During Growth Season: Liquid balanced fertilizer at half dose March–September.
- Wipe Leaves Monthly + Check For Pests Weekly: Healthy aglaos shine; sticky residue means act NOW!
- Practice Dividing Or Cutting Stems Once Confident: Propagate new plants as fun bonus project each spring/summer.
9. Most-Loved Cultivars & Special Challenges
Let’s not forget variety counts! Each type brings its own quirks:
‘Siam Aurora’:
Stunning red edges—but fades quickly in low light; needs more frequent misting during hot spells.
‘Silver Bay’:
Super common yet resilient; tolerates office lighting better than most, but leaf tips crisp easily under vents or fans.
‘Maria’:
Deep green camo-like patterns thrive almost anywhere except true darkness; gets bushy fast if pinched occasionally!
Hot tip: Whenever adding new varieties, isolate newcomers two weeks minimum before grouping—to spot pest stowaways early.
10. Final Thoughts – Growing With Confidence & Joy
If you take nothing else away from my journey…it’s perfectly normal to mess up sometimes—even experienced hobbyists lose plants here and there! What matters isn’t flawless technique, but building awareness and responding thoughtfully:
Celebrate small wins—a single new leaf unfurling feels amazing after months spent troubleshooting droopy stems or brown tips! Swap stories with fellow growers online; join local plant swaps if you can—it transforms indoor greenery into living memories.
Your Aglaonema will reward consistent care far more than sporadic bursts of attention—and with time, you’ll rely less on guides like this one because you’ll know exactly what YOUR plant family prefers.
Still unsure about something weird happening? Snap some photos, jot down details (“leaf yellowed after repot on June 12th”), ask fellow enthusiasts—or pop back here anytime!
Happy growing—and remember: even your houseplants are rooting for you!
Quick FAQ
Q: How often should I repot?
A: Every 2–3 years when pot feels crowded or draining slows noticeably—or whenever roots peek through drainage holes!
Q: How long before stem cuttings root?
A: Usually between two and four weeks depending on warmth/humidity/light used during rooting stage!
Q: Do they flower indoors?
A: Occasionally yes—but blooms are modest compared to stunning foliage and sometimes sap energy from leafy show-off mode!
(If you made it this far—you’re already ahead of most!)
Now pour yourself a cup of tea and enjoy spotting signs of fresh growth... because nothing beats seeing those glossy leaves perk up thanks entirely to YOUR care 💚


