Alfalfa Sprouting Made Easy: Quick Tips for Fresh, Nutritious Results

Sprouting alfalfa seeds at home isn’t complicated, but it does require a bit of consistent care to get crisp, fresh sprouts without the headaches. Let’s break down what actually works based on real experience, and I’ll share some practical examples so you know exactly what to expect.
Why bother sprouting alfalfa seeds at home?
Alfalfa sprouts aren’t just trendy garnish — they pack a serious nutritional punch. Vitamins A, C, and K? Check. Calcium and iron? Absolutely. Plus fiber and antioxidants that support digestion and immunity. When you grow them yourself, you skip the mystery of store-bought batches that might sit under fluorescent lights for days or get sprayed with preservatives.
Think about it: each tiny seed transforms into a burst of living nutrition in less than a week, powered by nothing but water and air. You’re basically turning your kitchen counter into a mini nutrient factory.
The no-nonsense recipe for sprouting success
1-2 tablespoons of good-quality alfalfa seeds are all you need to start a batch that fills a small jar or tray nicely. Here’s what I’ve learned works best:
- Soak: Cover those seeds with cool water for 8 to 12 hours—overnight is perfect if you do this before bed.
- Drain & rinse: This step can’t be skipped. After soaking, drain thoroughly (no standing water), then rinse with fresh water.
- Jar or tray setup: Use a wide-mouth mason jar with a mesh lid or simple sprouting trays. Mason jars with mesh lids make draining easy without losing any seeds.
- Twice daily rinses: Morning and evening, rinse your sprouts under cool running water and drain well each time.
- Keep warm but indirect light: Ideal temperature is around 70-75°F. Too cold slows growth; too hot risks mold. Keep them near natural light but avoid direct sun.
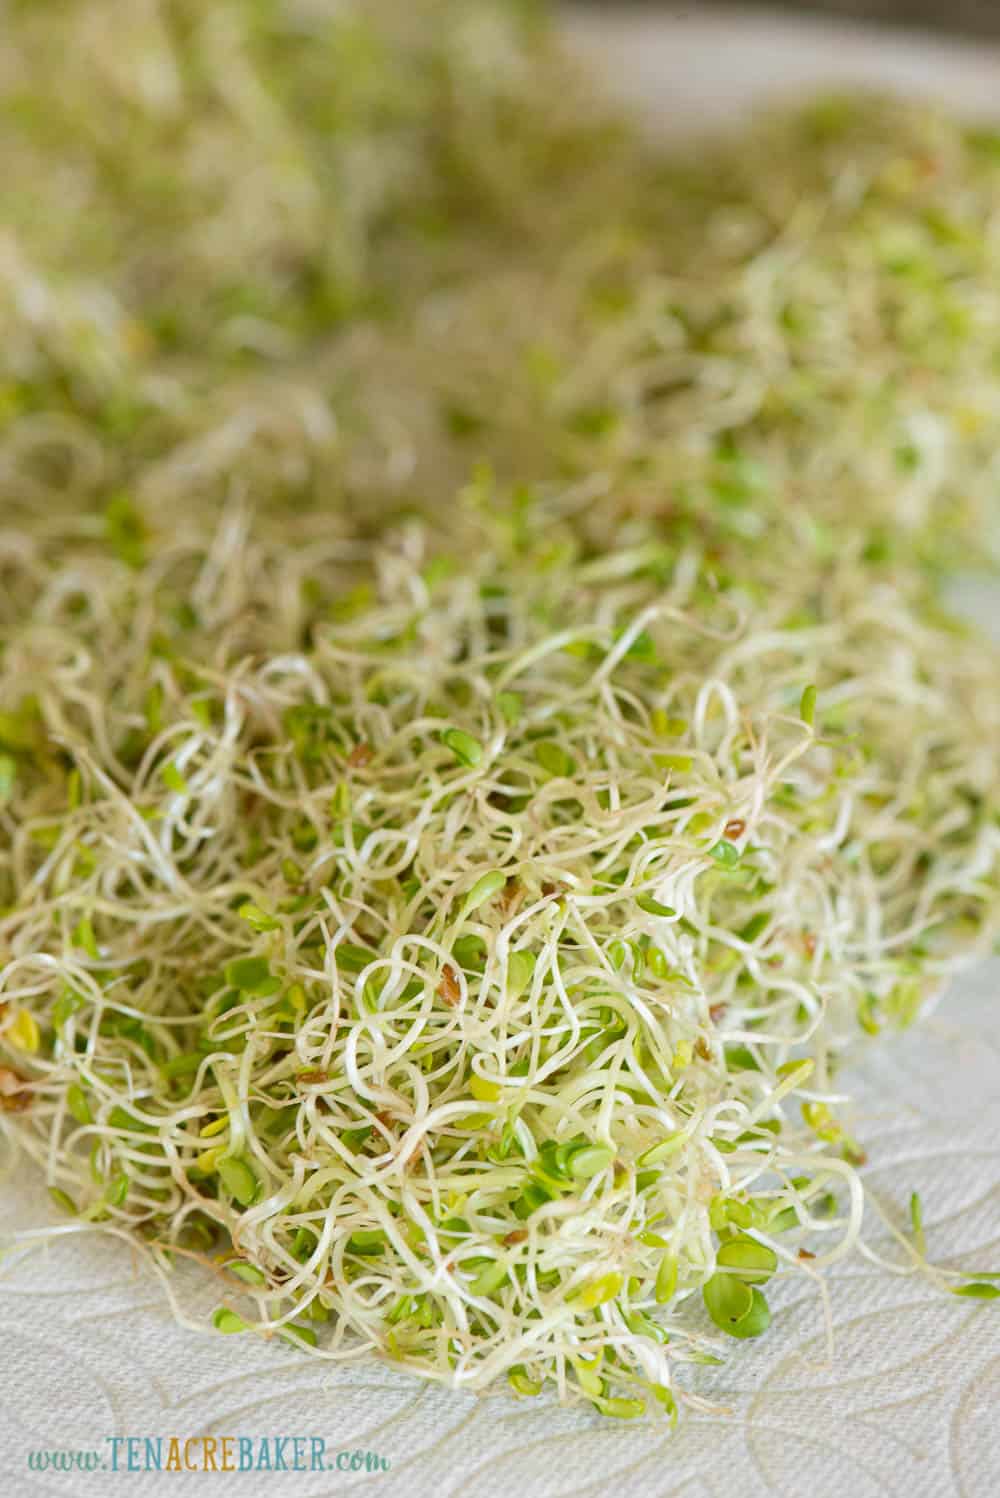
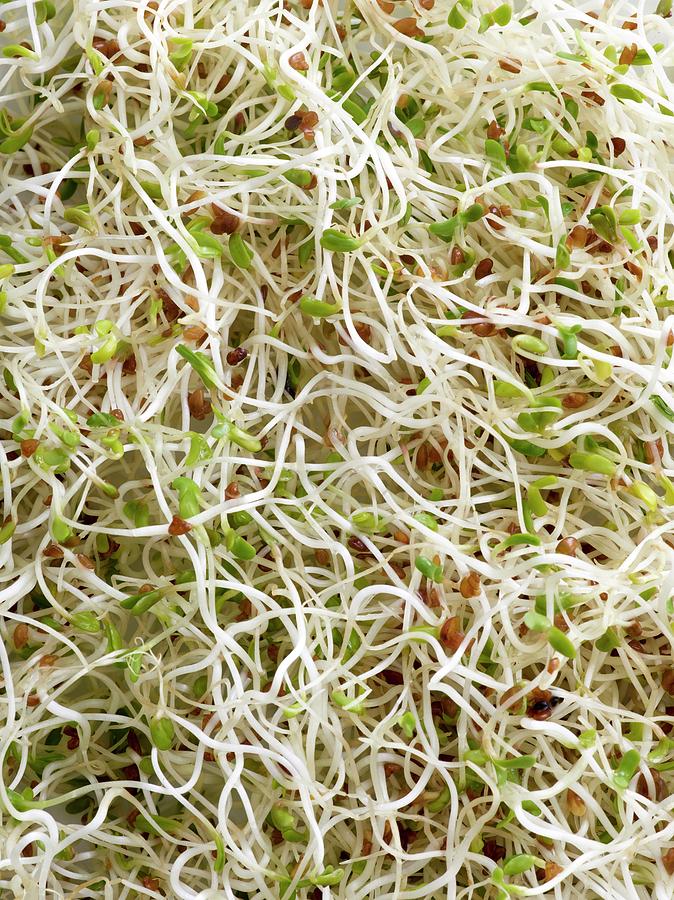
After about 4 to 6 days, when sprouts reach 1 to 2 inches with tiny green leaves opening up at the tips, give them one last rinse before storing in the fridge.
What trips most people up (and how to avoid it)
The biggest concern is mold or sliminess — nobody wants nasty sprouts growing bacteria on their kitchen counter.
Here’s what separates successful sprouters from frustrated ones:
- Cleanliness matters more than fancy gear. Always wash jars/trays with hot soapy water before starting.
- No standing water after rinsing — tilt your jar or tray enough so excess moisture can escape.
- Consistency in rinsing twice daily keeps sprouts moist but not soggy.
- If you detect any off smells or fuzzy spots anywhere on the batch, toss it immediately — don’t gamble with food safety.
One subtle trick I picked up: use filtered or bottled water if your tap water tastes chlorinated or has heavy minerals. It reduces risk of bacterial growth noticeably.
Real-world examples to bring this home
Example #1: Rookie Jamie ordered organic alfalfa seeds from an online supplier after watching a YouTube tutorial. Using one wide-mouth mason jar fitted with a mesh lid, Jamie soaked seeds overnight then set phone alarms for morning/evening rinses over five days straight. Result? Bright green crunchy sprouts ready for sandwiches by day five—no funky odors or mold issues.
Example #2: Urban Alex lives in an apartment without much counter space but has sunny windowsill room. Alex chose stackable sprouting trays placed near indirect sunlight and kept twice-daily rinses consistent despite busy workdays by syncing reminders on their phone calendar app. Two weeks later Alex was topping salads daily with fresh homegrown alfalfa instead of buying from the store.
Both succeeded because they adapted simple routines that fit their environments instead of chasing perfection from day one.
How do I know my sprouts are ready?
Look for these signs:
- Length: About 1–2 inches tall
- Color: White stems topped with small green leaves just unfolding
- Texture: Crisp and firm stems; no slime or yellow discoloration anywhere
If any part looks mushy or smells sour/funky — toss it out immediately.
A final thorough rinse before refrigeration keeps them fresh up to seven days (if you don’t eat them first).
Troubleshooting slow growth or weak sprouts
When things aren’t going well, check these common issues:
-
Temperature: My first batch sat near an open window during winter — temps dropped below 60°F and growth stalled completely. Moving the jar closer to the heater fixed this fast.
-
Rinse/drain routine: Overwatering causes rot; underwatering dries out seeds leading to shriveled sprouts that never open properly.
-
Seed quality: Old or cheap seed packets often have poor germination rates — always buy reputable organic brands intended specifically for sprouting.
Adjust one factor at a time so you can pinpoint what helps next cycle rather than guess blindly.
Ready-made action plan
Here’s exactly what you should do today:
- Buy quality organic alfalfa sprouting seeds (expect $3-$5 per 1-ounce packet).
- Grab a clean glass jar + mesh lid combo OR inexpensive plastic sprouter trays (available online or at health stores).
- Tonight before bed—measure out 1–2 tablespoons of seeds; soak covered in cool water for ~10 hours.
- Set two daily alarms on your phone tomorrow morning/evening as reminders to rinse & drain thoroughly.
- Over next several days observe changes carefully—note color, smell, length—and tweak location temperature if needed.
- Plan recipes where these crunchy greens shine: sandwiches, wraps, salads—even blended into smoothies!
Remember: patience beats rushing here every time; first few attempts might look scruffy but keep going—you’ll nail it soon enough.
Growing your own alfalfa sprouts boils down to straightforward repetition plus attention to basic hygiene and environment control—not miracle conditions or expensive gear.
Once mastered, this simple skill rewards you handsomely—with fresh flavor bursts that elevate meals plus confidence knowing exactly what’s going into your body from seed through harvest.
Your next batch starts soaking tonight—why wait when freshness is just days away?


