Grow Green and Thrive: Your Ultimate Guide to Successful Algae Farming

Starting algae farming can feel like stepping into a foreign world—full of unfamiliar terms, equipment, and biological concepts—but imagine this as a journey rather than a leap. Think of algae as tiny green powerhouses waiting quietly to transform sunlight, water, and nutrients into valuable products that can fuel industries, nourish communities, and heal environments. I’ve guided many beginners through this path, beginning with zero knowledge myself, so let’s walk through every step together—from the very first spark of curiosity to confidently running your own thriving algae cultivation.
What Is Algae Farming? A Beginner’s Snapshot
At its core, algae farming is cultivating microscopic or larger algae species in controlled settings to harvest biomass. This biomass can be turned into food supplements like Spirulina powder, biofuels that burn cleaner than fossil fuels, animal feed additives, cosmetics ingredients rich in antioxidants—or even used for wastewater cleanup.
Picture it like gardening—but instead of soil and flowers, you use water-filled ponds or clear tubes bathed in light where these amazing organisms multiply rapidly.
Here’s the simplest way to start today:
- Pick an algae species aligned with your goal (e.g., Spirulina for nutrition)
- Set up a basic growth system (open pond or small-scale tank)
- Provide steady sunlight or LED lighting
- Add balanced nutrients (nitrogen and phosphorus mainly)
- Monitor temperature (usually between 20–30°C depending on species)
- Check water quality regularly
- Harvest once the culture looks dense and vibrant green
This is not rocket science—it’s more like tending a delicate garden ecosystem where patience and observation are your best tools.
Understanding Algae: The Living Engines You’re Cultivating
Before diving into setups and equipment, it helps to understand what you’re working with:
Types of Algae
- Microalgae: These are tiny single-celled organisms invisible to the naked eye—think Chlorella or Spirulina. They reproduce quickly by dividing cells.
- Macroalgae: Larger seaweeds like kelp or nori visible underwater; often cultivated in coastal regions.
Both types harness photosynthesis but microalgae grow much faster due to their simple cell structure.
Why Are They Special?
Algae convert sunlight into energy remarkably efficiently — some species doubling their biomass daily under ideal conditions. They also absorb CO₂ actively during growth which makes them natural allies against climate change.
Growth Essentials Simplified:
- Light: Sunlight works fine outdoors; indoors requires specialized LED lamps tuned to blue/red wavelengths that algae prefer.
- Water: Species decide freshwater vs saltwater preference. Maintaining pH around 7–9 keeps them happy.
- Nutrients: Nitrogen and phosphorus are key; too little slows growth while excess invites contaminants.
- Temperature: Most thrive between 20–30°C but check specifics for chosen species.
Your First Steps: Setting Up an Algae Farm from Scratch
When I began years ago, I was overwhelmed by technical manuals full of jargon until I broke it down this way:

Step 1: Define Your Purpose Clearly
Are you after nutritional supplements? Biofuel production? Environmental cleanup? This choice narrows down your species options dramatically.
| Purpose | Suggested Species | Why? |
|---|---|---|
| Nutrition | Spirulina | High protein; widely studied |
| Biofuel | Nannochloropsis, Chlorella | Rich in oils convertible to biodiesel |
| Wastewater Treatment | Local native microalgae strains | Naturally adapted for pollution absorption |
Step 2: Choose Your Cultivation Method
For beginners starting small:
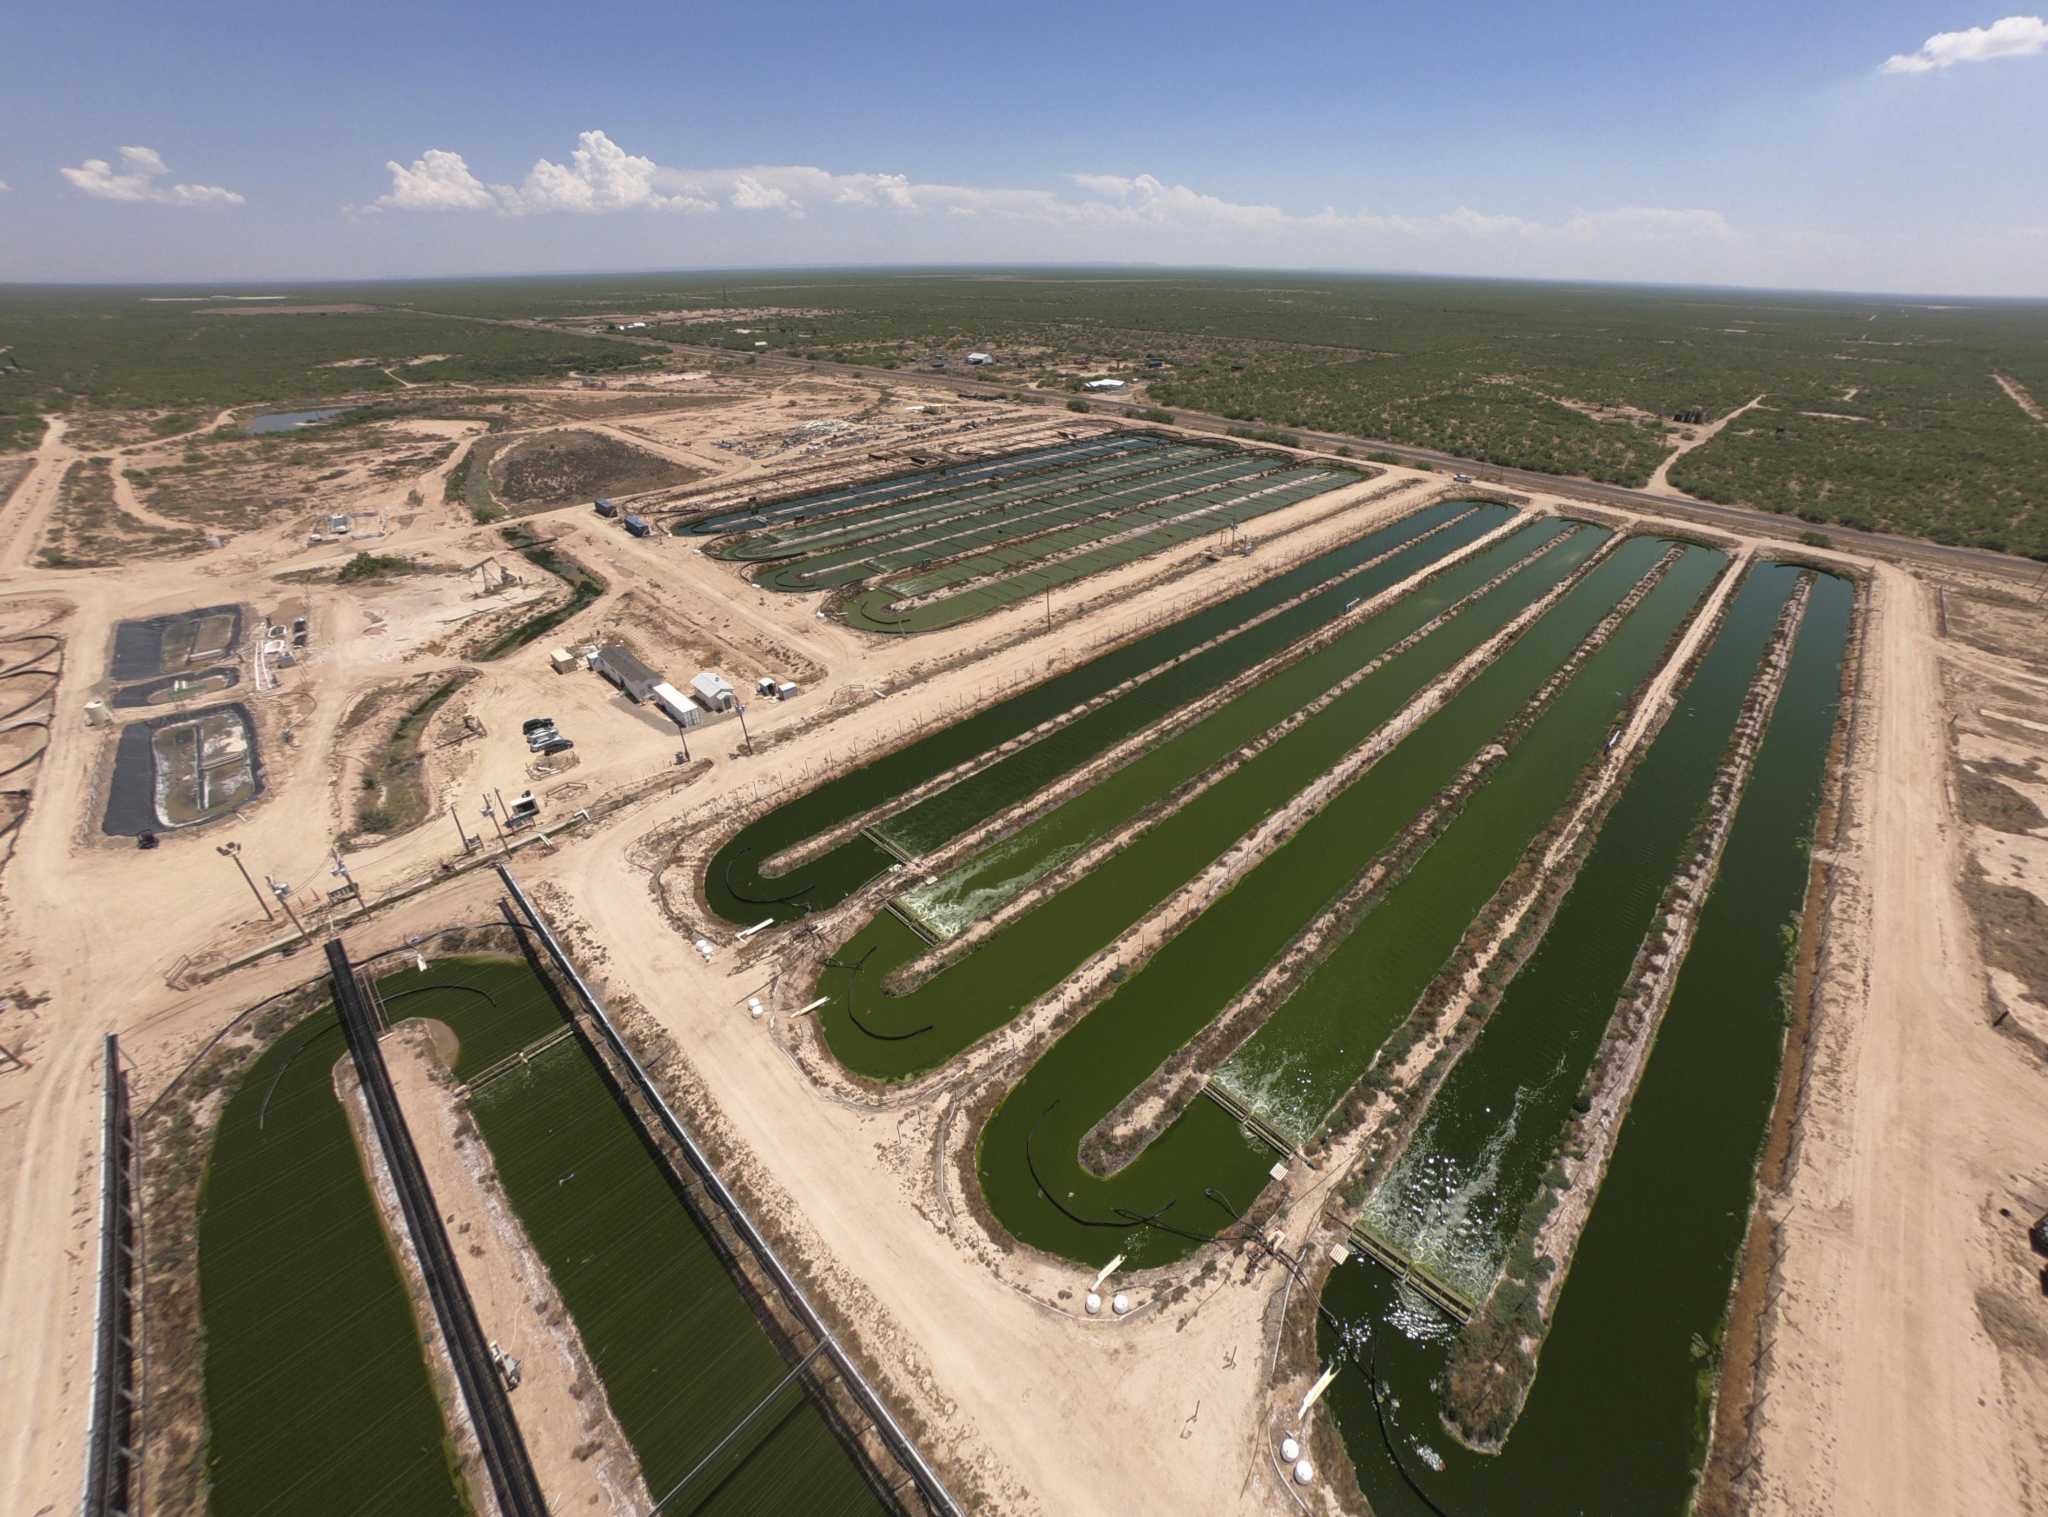
- Open raceway ponds — inexpensive earthen or lined ponds stirred gently; exposed but easy to manage
- Small photobioreactors — closed transparent tubes/tanks offering more control at higher cost
Starting with open systems helped me grasp basics without breaking the bank.
Step 3: Prepare Growth Medium & Inoculate Culture
Make nutrient-rich water using fertilizers designed for algal growth—these balance nitrogen and phosphorus perfectly. Obtain starter cultures from trusted suppliers rather than wild harvesting initially—it avoids contamination headaches later on.
Sterilize all containers before adding cultures—a simple bleach rinse followed by thorough washing works well.
Step 4: Daily Monitoring Routine
Each morning I’d check:
- Water temperature (digital thermometers suffice)
- Light exposure duration (aiming for ~12–16 hours depending on species)
- pH levels (using affordable test strips)
- Clarity & color changes signaling health
Keeping notes helps detect trends early before problems snowball.
Step 5: Harvesting Basics
Once cultures turn dense dark green—usually after 7–14 days—you harvest by filtering out algae using mesh screens or letting cells settle naturally over hours then decanting clean water carefully.
Don’t over-harvest! Leaving some biomass intact lets cultures bounce back strong next cycle.
Facing Challenges Head-On Without Panic
Early stumbles are normal—even inevitable—but here’s how I learned to tackle them calmly:
| Problem | Cause | Fix |
|---|---|---|
| Culture Contamination | Unwanted bacteria/fungi invade | Sterilize tools; avoid overfeeding; monitor closely |
| Slow Growth | Insufficient light/nutrients/temperature stress | Adjust environment variables gradually |
| pH Swings | Excess nutrients causing alkalinity shift | Frequent testing; add buffering agents if needed |
| Harvest Inefficiency | Improper filtration method selection | Experiment with flocculants or centrifuges if possible |
When my first culture crashed because I left pond uncovered overnight allowing dust contamination—I made adjustments patiently instead of quitting altogether!
Boosting Productivity When You’re Ready To Scale
After mastering basics:

Precision Nutrient Control
Using simple sensors linked to automated dosing pumps keeps nutrient levels optimized continuously rather than guessing once daily feeding amounts.
Advanced Lighting Setup
LED arrays programmed with timers replicate optimal daylight cycles improving photosynthesis efficiency indoors without wasting electricity.
Strain Improvement & Selection
Collaborate with local universities or biotech firms exploring native strains better adapted to your climate—these often outperform imported ones in yield & resilience.
Symbiotic Integration Systems
Combine algae ponds downstream from aquaponics fish tanks—the fish waste provides nutrients while cleaned water recirculates back promoting sustainable closed-loop farming!
Essential Tools & Where To Find Them
Practical gear choices matter early on:
- Thermometer & pH meter kits ($20-$50 range) – basic but reliable monitoring starts here
- Mesh filters/flocculation kits – low-tech harvesting aids
- Starter cultures sourced from certified suppliers like Carolina Biological Supply Company or local agricultural research stations
- Online communities such as Reddit r/algaefarming offer real-time troubleshooting advice from peers worldwide
- Industry portals (Algae Biomass Organization) provide free webinars expanding practical knowledge
Real-Life Inspiration From Beginners Just Like You
A friend in rural India started a one-acre spirulina pond based solely on online guides plus trial-and-error learning—they now supply nutritious powders locally boosting family incomes sustainably. Another case involved a European startup combining CO₂ capture from factories powering photobioreactors producing biofuel blends sold commercially—proof that scalable projects begin with informed small steps!
Troubleshooting Quick Guide For New Farmers
If you notice sudden drops in growth rate:
“Did we reduce light accidentally?” “Is temperature fluctuating too much?” “Any visible contamination?”
If water becomes murky brown not green:
“Could bacteria have invaded?” “Was sterilization skipped somewhere?”

Inconsistent harvest yields:
“Is inoculum volume consistent each batch?” “Are we harvesting at correct culture density?”
Asking these questions calmly makes problem-solving manageable instead of frustrating.
Your First Week Action Plan
Day 1: Choose your goal + pick species
Day 2: Decide cultivation set-up type
Day 3–4: Order supplies + sterilize containers
Day 5: Prepare medium + inoculate culture
Day 6–7: Begin daily monitoring routines
Week 2 onward: Track progress + adjust inputs slowly
Ongoing: Join online forums sharing experience openly
Remember—even experts were once complete novices fumbling initial attempts! Consistency builds confidence faster than rushing ahead blindly ever will.
Continuing Growth Beyond First Success
Once comfortable managing your farm consider:
- Obtaining organic certification elevates product marketability
- Attending workshops/webinars expands know-how and networks
- Applying for grants supporting sustainable agriculture projects funds upgrades
- Partnering with local universities opens doors for innovation collaboration
Plus keep experimenting cautiously while documenting every change—it turns guesswork into sound strategies over time!
Final Thoughts From Someone Who Started At Zero Too
Algae farming isn’t just about turning sunlight into biomass—it’s about transforming curiosity into skills step-by-step while nurturing living systems responsibly. The secret lies less in technical wizardry and more in patient observation coupled with systematic action plans tailored just right for beginners aiming eventually at confident mastery.
So take one careful step today—whether sketching pond layouts or ordering your first culture—and watch how momentum grows steadily beneath those tiny green cells powering futures greener than you imagined possible. If confusion creeps back remember—you’re joining a community eager to help along every twist and turn. Keep asking questions aloud—that’s how breakthroughs begin!
You’ve got everything needed inside already—now let those humble algae surprise you! 🌿✨