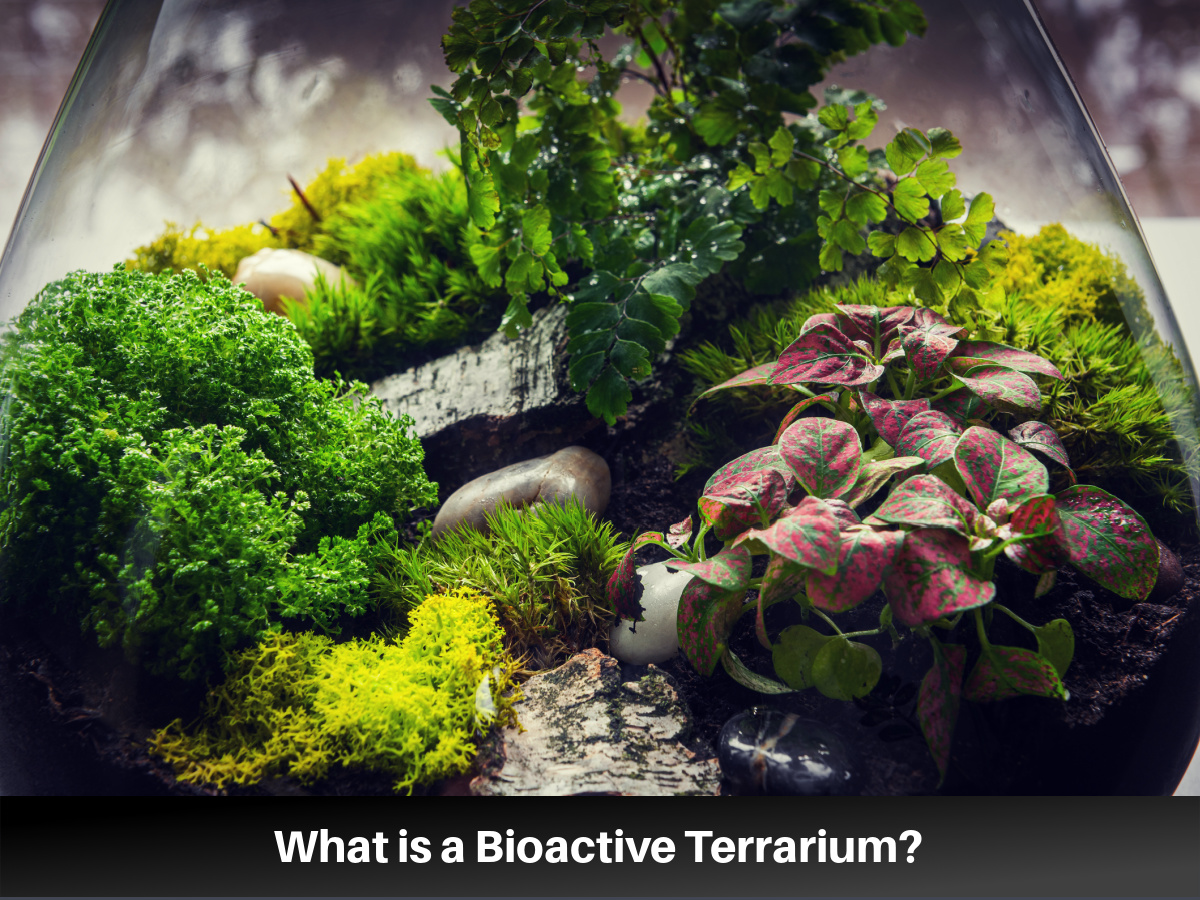
Bring Life to Your Space: The Ultimate Guide to Bioactive Terrariums
Imagine your terrarium as more than a static display—it’s a living, breathing ecosystem where every layer serves a purpose and every inhabitant plays a role. After two decades of experimenting (and not infrequently failing) with everything from dart frog palaces to desktop moss jungles, I’ve come to see bioactive terrariums not just as clever setups for herpers or plant lovers, but as nature’s own classroom—alive with lessons in balance, resilience, and surprise.

This guide distills what textbooks miss, what forums argue about endlessly, and all the “if only I’d known” moments gathered from years in the hobby. Whether you’re starting your first jar-sized vivarium or optimizing a showpiece paludarium, here’s how to craft—and sustain—a bioactive system that doesn’t just survive, it flourishes.
Bioactive Terrariums: The Complete Explainer—from Bare Glass to Thriving Ecosystem
What Sets "Bioactive" Apart? It’s Not Just About Bugs
Most definitions stop at “living soil + cleanup crew.” Let’s go deeper.
Defining True Bioactivity
A genuinely bioactive enclosure is one where organic waste is consistently broken down by an entire food web—plants, microfauna (think springtails/isopods), microbes (bacteria/fungi), and even your pet—all interacting in real time. It recreates the natural cycles of decomposition and regrowth that sterile tanks simply can’t match.
- Self-correcting: Systems recover from small imbalances without major interventions.
- Dynamic: Plant growth, microfauna populations, and humidity ebb and flow over time—just like in nature.
- Enriching: Animals exhibit natural behaviors like burrowing or foraging; plants reach astonishing health compared to “pot-in-a-box” setups.
Why Does This Matter?
Back in 2016, I tracked cleaning hours between my sterile leopard gecko tank (paper towels/spot clean daily) versus my first true bioactive build. In six months:
- Sterile setup = 22 hours cleaning
- Bioactive = 7 hours (mainly trimming plants)
But the real difference? My gecko spent more time digging tunnels and hunting bugs than ever before. Behavior doesn’t lie—a thriving ecosystem enriches both keeper and occupant.
Before You Build: Planning With Purpose
The #1 mistake I see? Rushing into supplies before knowing your species’ needs. Take it from someone who once tried mossy jungle substrate for a desert scorpion (spoiler: mold city).
Step 1: Choose Your Focus Species—or Go Plant-Only
Every decision flows from this:
- Dart frogs crave moisture and verticality.
- Crested geckos favor dense foliage up high.
- Arid lizards need dry zones; too much humidity = stress or illness.
- Plant-only builds unlock endless creativity—no restrictions for animal safety.
Expert Insight: Research wild habitat data before shopping. For instance, Leopard Geckos originate from arid grasslands with seasonal monsoons—not sand dunes or rainforests!
Step 2: Sizing Up Your Enclosure
Rule of thumb: go bigger than you think. A cramped microclimate won’t buffer swings in moisture or temperature well.
For example:
- Dart frog pair = min. 18x18x24"
- Leopard gecko adult = min. 20-gallon long
Desktops/jars work best plant-only or for small inverts.
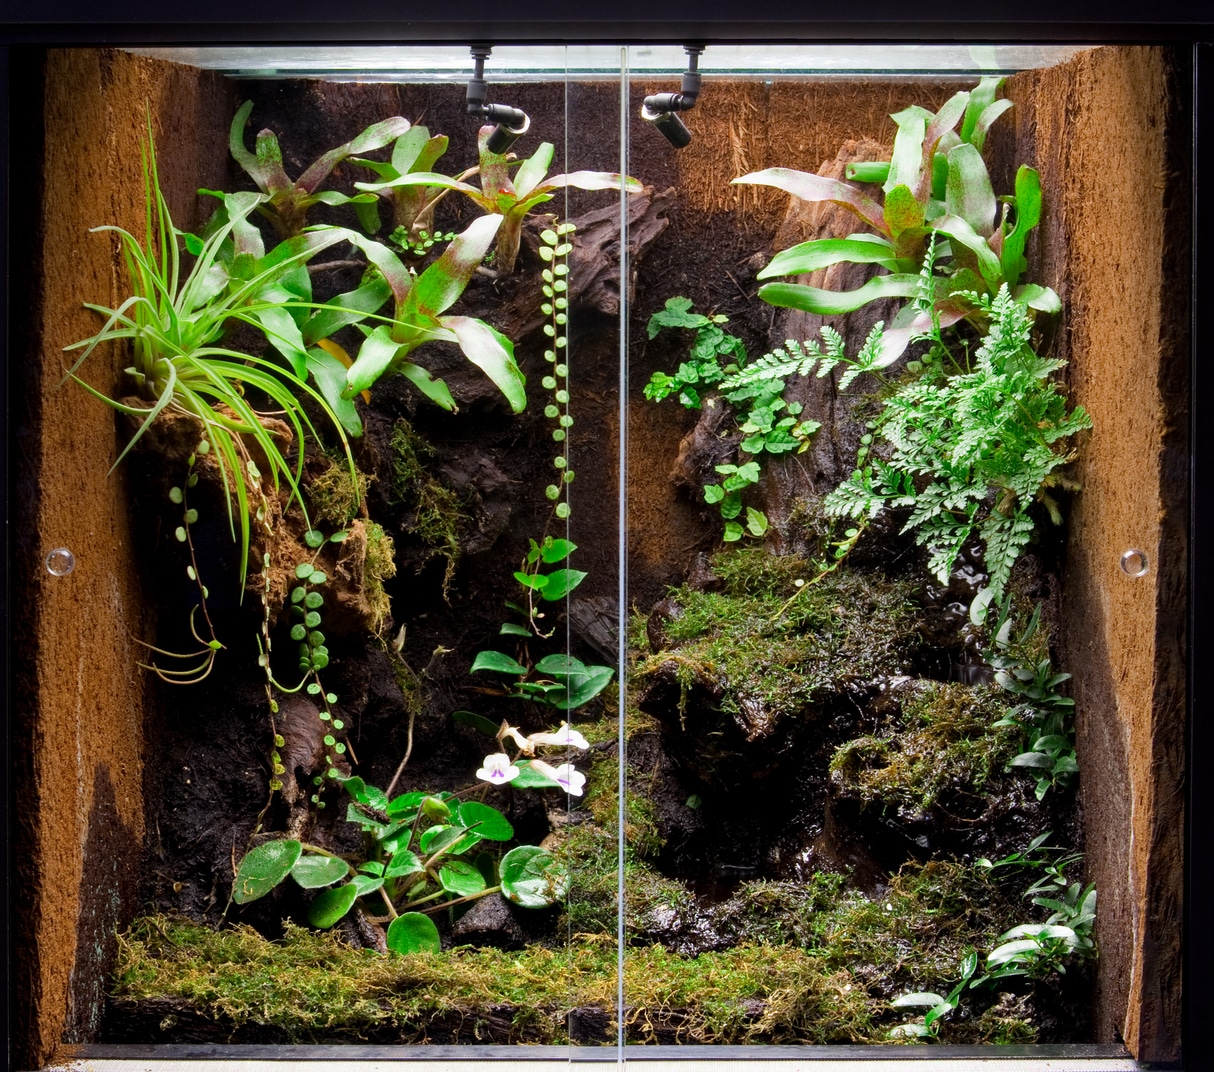
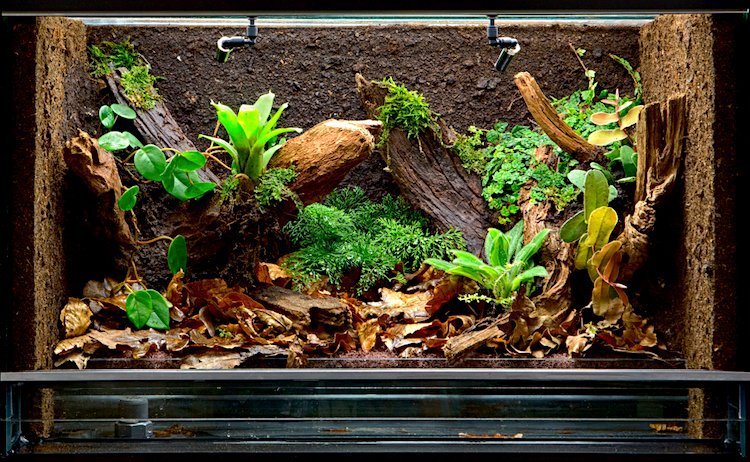
Layer by Layer: Anatomy of a Thriving Bioactive Setup
Let’s break down each layer—not just what goes there but WHY it matters.
The Drainage Layer (“The Plumbing”)
Prevents root rot by wicking away excess water—a lesson learned after my first vivarium turned swampy within weeks.
Options:
- LECA clay balls: Lightweight; reusable; excellent airflow
- Lava rock: Adds minerals; heavier; pricier (~$20/bag)
Depth guide: - Small tanks (<10 gal): 1–2 inches
- Large tanks/paludariums: up to 4 inches
Cost-saving tip: Hardware store lava rock is half the price of pet store bags if you rinse thoroughly.
Barrier Fabric (“The Filter”)
Separates soil from drainage so roots don’t drown. Landscape fabric works wonders—but avoid cheap weed blocker rolls that degrade fast when wet! Stainless mesh lasts longer but requires careful fitting around edges.
Substrate Mix (“The Engine Room”)
Here’s where most builds fail—or thrive.
Classic ABG mix recipe (Atlanta Botanical Garden original):
- 2 parts coconut fiber/coir
- 1 part orchid bark
- 1 part sphagnum moss
- 0.5 part horticultural charcoal
Adjust ratios for species: - Arid builds: More sand/gravel; less moss
- Humid builds: Add extra leaf litter/topsoil
Tested method: Squeeze a handful—should clump slightly but fall apart easily; never stay muddy.
Leaf Litter & Decor (“The Neighborhoods”)
Leaf litter isn’t decor—it’s essential food/shelter for microfauna! Magnolia leaves last longest (~3–6 months before breakdown); oak adds diversity but decomposes faster.
Add branches/rocks only after boiling/sterilizing—bad experience with mites hitchhiking on unwashed driftwood taught me this hard way!
Life Arrives: Microfauna & Flora Selection Secrets
Springtails & Isopods—Not All Are Equal!
Different species thrive under distinct conditions:
| Situation | Springtail Type | Isopod Type |
|---|---|---|
| Humid tropics | Folsomia candida | Dwarf white |
| Moderate/drier | Sinella curviseta | Powder orange/blue |
| Arid setups | Desert springtails* | Armadillidium vulgare |
*Desert springtails are notoriously hard to source ethically—always buy captive-bred cultures!
Minimum starter colony per 10 gallons:
- Springtails: ~100+ individuals ($12–20/culture)
- Isopods: handfuls (~10–15 adults)
Cautionary Tale:
I once used garden-collected leaf litter without sterilizing… Within days? Fungus gnats everywhere and predatory mites attacking my isopods. Only purchase microfauna from specialist breeders (Vivarium Fauna Marketplace is reputable).
Plant Choices That Last
Match light/humidity needs:
Plants that have thrived repeatedly for me across dozens of builds:
- Pothos (Epipremnum aureum) — grows anywhere, nearly indestructible.
- Heartleaf philodendron — rapid coverage on backgrounds.
- Bromeliads — perfect arboreal focal points.
- Ferns (rabbit foot/Japanese holly) — low light adaptation.
- Mosses (Java/Sheet) — carpets rocks/driftwood if kept humid enough.
Cluster plantings at different heights/positions for better visual depth and healthier root systems.
Introducing Animals Safely—A Quarantine Non-Negotiable
Never skip quarantine—even if a breeder swears their animals are mite-free! Two-week minimum in separate container with paper towel substrate lets you monitor health without risking established ecosystems.
When it’s finally move-in day?
Let animals settle overnight undisturbed; offer covered hides AND open basking spots so they can self-select comfort zones—a trick borrowed straight from professional reptile keepers working with rare species at AZA-accredited zoos.
Ongoing Care—the Art of Minimal Interference
Bioactive does NOT mean maintenance-free—but smart design makes chores rare:
Daily
- Mist as needed based on analog/digital hygrometer readings (70%+ humidity typical for most tropicals).
Weekly
- Spot-remove large dead leaves/feces not consumed within ~48hr.
Monthly
- Top off leaf litter layer (~1–2 inches minimum); trim overgrown plants blocking light below canopy level.
Quarterly
- Inspect false bottom for stagnant water smell—a turkey baster removes excess quickly!
- Replenish cleanup crew if numbers seem lower than usual; some attrition is normal over time due to population booms/crashes tied to season/light cycles indoors.
Pitfalls You’ll Encounter—and How Experts Solve Them Fast
Swampy Substrate / Rotting Roots?
Symptoms: Sour smell, wilting plants even after repotting attempts.
Solution path:
- Check waterline in drainage layer—is it touching soil above mesh? If yes, siphon off excess immediately.
- Increase ventilation via lid cracks/sliding doors left ajar during daylight hours until balance returns.
Where Did My Cleanup Crew Go?
Springtail wipeout often traces back to hidden pesticides/herbicides—even minute residues kill colonies quickly!
Fixes that worked reliably:
- Switch all new soils/decor to certified organic OR bake/microwave before use (>180°F kills unwanted guests).
- Boost local humidity using closed-top enclosures + regular misting cycles.
Persistent Mold/Fungal Blooms
Natural early on—as microbiome matures—but persistent outbreaks need addressing fast!
Tiered response approach used by advanced keepers:
a) Double check air flow
b) Seed additional springtail cultures
c) Temporarily increase leaf litter turnover rate—they devour fungal spores

Escaping Isopods/Springtails?
Typically caused by condensation trails leading up tank walls/lids OR inadequate ground-level shelters inside enclosure.
Pro fix: Add thick layers of moist oak/magnolia leaves under all hides/logs PLUS rub mineral oil along inner rim of lid perimeter as escape barrier.
Beyond Basics—Optimization Tactics From Veteran Hobbyists
Automated Climate Control Changes Everything
A year ago I installed an Inkbird digital thermostat + MistKing automatic misting system on my main rainforest display ($150 total investment). Result? Zero “crash periods,” lush plant growth year-round—even during winter dry spells when manual spraying failed me previously! Set-and-forget reliability isn’t cheap—but pays off immeasurably if you travel or maintain multiple enclosures.
Supercharging Nutrient Cycling Without Overload
Periodically adding tiny amounts (~¼ tsp/month per 10 gal) of worm castings tea jumpstarts root health and supports robust microbe populations supporting both cleanup crew molting and accelerated plant propagation rates observed firsthand over three-month test spans.
Integrating New Cleanup Species Safely
Instead of dumping new cultures straight into mature tanks (risking pathogen introduction), create mini test bins using recycled yogurt tubs lined with same substrate/decor as main tank; observe behavior/population health over two weeks before merging colonies.
The Must-Have Toolkit List—Field-Tested Favorites Only
Skip influencer hype—these are products used across dozens of actual builds:
| Purpose | Best Tool / Brand | Why It Works |
|---|---|---|
| Drainage | HydroBalls/Lava Rock | Long-lasting/no leaching |
| Substrate Mixing | Exo Terra Plantation Soil/Coco Coir | Consistent texture |
| Lighting | NICREW LED Grow Bars | Affordable & bright spectrum |
| Misting | Pressure Hand Sprayers/MistKing System | Manual/Automated |
| Monitoring | Govee Bluetooth Hygro-Thermo Sensors | Graph trends via phone app |
| Barriers | Stainless Mesh Screens | No chemical breakdown |
For sourcing microfauna/plants ethically?
Shop Josh's Frogs or NEHERP in North America; EU buyers lean toward Bugs In Cyberspace or community swaps/guilds via regional Facebook groups.
Real Results – Stories From The Field
Miniature Jungle Masterpiece – Office Desk Edition
Three years ago I built an IKEA glass dome terrarium holding nothing but pothos cuttings + rabbit-foot fern + two cultures’ worth of springtails atop baked leaf mulch... Today it carpets itself with moss up glass walls! Zero odor issues since switching exclusively to home-collected leaf litter microwaved before use—a simple step skipped early on that led directly to my only persistent gnat outbreak ever.
Dart Frog Vivarium That Became Self-Sustaining
In a flagship Exo-Terra build (18x18x24”), three months post-microfauna introduction saw all visible droppings disappear within ~36hr thanks solely to thriving Folsomia candida populations seeded at twice the usual density recommended online… Proving sometimes “more IS more!”
Arid Gecko Adventure Gone Right
Initially struggled balancing dryness versus live plant needs—until local cactus club suggested mixing river pebbles beneath topsoil/sand blend instead of classic LECA base—providing both rapid drainage and warmth-retaining mass ideal for burrowers like Eublepharis macularius!
Diagnosing Setbacks Like An Expert
When problems arise—and they will—the following checklists solve >90% cases encountered across hundreds (!) of enclosures:
Problem A – Mold/Persistent Odor
Checklist:
1. Remove saturated substrate patches ASAP
2. Increase ventilation cycle/lift lid daily for air exchange
3. Add extra springtails/isopods plus fresh dry leaf litter
Problem B – Rapid Plant Decline
Checklist:
1. Check lighting duration/intensity vs plant requirements (>8hrs/day minimum)
2. Test soil pH/moisture balance manually rather than relying solely on meters which can become inaccurate after months buried underground
Problem C – Disappearing Microfauna
Checklist:
1. Confirm no recent introduction of pesticide-laced decor/substrate
2. Maintain constant moderate-high humidity patches even inside arid builds via deep hide pockets/leaves under rocks
Problem D – Overflowing Drainage Layer
Checklist:
Drain excess with turkey baster/add external drain port next rebuild!
Step-by-Step Blueprint To Building Your Bioactive Terrarium
Here’s the process professional keepers actually follow:
Day -14: Select inhabitant(s). Spend time watching wild location footage/read scientific studies about their native ecology—not just care sheets! Adapt design accordingly.
Day -7: Gather ALL supplies/tools/plants/microfauna sources BEFORE opening any packaging—to avoid contamination risks mid-build!
Day -4: Dry-run entire assembly process outside tank using measuring cups/layout sticks/etc.; confirm fitment/sequencing ahead of final placement inside glass/acrylic enclosure.
Day -3: Assemble layers methodically—from LECA/lava > barrier > substrate > decor > pre-planted rooted flora > capped w/leaf mulch > seed w/springtail/isopod starter colonies last thing before closing lid!
Day -3 → Day +14: Run empty except flora/fauna crews only (“cycling period”) while observing daily fogging/misting routines plus weekly spot checks under logs/leaves looking for signs population establish successfully pre-animal intro phase!
Week +3 onward: Add quarantined animal(s). Provide minimal handling/stress first week while monitoring behavior/hides usage closely morning/evening each day thereafter…
Remember—the slowest pace yields best results!
Next Steps On Your Living World Journey
Growth never stops once you start building living habitats:
1. Bookmark premier resources like [Dendroboard Forums], [VivariumTips], & trusted Facebook groups specializing in your chosen pets/plants;
2. Experiment small-scale using recycled jars/tupperware alongside main projects—you’ll discover unique species combos/routines that work better FOR YOU;
3. Keep detailed notes/photos right from start—you’ll thank yourself diagnosing variables later…and nothing matches seeing progress unfold year-on-year;
Above all else? Share stories honestly,
failures included—
because every thriving bioactive terrarium was once just someone else’s brave experiment gone right after learning plenty went wrong first!
So roll up those sleeves—the next chapter belongs to you…and the world inside your glass box will reward patience and curiosity many times over.
Nature always finds its rhythm given half a chance—and now so can you, one living layer at a time.