Master Botanical Soap Crafting: Create Beautiful, Natural Soaps with Ease

If you’ve ever daydreamed about transforming a handful of wildflowers into creamy, fragrant bars that feel like art in your palm—welcome. Botanical soap crafting isn’t just a hobby; it’s a portal into nature’s chemistry, a creative playground where mistakes become experiments and every batch holds the promise of surprise. I’ve spent years chasing the perfect swirl, the truest herbal hue, and that irresistible “what IS that scent?” moment. Along the way, I built a system—a blueprint anyone can follow and adapt—that moves you from curious dabbler to confident artisan.
You’re about to get everything: not just recipes or basic safety notes, but real-world workarounds, what went wrong for me (and how I fixed it), plus the kind of advanced tricks you only discover after dozens of batches and hours elbow-deep in suds.
Let’s craft something unforgettable.
I. Why Botanical Soap Captivates—and How You Can Harness Its Power
My first botanical soap came out looking more like an autumn swamp than Instagram gold. But as soon as I lathered that rough-hewn bar—infused with homegrown calendula—I was hooked: silky bubbles, subtle herbal aroma, my skin softer than any store-bought bar could deliver.
Here’s why this practice is pure magic:
- Creative Authority: You design every aspect—color, scent, texture—tailored for your skin or values (vegan? no nuts? allergen-aware?).
- Nature on Demand: Freeze fleeting blooms in time. That lavender you picked in July can scent your December bath.
- Science Meets Soul: Saponification is chemistry at its most poetic—a transformation with visible results.
Original Insight
Most guides treat botanical soap as “just add flowers.” The real secret? Extraction methods are your best friends: infusions unlock benefits without causing ugly browning or mushiness. And knowing how botanicals behave under heat, lye, or over weeks of curing is what separates passable from perfect.
II. The Mastery System: A Step-by-Step Roadmap
I learned the hard way—botanical soap mastery comes from systems thinking. Here’s my battle-tested sequence:
1. Choose Your Method Intentionally
Shortcut Chart:
| Method | Pros | Cons | My Pro Tip |
|---|---|---|---|
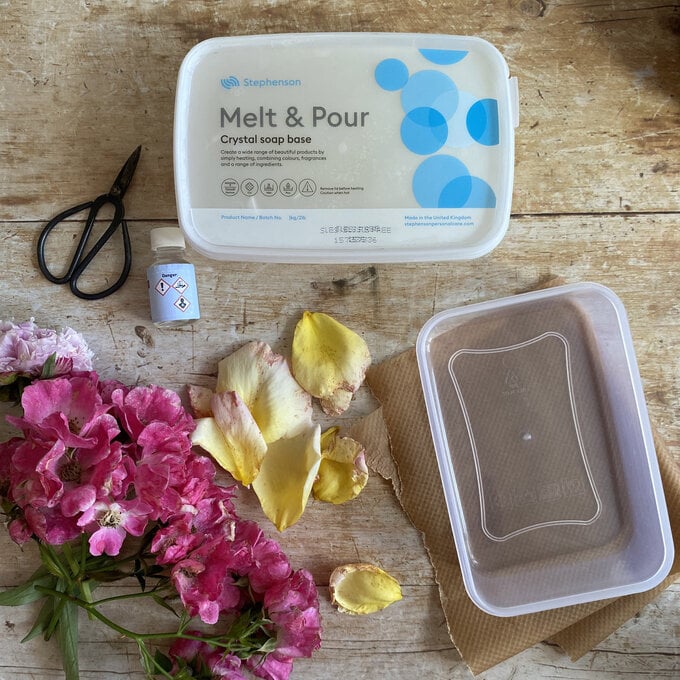
| Melt & Pour | Fastest; no lye handling | Less control over base oils | Perfect for testing new botanicals |
| Cold Process | Total customization | Needs patience/safety | Best balance artistry/performance |
| Hot Process | Ready sooner; rustic look | Tricky to swirl/colors fade | Great for deeply infused oils |
Advanced Move:
For ultimate control and artistry, start with cold process but master melt & pour for speed-gifting or rapid R&D (I use MP when testing how new botanicals perform before committing to a full CP batch).
2. Ingredient Selection—with Extraction Methods
Forget tossing petals straight into batter! Here are my extraction power moves:
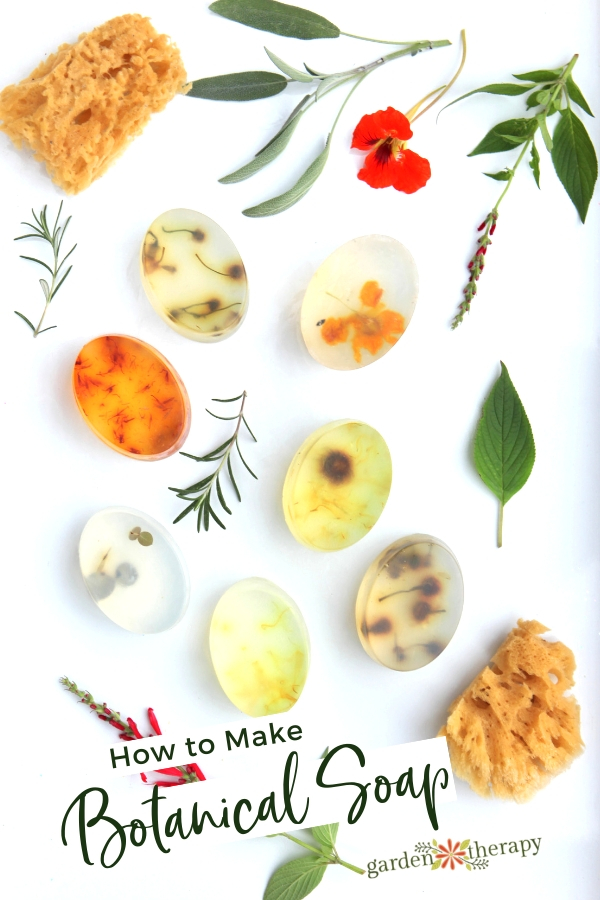
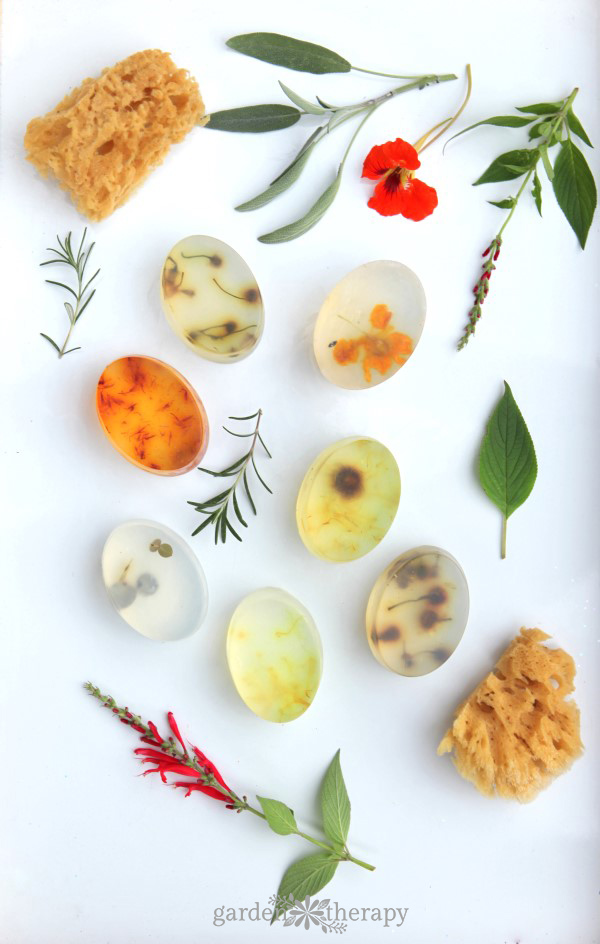
- Oil Infusion (Hot/Cold): Steep dried herbs/flowers in oil (sunlight for weeks OR low oven <60°C for hours). Calendula gives yellow tint + healing properties; rosemary deepens green.
- Glycerite Tinctures: For delicate scents like lilac/violet that vanish with lye—extract in food-grade glycerin, then add post-cook (HP) or at thin trace (CP).
- Powdered Botanicals: Dry fully! Then powder ultra-fine before blending with a little oil—prevents those dreaded brown clumps.
- Tea Decoctions/Infusions: Replace water with strong cooled tea made from herbs/spices (think chamomile or rooibos).
Unexpected Twist: Some botanicals go brown because enzymes aren’t deactivated—quick-dip fresh leaves in boiling water for 5 seconds before drying/powdering stops this.
3. Safety as Ritual
No cutting corners here: goggles and gloves aren’t optional even after 100+ batches (trust me on this; lye burns don’t discriminate).
Shortcuts I Use:
- Dedicate one cheap plastic tablecloth to soaping days—quick cleanup.
- Always keep vinegar nearby—not to neutralize spills on skin (that’s a myth!) but great for cleaning up tools after.
- Set an alarm on your phone when mixing lye—it’s too easy to get distracted mid-recipe!
III. From First Batch to Repeatable Success: The Blueprint
Preflight Checklist
Every session starts with my ritual setup—a trick that cuts “uh-oh” moments by half:
- Print/write recipe + checklist
- Lay out ALL tools/ingredients before starting
- Prepare two backup containers (“soap catchers”) for sudden seizing/mishaps
- Have camera handy—you’ll want before/after shots for tracking progress!
Example Beginner Recipe – Sunbeam Oatmeal Lavender Bar
(Yields approx 8 bars)
Oils & Fats:
- Olive – 340g
- Coconut – 250g
- Shea butter – 100g
- Sunflower – 100g
Lye Solution:
- Sodium hydroxide – 105g (double-check via online calculator)
- Distilled water – 230g (or use strong chamomile tea)
Botanicals/Additives:
- Dried lavender buds – 2 tbsp
- Finely ground oats – 2 tbsp
- Lavender essential oil – up to 25g
Process Pointers:
- Heat oils gently—not above 55°C/130°F—to preserve botanicals’ color/scent.
- Mix lye into COLD liquid outside/in ventilated area; let both solutions cool until within ~10°C/18°F of each other (~43–54°C /110–130°F is safe zone).
- Stick blend to light trace; add powdered oats/lavender last so they float not sink!
- Pour fast if adding essential oils—they sometimes accelerate thickening (“seizing”).
- Wrap mold lightly; avoid overheating if using milk/honey which can scorch.
IV. Troubleshooting Like a Scientist: Real “Fails,” Real Fixes
If someone tells you they never botched a batch—they’re fibbing! Here are some memorable mishaps and what finally solved them:
Problem: Green Botanicals Turn Brown/Mushy
First Attempt: Embedded fresh basil = swampy disaster.
Breakthrough: Dehydrate overnight at lowest oven setting (~35–40°C), then powder.
Problem: Colorants Clump Instead of Swirl
First Attempt: Tossed beet root straight into batter = splotchy chaos.
Fix: Premix ALL powders with tablespoon reserved oil first before blending into traced batter.
Problem: Scent Fades After Cure
Citrus EO evaporated like Houdini!
Solution: Anchor top notes by pairing citrus EOs with woodsy bases (cedarwood, patchouli); slightly increase EO content within IFRA limits.
Problem: Botanicals Float/Sink
Petals all sank on me early on…
Shortcut Hack: Add botanicals at medium trace when batter thickens enough to suspend solids evenly.
V. Advanced Techniques—the Artisan’s Toolkit
Ready to level up? These are my “secret handshake” methods:
- Double Infusions for Power Bars
- Infuse both oil AND water phases with botanicals (e.g., chamomile-infused olive oil + strong chamomile tea as liquid). Result? Intensified color/scent/healing benefit.
- Hybrid Swirl Systems
- Combine drop swirls and hanger swirls using contrasting plant colorants layered intentionally; creates gallery-worthy bars even in basic molds.
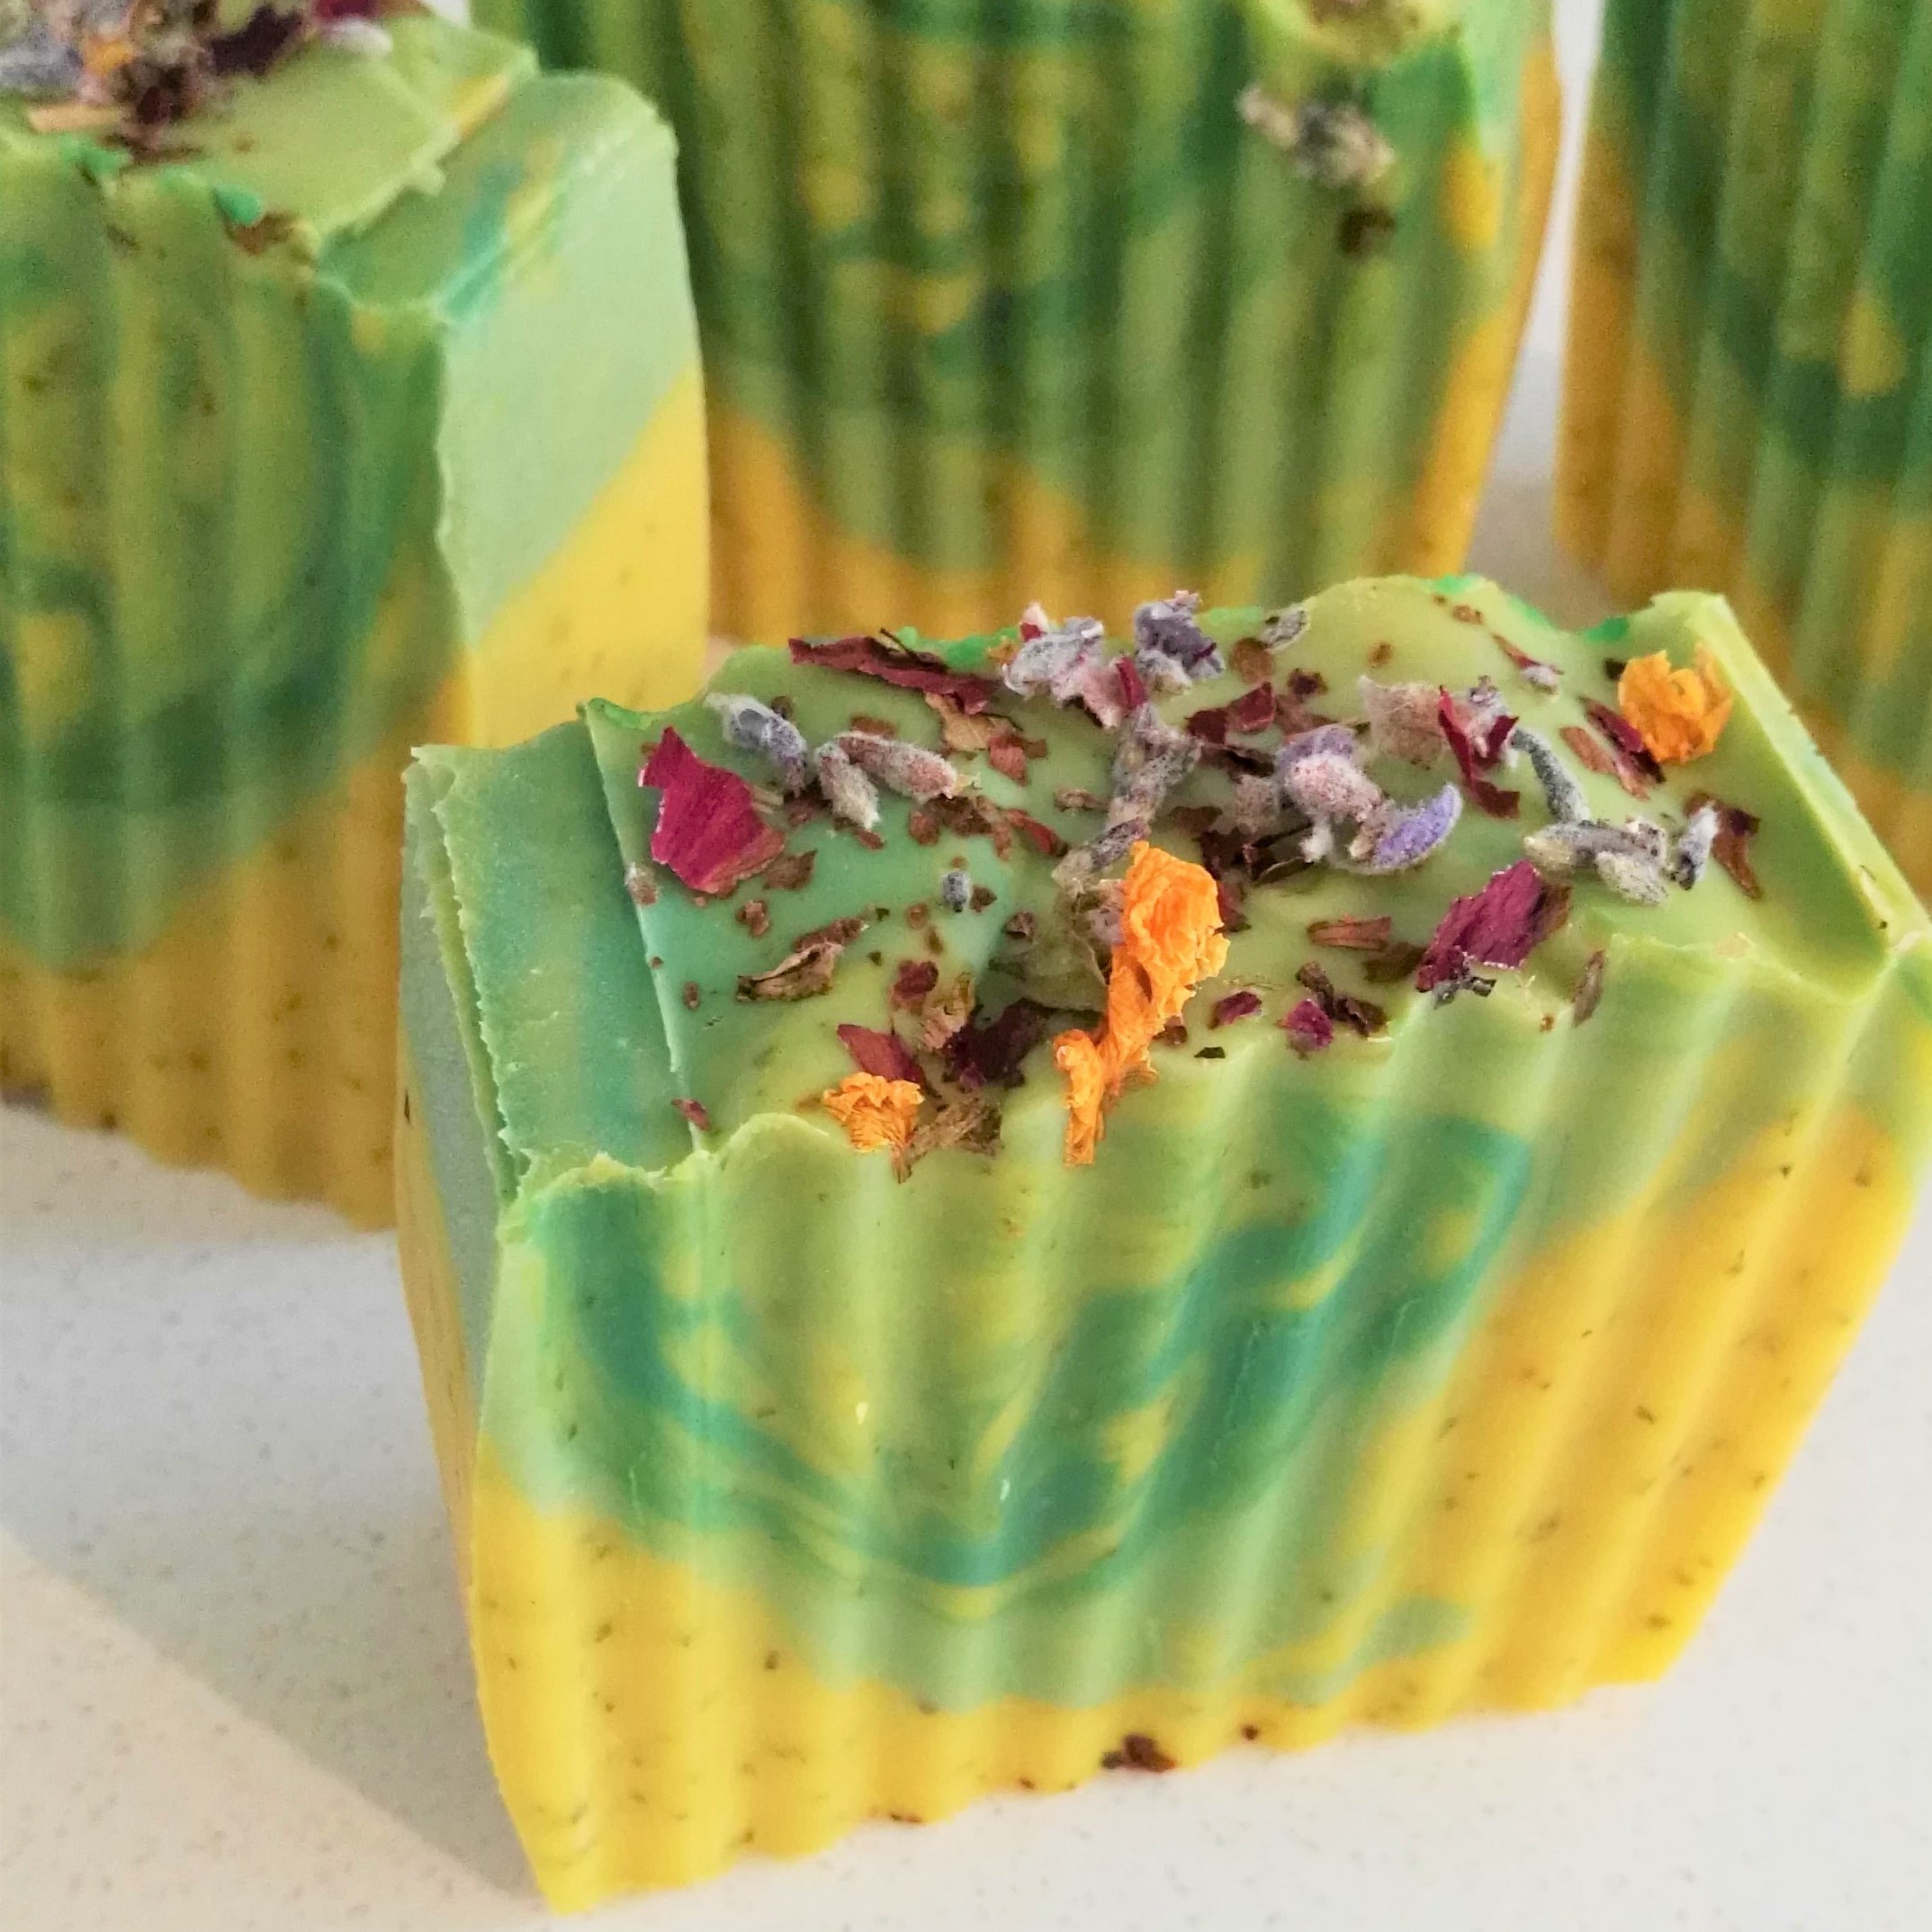
- Pressed Flower Embeds
- Dip dried petals/leaves in melted cocoa butter before placing atop poured batter—the barrier keeps colors vivid during cure!
- Testing Shelf Life Systematically
- Save slivers from every batch in labeled zip bags stored both light-exposed/dark; check quarterly for scent/color/fade/rancidity patterns.
- Superfat Calculation Tweaks
- For facial bars or ultra-sensitive skin? Increase superfat % by one notch and switch coconut out for babassu oil—a less drying alternative discovered during my eczema-soap phase!
VI . Essential Gear & Resource Arsenal
You don’t need a lab—but certain tools make life easier and results pro-level:
- Digital scale accurate within ±1 gram
- Stick blender dedicated only to soaping (oil residue never fully leaves)
- Silicone loaf/bar molds (reusable = zero sticking)
- Heavy-duty gloves + splashproof goggles
- Dedicated thermometer(s)—infrared saves time!
- Fine-mesh strainer + old coffee grinder (for powdering botanicals)
Where I Source:
Mountain Rose Herbs™ remains gold standard botanical supplier;
Bramble Berry® excels at specialty molds/fragrance oils;
Soapmaking Reddit & Modern Soapmaking blog—my go-to troubleshooting libraries.
Foraging tip: Build your own wire-mesh dehydrator rack using $8 worth of hardware store mesh + pine frame = freshest DIY dried florals ever!
VII . Case Studies From My Bench
Nothing beats seeing theory come alive:
Case #1 — Calendula Silk Bars (Miriam)
After five batches molded too early (!) turned crumbly, Miriam solved softness by adding calendula-infused sunflower oil AND swapping half her water phase with oat milk steeped overnight—her next bars were golden-hued and creamy beyond belief.
Case #2 — Matcha Mint Swirl Adventure (Kai)
Kai struggled keeping green swirls vibrant till he switched from fresh spinach puree to ultra-fine matcha whisked into olive oil pre-blending—the result looked like marbled jade months later instead of khaki mud!
Case #3 — Rose Petal Wedding Keepsakes (Elena)
Elena wanted pressed rose petals atop pure white guest soaps…petals kept browning until she brushed each side lightly with cocoa butter right before topping still-wet loaves—a hack she picked up scrolling Turkish artisan accounts late one night.
Each story proves mastery isn’t magic—it’s iteration fueled by curiosity.
VIII . Pro Troubleshooting Table—for When Things Go Sideways
| Problem | Likely Cause | Field-Tested Fix |
|---|---|---|
| Moldy embedded flowers | Botanicals not bone-dry | Oven dehydrate @40°C min overnight |
| Fading colors | Light/pH sensitive plant dye | Pair w/stable oxide clay anchors |
| Brittle texture | Too much coconut/not enough superfat | Reduce coconut/add high oleic oil |
| Scratching/exfoliant | Particles too large/sharp | Regrind finer/test max inclusion rate |
| Weak/lost fragrance | Not enough EO/no anchor used | Increase EO slightly/pair w/base note |
Pro shortcut? Keep mini test molds handy—pour off small sample cups anytime experimenting so errors don’t ruin whole batches!

IX . Your Complete Action Plan—for Genuine Progress Fast
Here’s how you leapfrog months of random trial-and-error:
1️⃣ Pick ONE method fitting your bandwidth/mood today (cold process = deepest learning / MP = immediate gratification!)
2️⃣ Assemble gear/supplies ahead—including “fail bucket” container just in case
3️⃣ Choose just ONE hero botanical paired w/a matching essential oil
4️⃣ Fully dry/prep/powder botanicals day ahead if possible
5️⃣ Map out every measurement on paper—in grams! No eyeballing allowed.
6️⃣ Block off distraction-free time slot—the difference between zen flow state vs rushed chaos is real!
7️⃣ Snap pics/write down variable changes per batch—even failures become future gold.
8️⃣ Clean obsessively post-session—you’ll thank yourself next round.
The more systematic your process becomes…the more room you have left for creativity.
X . Beyond Basics—Where Will You Take This Next?
You’re now equipped not just to follow recipes—but build them.
🌱 Run mini-experiments varying only ONE element per batch so cause/effect is crystal clear
🌿 Join active communities sharing photos/results/troubleshooting tips—I credit peers’ input with at least three major breakthroughs in my own workflow
🌸 Start building your own local materia medica—not just relying on bought ingredients but wild-harvesting yarrow/chickweed/calendula when safe
🧪 Dream big! Tinker toward business ambitions early by tracking costs/batch yields/documenting compliance steps now—it’ll save immense stress later
And above all else…celebrate the stumbles along the way (“Lavender Marshmallow Surprise” lives forever among my friends thanks to one legendary overpour).
Your hands will stain golden from turmeric infusions; your kitchen will smell like an apothecary garden after rain; every bar will whisper lessons only experience reveals.
This journey belongs uniquely to YOU—and I’m cheering wildly from beside the cauldron.
Bookmark these blueprints,
Trust curiosity,
And go create something extraordinary!
Happy crafting—
The Enthusiast