Comprehensive Guide to Breadfruit Trees: Cultivation, Care, and Benefits
Step into the world of breadfruit trees and you’re not just growing a plant—you’re joining a living tradition that’s fed families, inspired legends, and transformed landscapes for millennia. If you want to move beyond surface-level tips and truly master breadfruit—whether you’re planting your first sapling or optimizing an agroforestry system—this is your launchpad. We’ll go step-by-step, from rookie mistakes (I’ve made them all!) to expert-level insights that only emerge after years in the field.
This isn’t theory cobbled together from gardening forums; it’s a roadmap built on real trials, failures, triumphs, and conversations with growers from Samoa to Puerto Rico. Ready to get your hands dirty? Let’s dive in.
1. Breadfruit Trees Unpacked: From Ancient Staple to Modern Marvel
What’s the big deal about breadfruit?
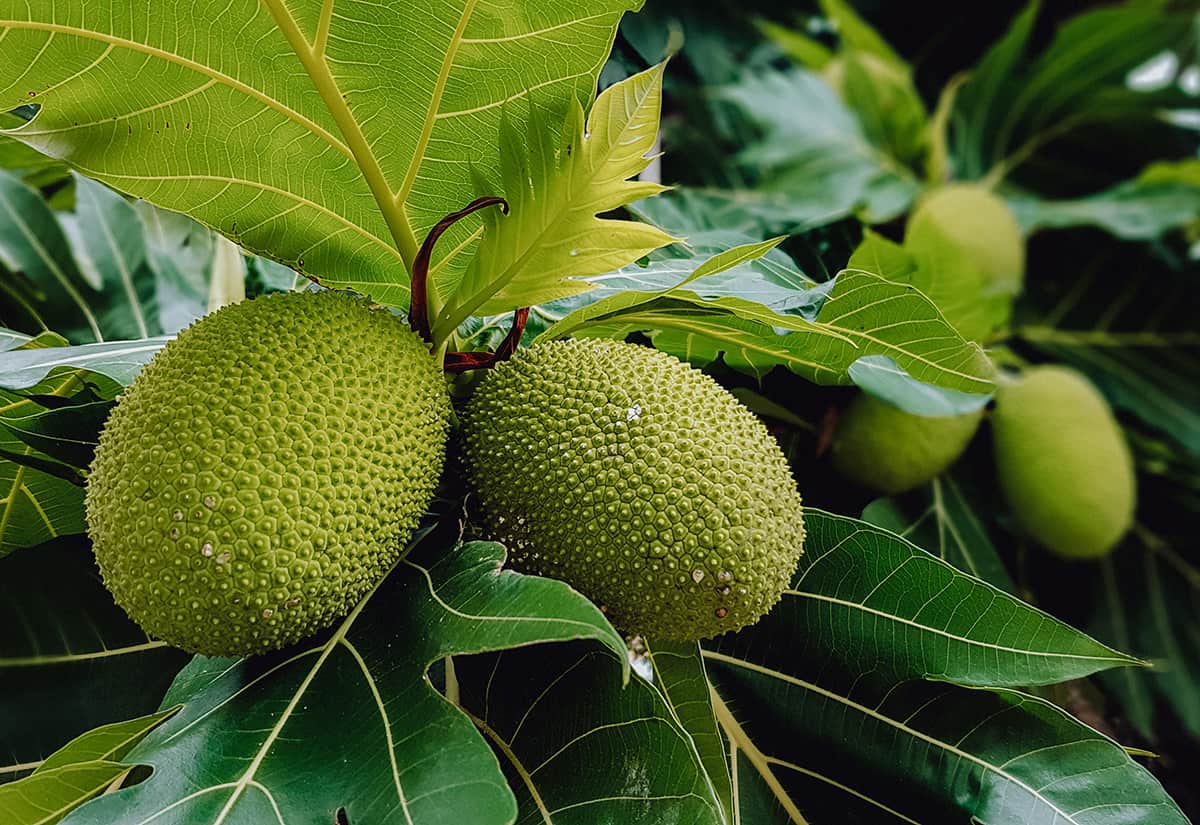
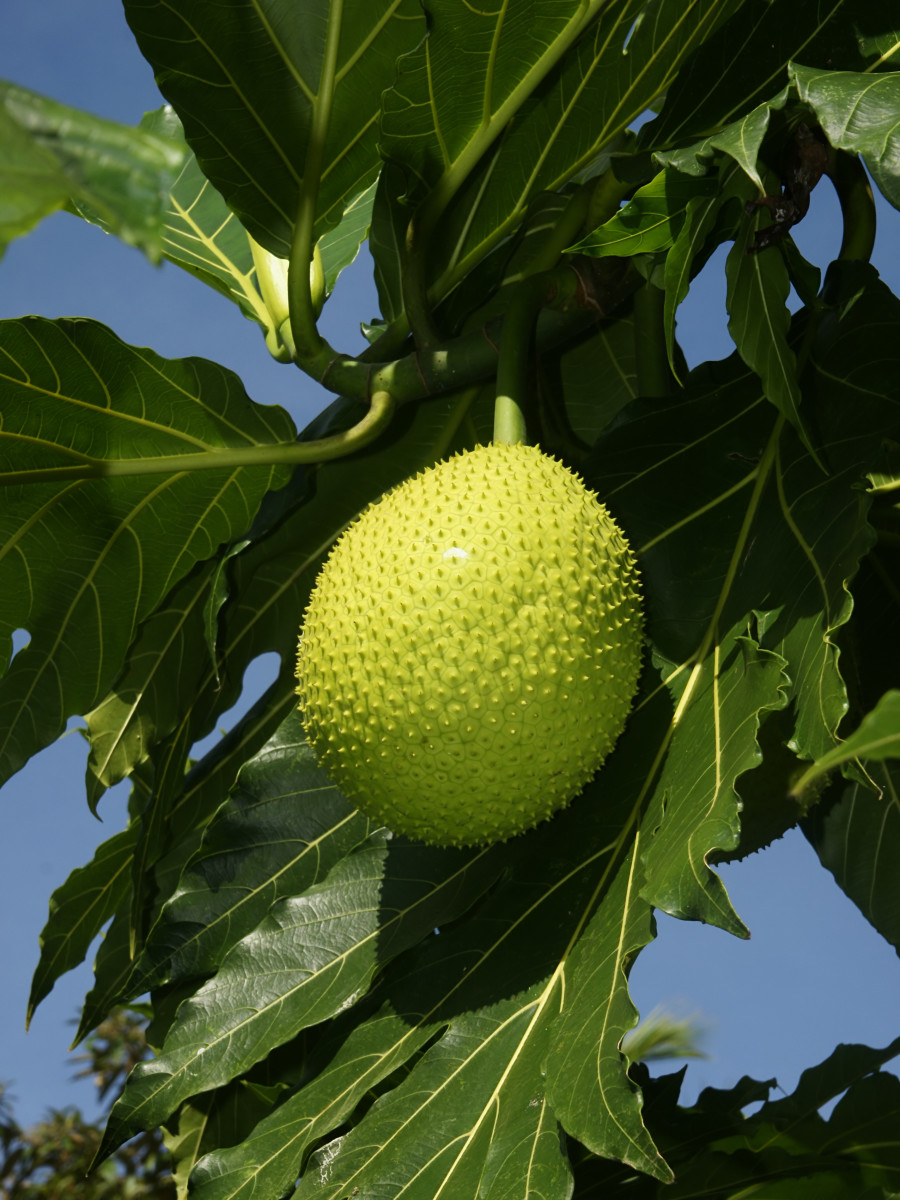
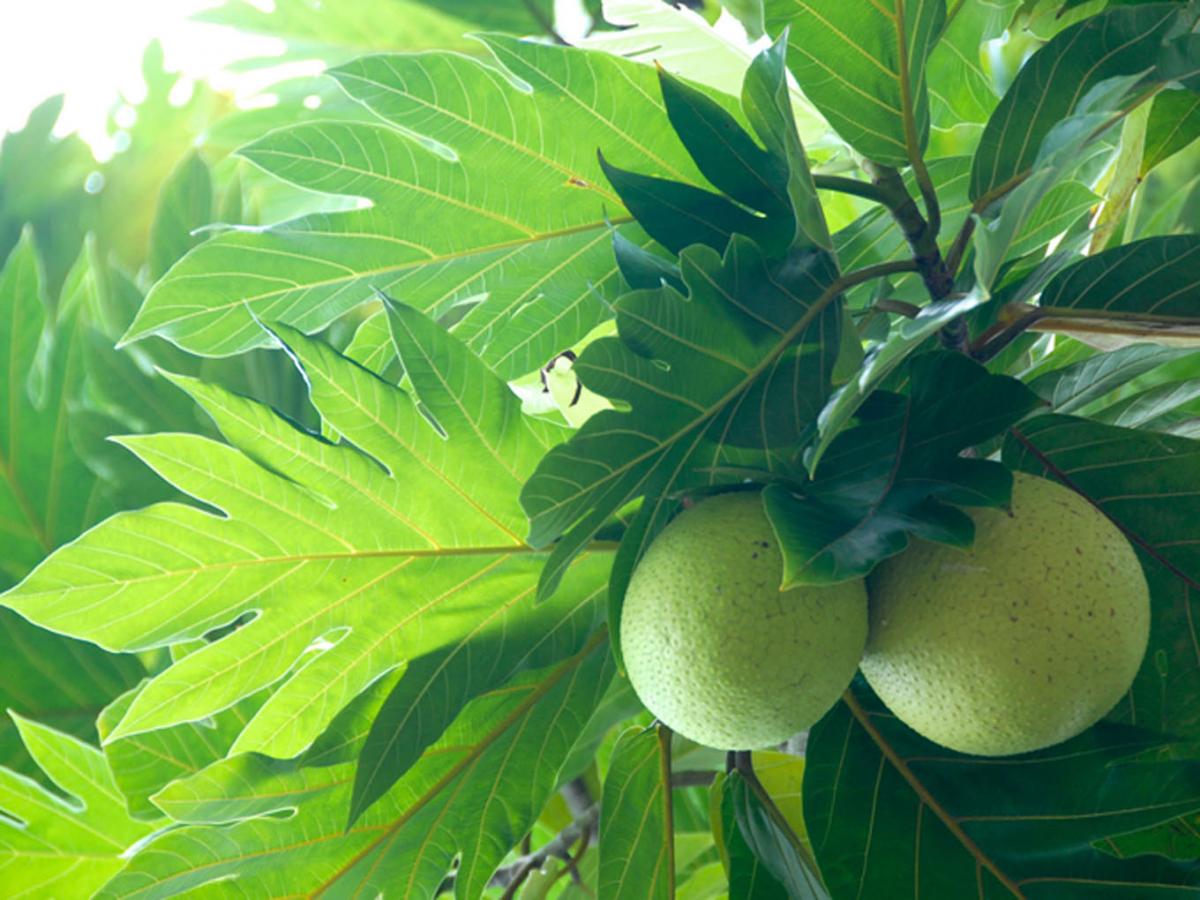
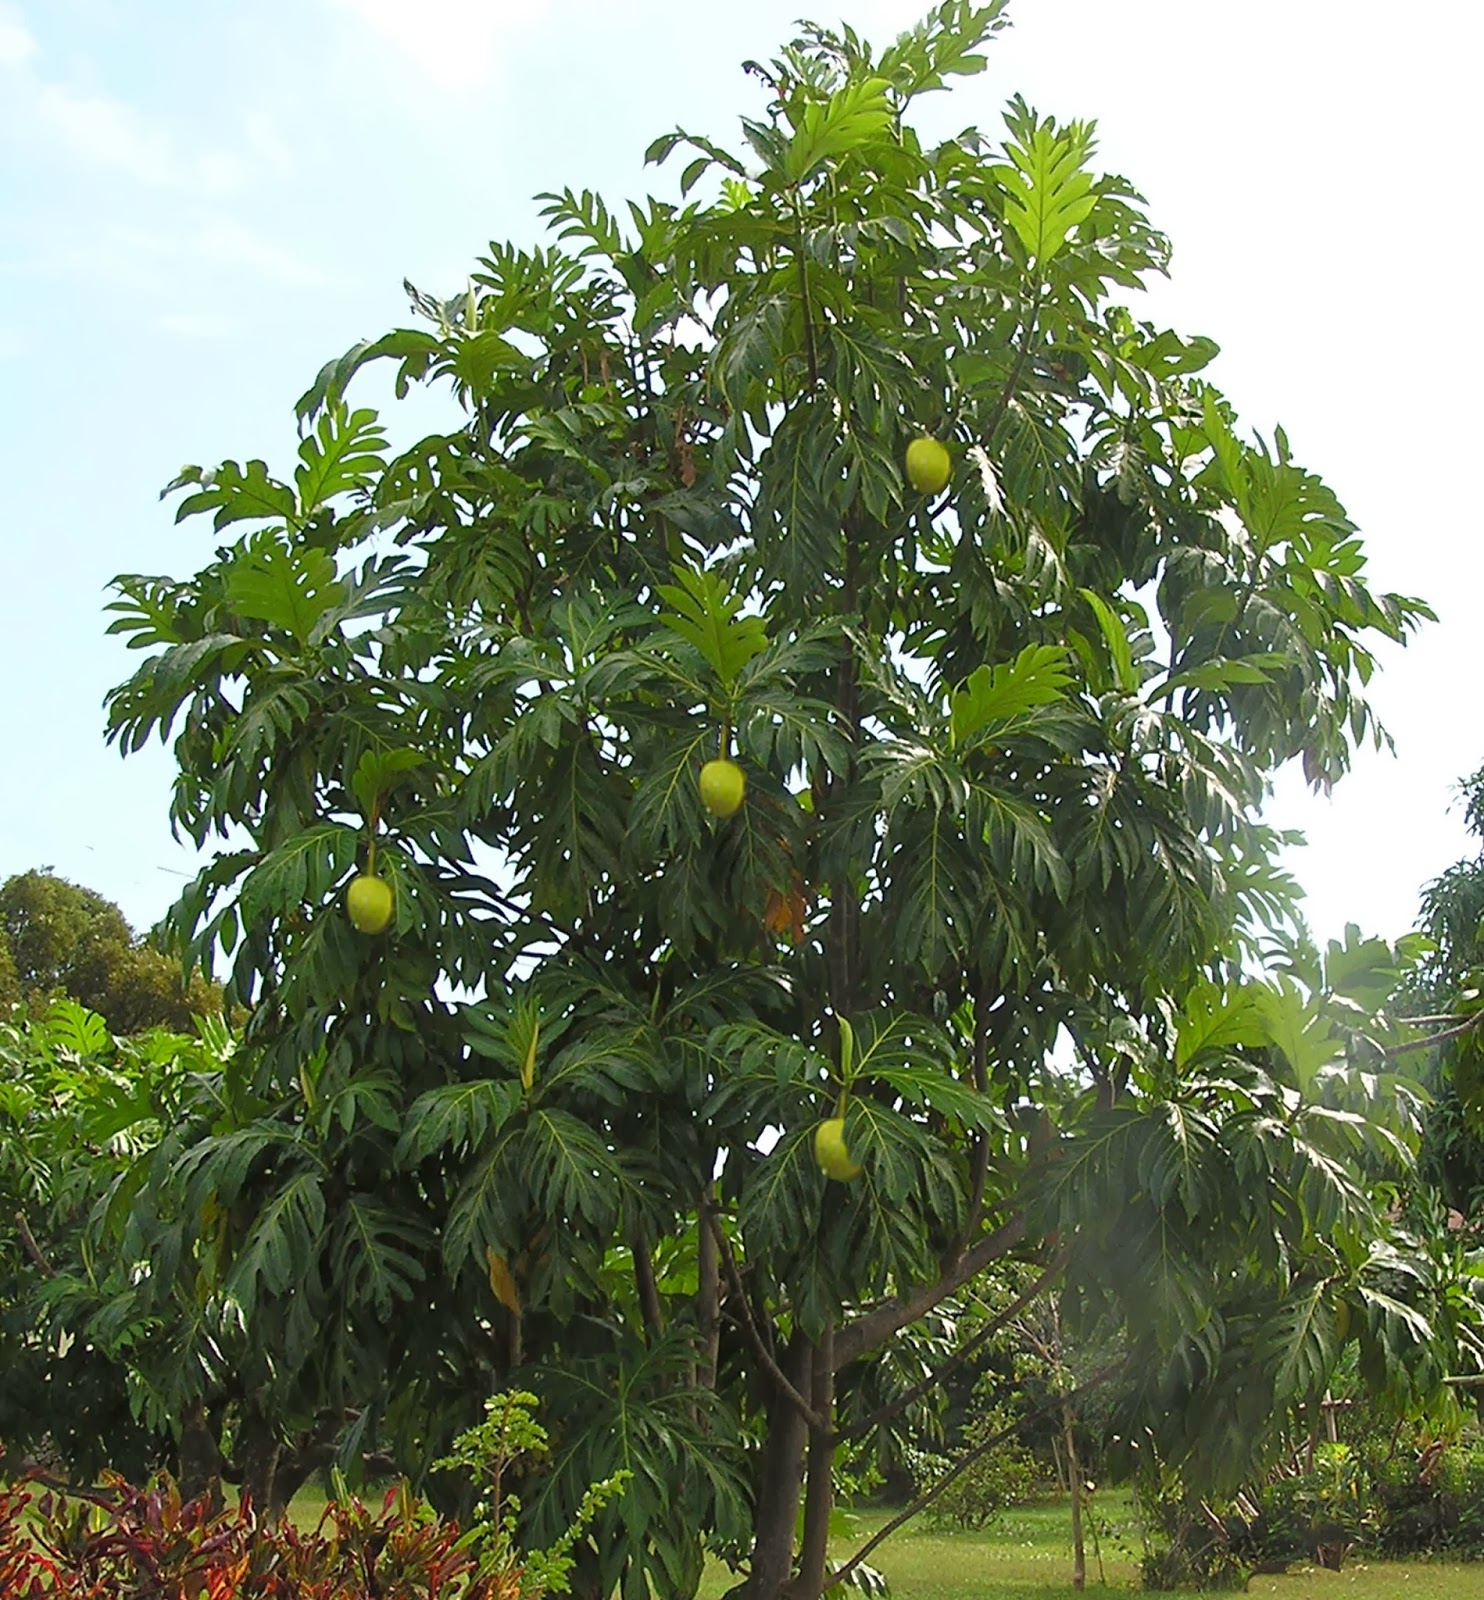
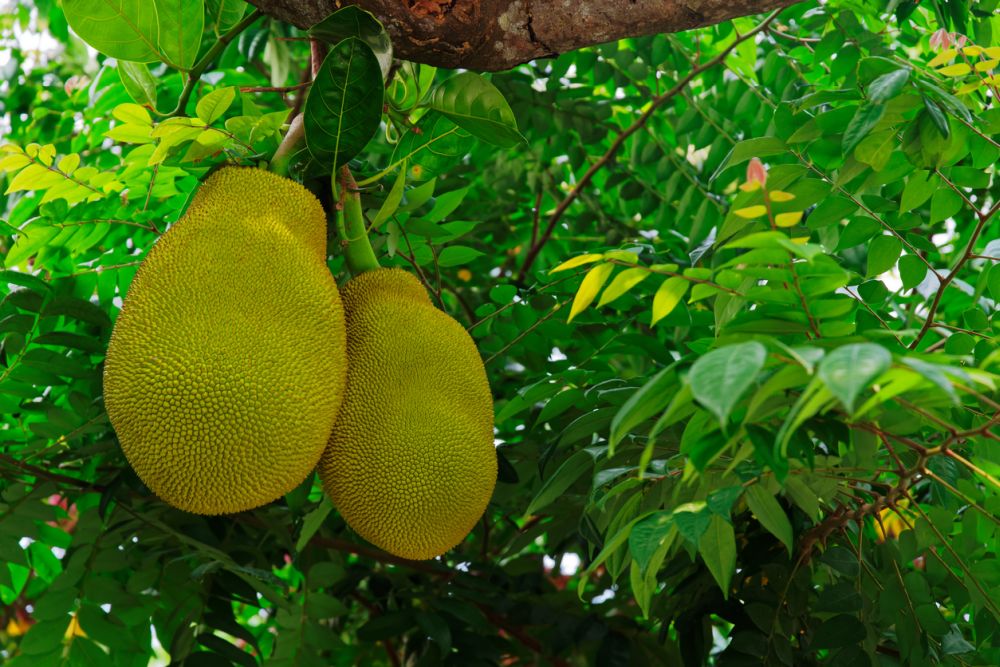
Picture this: In the dappled shade of a 60-foot canopy, clusters of green orbs—some as heavy as a newborn baby—dangle like edible lanterns. Crack one open after roasting and inhale the aroma: warm, nutty, with a hint of fresh-baked sourdough. That’s breadfruit (Artocarpus altilis), a tree that’s been described as “the staff of life” across Oceania.
But what sets it apart isn’t just its prolific yields or culinary flexibility—it’s the way communities have woven it into everything from food security plans to cultural rituals. I still remember my first taste during a Pacific research trip in 2017: smoky, creamy flesh scooped straight from hot embers under moonlight—a flavor memory that never left me.
Quick Breadfruit Facts:
- Origins: South Pacific; spread by canoe voyagers over 3,000 years ago
- Family: Moraceae (think figs & jackfruits)
- Lifespan: Up to 80+ years if cared for well
- Fruit Output: A single mature tree can drop over 200 fruits annually!
Breadfruit isn’t just food—it’s history on a branch.
2. Foundational Mastery: Understanding What Makes Breadfruit Thrive
Before you even dig a hole, let’s talk fundamentals most guides gloss over:
Climate Reality Check
Breadfruit is not for cold climates—no matter what optimistic seed sellers claim! I once tried overwintering potted saplings at 10°C (50°F) indoors; they sulked, dropped leaves, then died with dramatic finality by February. Lesson learned: true tropical warmth (70–90°F/21–32°C) year-round is non-negotiable.
Soil Secrets
Forget clay or swampy ground unless you love heartbreak. The roots need air! My best results came with sandy loam enriched with coarse compost—aeration is everything. Use a $15 soil pH meter; aim for slightly acidic to neutral (pH 6–7).
Sunlight Is Non-Negotiable
Six hours minimum per day—or else your tree becomes an oversized houseplant that never fruits (ask me how I know…three years wasted under partial shade!).
3. Planting Your First Breadfruit: Step-by-Step With Insider Tweaks
Let’s break down what actually works—and where most beginners stumble:
Step One: Sourcing Quality Plant Material
- Rooted suckers/pups: Sturdy but can harbor soil pathogens.
- Tissue culture plants: These are game-changers—in my last project in Hawaii, every tissue-cultured ‘Ma‘afala’ sapling outgrew traditional stock by year two.
- Seedlings: Only viable for seeded types (“breadnuts”). Edible types are almost always seedless clones.
Pro tip: Insist on disease-free certification if ordering online; don’t cut corners here.
Step Two: Site Selection
Think decades ahead! I lost my “perfect” spot when neighbors added solar panels—shade wars aren’t fun.
- Test drainage by digging a hole and filling it twice; if water sits longer than four hours the second time, pick another spot.
- Allow at least 30 feet clearance from structures or power lines.
Step Three: Soil Prep Like You Mean It
This isn’t tomato gardening:
- Mix two buckets of aged compost with native soil + two handfuls slow-release organic fertilizer at planting.
- Dig an extra-wide hole (~18" x 18") so new roots don’t hit compacted edges—a mistake I made on my first try led to stunted growth for three seasons!
Step Four: Planting Ritual
Gently untangle circling roots (they will choke new growth).
Plant level with surrounding soil—never deeper!
Water deeply right after planting; mulch with coconut husk/leaves but keep mulch six inches away from trunk to prevent rot.
Step Five: Water Management That Works
My “finger test” saves lives every dry season:
Insert finger two inches into soil at noon; if dry and crumbly = water thoroughly.
Drip irrigation beats overhead sprinklers—roots get what they need without inviting fungal issues on leaves.
4. Avoiding Classic Mistakes—and How To Recover Fast
I’ve seen even seasoned orchardists sabotage their breadfruits unwittingly:
-
Ignoring Drainage Warnings
Raised beds aren’t just optional—they’re essential in heavy soils! In Jamaica’s red clay zones we built mounds three feet high before planting…those trees thrived while neighbors’ drowned after one hurricane season. -
Overzealous Pruning
A rookie error I made early on was hacking back too much canopy at once (“to let more light in!”). Result? Sunburnt bark and zero fruit next season. Instead, thin out only crossing branches each late dry season—let dappled light reach interior but keep protective leaves intact. -
Fertilizer Burn
Dumping chemical fertilizer directly onto roots burned half my starter grove back in 2019 ($200 lesson!). Side-dress lightly around drip line instead; less really is more here. -
Harvest Timing Fails
Under-ripe fruit oozes sticky latex when scratched; overripe collapses fast post-pickup—I once lost half my harvest during an unexpected heatwave because I waited too long!
5. Level Up: Advanced Methods For Serious Growers
Once you’ve mastered basics…it gets fun!
Maximizing Yields Year After Year:
- Switch to potassium-rich organic blends pre-flowering (banana peels composted work wonders).
- Keep canopy open but shaded inside—a humid microclimate deters leaf scorch yet boosts pollination.
- Annual yield logs help track patterns (“Why did Tree #3 double output this year?”).
Propagation Power Moves:
Tissue culture is gold-standard for disease resistance—but if you want dozens of clones fast? Try air-layering healthy branches mid-rainy season (wrap with damp sphagnum moss/plastic wrap until roots burst through). My record? Eleven rooted layers off one mother tree in nine months!
Grafting Experiments:
Want drought-tolerant AND high-yield? Graft elite scions onto local wild rootstocks—I watched Samoan farmers double survival rates this way during El Niño droughts in 2015–16.
Agroforestry Integration
Don’t just plant monocultures! My own plot mixes breadfruit with pigeon pea windbreaks and taro understory—the diversity keeps pests guessing and maximizes land use per square foot.
6. Real Tools & Resources Worth Your Budget
Skip cheap gadgets cluttering garden centers—instead invest in:
- Heavy-duty digging spade ($40+)
Cheap ones bend before finishing first hole! - Japanese-style pruning saw ($25): Cuts cleanly through thick limbs without splitting wood.
- Digital moisture meter ($15): Prevents both under & over-watering.
- Organic seaweed/fish emulsion concentrate ($20/gallon): Doubles as foliar spray during rainy seasons for lush leaf health.
For education & troubleshooting:
- Breadfruit Institute – NTBG
- Diane Ragone's "Breadfruit Production Guide" PDF
- Local extension offices—they often know which pests hit your region hardest each year!
7. Case Studies From The Field
Let these real-life stories shape your strategy:
Puerto Rico Post-Hurricane Plot:
After Maria hit in 2017, we planted compact ‘Ma‘afala’ clones paired with pigeon peas as nurse crops outside Ponce city limits—not only did breadfruits begin yielding by Year Four (86 fruits per tree), but pigeon peas fixed nitrogen so effectively we slashed synthetic fertilizer costs by half within two seasons.
Jamaican Roadside Orchard:
In Clarendon parish Denzel intercropped seeded “breadnut” varieties among coconuts using nothing but cow manure compost; seven years later he was selling fried breadnuts roadside August–November—and supplying local livestock free fodder from pruned branches!
Hawaiian School Project:
A primary school installed five tissue-culture saplings backed by university support on rocky field margins—they now shade outdoor classrooms AND feed kids baked ‘ulu chips weekly while students learn propagation hands-on every spring semester.
8. Troubleshooting Like An Expert
Here’s how seasoned growers spot trouble—and nip it quick:
| Symptom | Likely Cause | Solution |
|---|---|---|
| Wilting midday | Root damage/drought | Deep soak root zone + check drainage |
| Sooty mold | Aphids/mealybugs present | Remove pests w/ neem oil + wash leaves |
| Leaf drop | Sudden temp swings | Mulch base heavily + reduce water stress |
| No fruit set | Poor light/nutrition | Prune nearby shade + boost K-rich feeding |
| Premature fruit drop | Wind/drought stress | Stake young trees + irrigate consistently |
My mantra? Walk your trees weekly—touch leaves, scan undersides for mites/aphids before outbreaks explode!
9. Action Plan Checklist — Your First Breadfruit Breakthrough
Here’s your week-by-week blueprint—for individuals ready to move beyond dreaming:
Prepping Phase
☑️ Research varieties best suited for your microclimate
☑️ Order certified disease-free plants/tissue culture starters
☑️ Map out sunniest site w/ drainage test completed

Planting Week
☑️ Dig broad/deep holes amended w/ compost & slow-release organic fertilizer
☑️ Transplant gently after root inspection/tangling correction
☑️ Mulch wide ring around base—not up against trunk
First Quarter
☑️ Water regularly using finger test/moisture meter
☑️ Monthly feedings w/ diluted fish emulsion or balanced organic granules
☑️ Weekly pest scans/prune any damaged limbs immediately
Months Four Onward
☑️ Reduce watering as roots deepen
☑️ Top up mulch each rainy season
☑️ Fertilize quarterly targeting dripline perimeter
By Year Three+
Watch for flower buds post-wet season!
Light annual pruning right after main harvest keeps vigor high.
Harvest ripe fruits gently twist-off when skin yellows slightly & latex flow subsides—a trick learned from Samoan elders who could judge ripeness by touch alone!
Store harvested fruits cool/dry up to five days max—or process within two days during hot spells since spoilage accelerates above ~85°F ambient temps.
10. Growing From Novice To Neighborhood Legend
Every great orchard started somewhere—from backyard corners to wind-swept coastal fields—and mastery comes not from avoiding mistakes but learning faster than last year’s storms can undo your progress.
Key next steps?
1️⃣ Source your starter trees THIS month—even one thriving sapling inspires friends/neighbors guaranteed!
2️⃣ Document everything: snap photos each season (“That time mulch depth made all the difference…”).
3️⃣ Plug into grower networks online/local extension events—you’ll meet mentors who’ve faced every challenge imaginable.
4️⃣ Experiment joyfully—with recipes and growing tweaks alike! Fried ‘ulu chips may become family legend overnight…
Above all? Stay curious and patient—the best breadfruits I ever tasted grew slowly through unpredictable weather and plenty of trial-and-error care along the way.
Planting breadfruit isn’t just adding greenery—it’s investing in resilient food security AND creating stories worth sharing long after harvest baskets fill up each autumn storm cycle.
Ready? Grab that shovel (the good one!), choose your spot wisely…and start writing YOUR chapter in this living epic of breadfruit mastery today!