Bromeliad Care Made Simple: A Step-by-Step Guide for Thriving Plants
The first time I met a bromeliad, I was standing on my grandmother’s humid Florida porch in the late ‘90s. A fat drop of rain slid down a leaf, landing perfectly in the plant’s central "cup"—catching a glint of pink from its bloom. Grandma winked and said, “If you can keep these happy, you can keep anything alive.” She wasn’t wrong. Bromeliads taught me patience, close observation, and creative problem-solving more than any other plants ever had. Think of this as your masterclass—woven with real stories, missteps (oh, so many!), and practical tips that took me from nervous beginner to confident collector.

Whether you’re eyeing your first Guzmania or plotting a lush living wall of Tillandsias, let’s walk this journey together—from rookie basics to those secret nuggets most folks never hear about.
1. BROMELIADS UNVEILED: WHAT THEY REALLY ARE
Imagine yourself wandering Rio de Janeiro’s Jardim Botânico back in 2012, notebook in hand, scribbling notes on every odd shape: flaming swords that looked alive (Vriesea), candy-pink vases (Aechmea), air plants clinging to tree trunks like little green sea creatures (Tillandsia). At that moment I realized bromeliads aren't just “houseplants”—they’re entire miniature ecosystems.
Meet Your New Plant Friends:
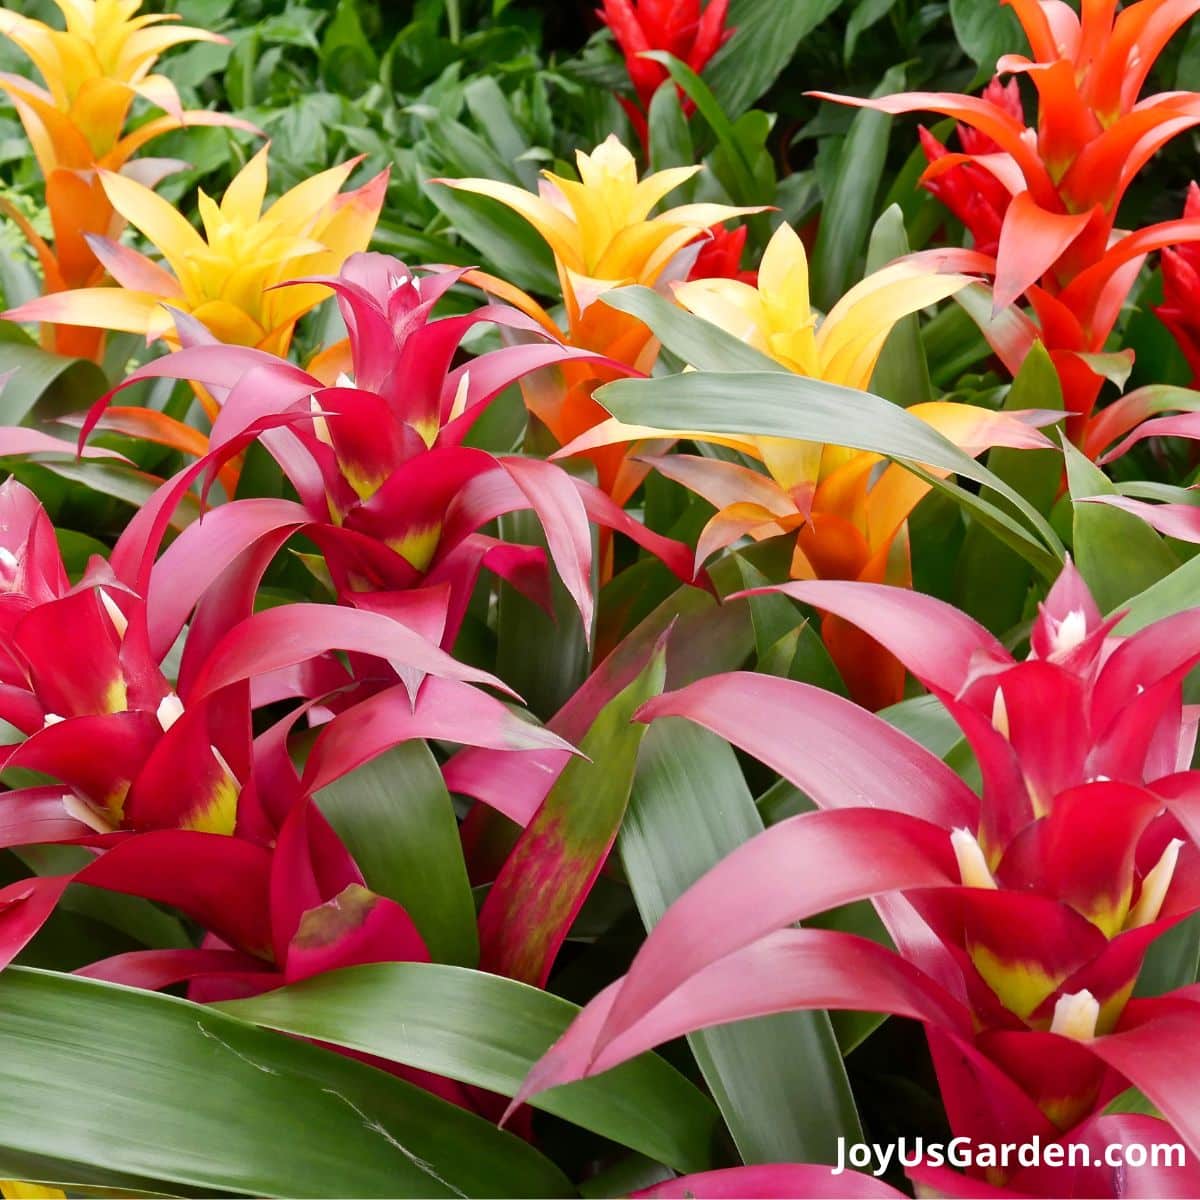
- Guzmania: The drama queens with neon spikes lasting months.
- Aechmea: Modern art bouquets—bold flower stalks.
- Neoregelia: Rosettes that blush red or purple when happy.
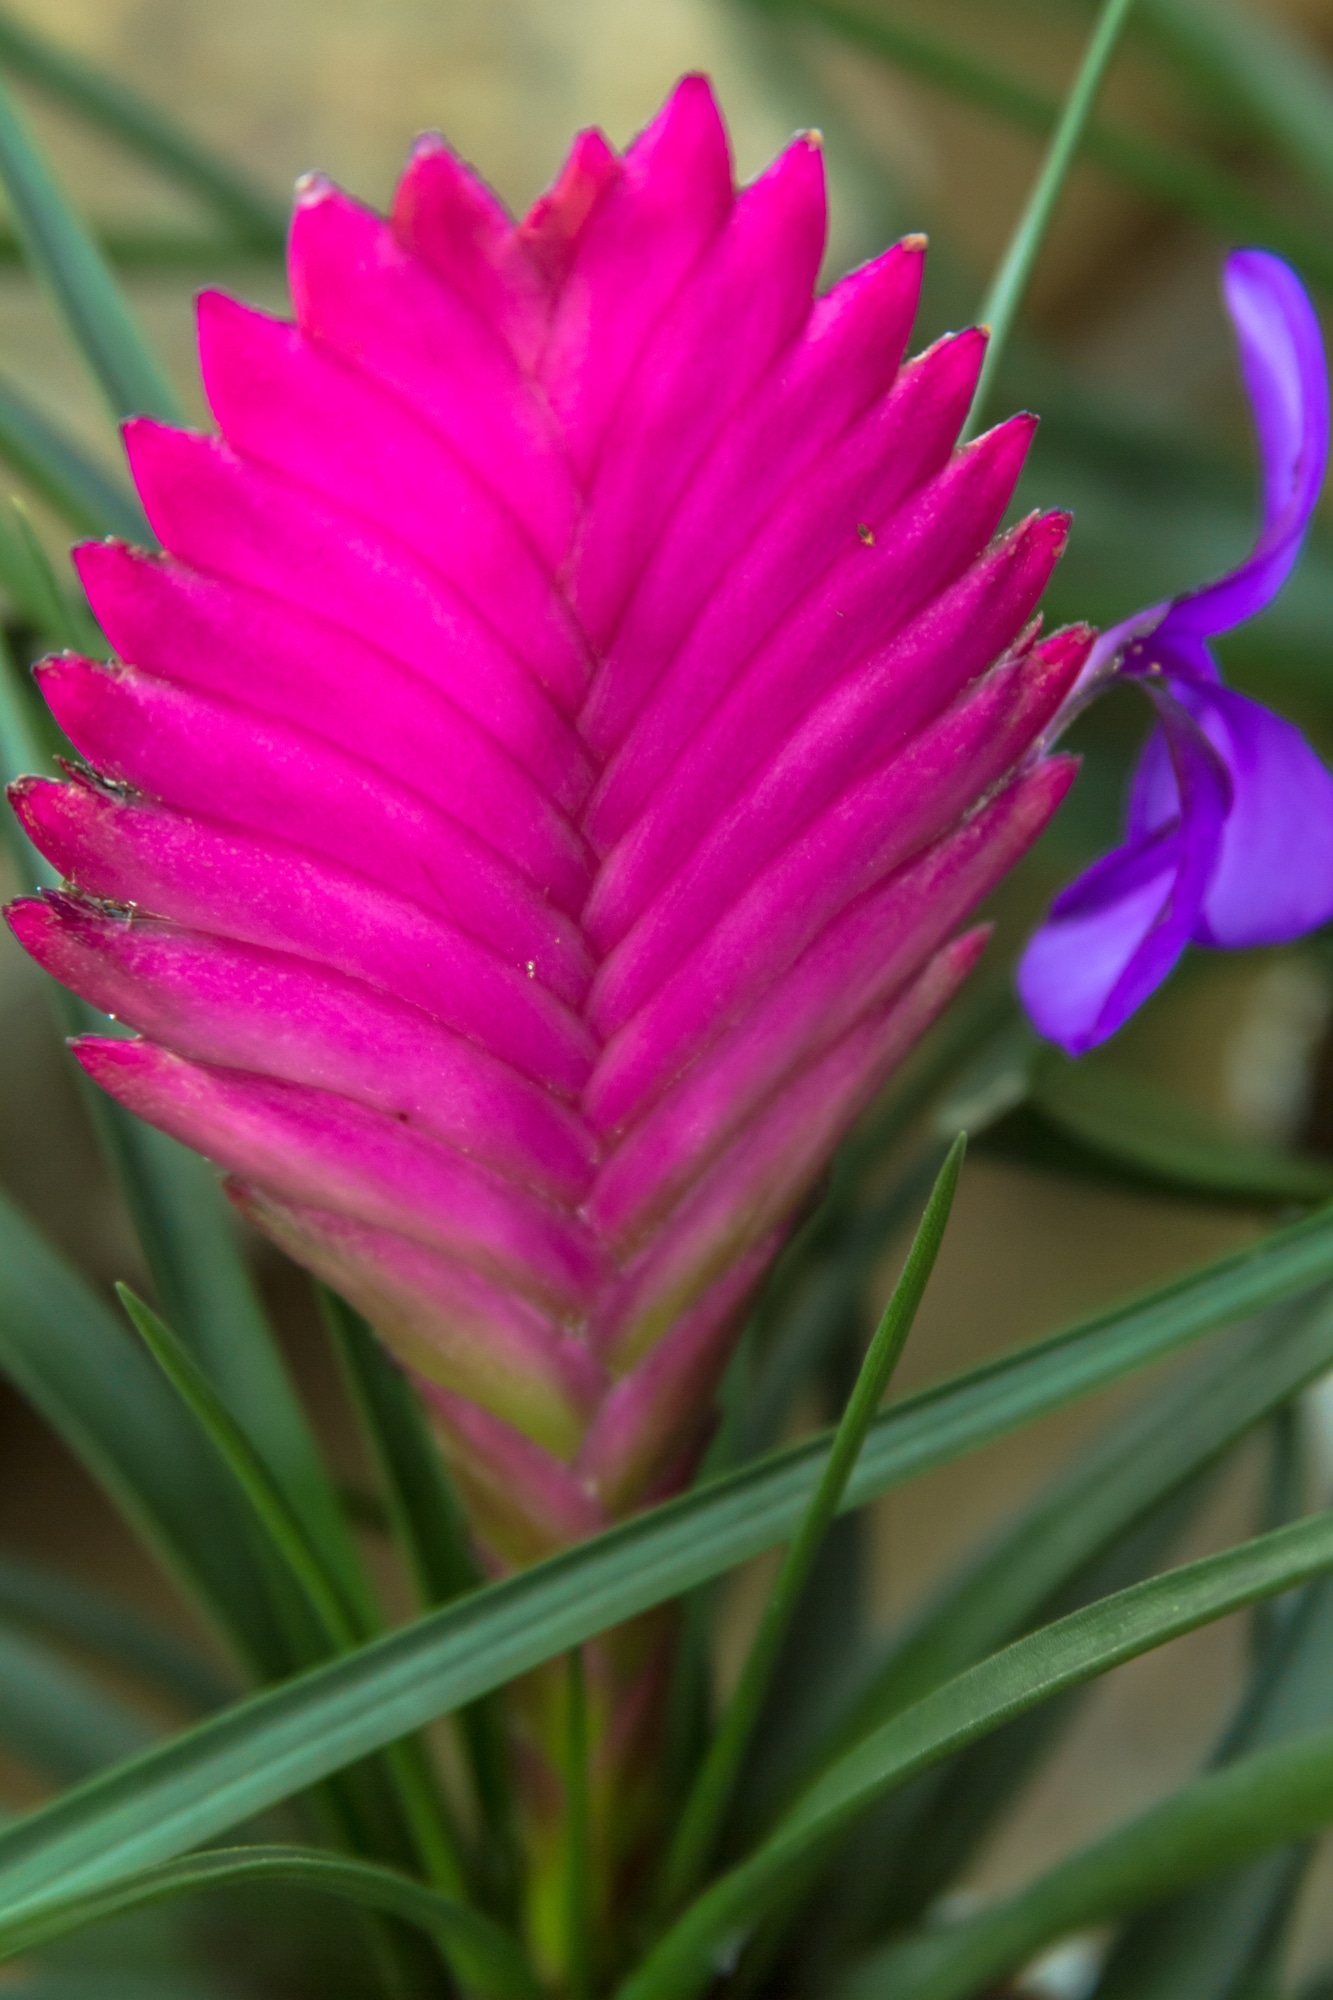
- Tillandsia: Air plants that don’t need soil at all—thriving on humidity and your imagination.
- Vriesea & Billbergia: Wild patterns and shapes often overlooked but just as stunning.
The Life Cycle — Spoiler Alert: It’s Bittersweet
Bromeliads grow in tight spirals forming living vases to catch rainwater and nutrients. They flower once—sometimes for four glorious months—and then all energy channels into pups: tiny clones sprouting at the base. The adult slowly fades away, handing over the baton to new life. It’s a bittersweet farewell but such an elegant legacy.
2. ESSENTIALS FOR BEGINNERS: GETTING THE BASICS RIGHT FROM DAY ONE
LIGHT — Finding Bromeliads’ Sweet Spot
Early on, I made the rookie mistake of sunbathing my Neoregelia on a July south-facing sill. Within days? Crispy leaf tips and dull colors—a hard lesson learned! These beauties thrive best in bright but indirect light, which means no scorchers but plenty of daylight warmth.
If you’re unsure about the best spot in your home, don’t miss our in-depth guide on Ideal Light Conditions for Growing Healthy Bromeliads Indoors—it’s packed with practical tips and window-by-window advice.
Quick test: Stand where you’ll put your plant at noon with a paperback book open:
- Can you read without squinting or harsh shadows? Perfect.
- Too much glare/squinting? Move it farther.
- Too dim? Try somewhere else.
In general:
- East-facing windows are your bromeliad goldmine.
- North-facing windows are gentle and safe.
- West/south windows require sheer curtains or extra distance from glass.
WATERING — Restraint Is The Name Of The Game
During a dusty renovation in 2019, my bromeliads struggled because construction dust clogged their tanks—the central cups that hold water. Lesson? Water carefully and avoid letting old water stagnate.
For a detailed walkthrough on avoiding the most common mistakes, check out our Step-by-Step Guide to Watering Bromeliads Properly.
Tank Bromeliads (Think Aechmea, Neoregelia):
Pour distilled or rainwater into the cup until it’s about half full—not overflowing. Empty this water completely before refilling weekly to keep algae and odors at bay.
Soil/Mounted Types:
Water soil only when the top inch feels dry; roots hate soggy feet!
Mounted Tillandsias? Soak upside down in lukewarm water for 20 minutes weekly. Shake off excess before hanging back up—not soaking longer or daily misting alone!
HUMIDITY & TEMPERATURE — Jungle Vibes Without The Drama
They love humidity but won’t throw tantrums if it dips below rainforest levels. Keep humidity above 40% whenever possible—I use a $12 digital hygrometer from Amazon for peace of mind. Ideal temperature? Think perfect spring break weather: 60–80°F (16–27°C).
Watch out for cold drafts—you'll notice growth stalling right away if they get chilly.
SOIL & MOUNTING — Let Those Roots Breathe
Forget dense potting soil! My go-to mix is:
50% orchid bark + 25% perlite + 25% coco coir/peat moss
It drains quickly but holds just enough moisture for roots to breathe. For air plants mounted on driftwood or cork bark? Use fishing line (not glue!) tied gently, placed somewhere airy—but avoid tight spots near glass that cook under sunbeams.
FEEDING WITHOUT DROWNING THEM IN LOVE
I once overfed my bromeliads so badly they nearly keeled over… kind of like feeding your dog too many treats!
- Fertilize once a month during spring/summer using half-strength balanced liquid fertilizer (“Dyna-Gro Grow” is my favorite).
- Apply by pouring into the central tank/soil or mist leaves lightly.
- Stop feeding during winter dormancy unless you’re running grow lights year-round.
Less truly is more here!
For more on nourishing your plants without overdoing it, see our complete resource on Fertilizing Bromeliads: Best Practices for Optimal Growth.
3. YOUR FIRST MONTH WITH A BROMELIAD: BEGINNER’S SURVIVAL GUIDE
I still remember my first mail-order Guzmania arriving—a soggy mess after shipping! Leaves were limp as wet noodles. Here’s exactly what got it thriving again:
Step-by-Step Survival Plan
- Identify Your Plant: No label? Google images or post photos in dedicated Facebook groups. If you want help narrowing down your options, our How to Choose the Right Bromeliad Species for Your Home guide can help you find the perfect match for your space and lifestyle.
- Pick Location Carefully: Bright indirect light only—no harsh midday sun!
- Pot/Mount NOW: Upgrade promptly if rootbound or sitting in dense peat-heavy soil; switch to chunky orchid mix. For stress-free transitions, see Tips for Repotting Bromeliads Without Stressing the Plant.
- Water With Precision: Fill tank halfway with distilled water; flush old water weekly without fail!
- Boost Humidity Creatively: Pebble trays under the pot work wonders; shower room windows are great too.
- Fertilize Lightly: Half-strength solution once monthly; never dump undiluted fertilizer!
- Observe Daily: Yellowing or curling leaves usually scream “too much/little water” or poor light.
- Don’t Rush Pups Separation: Wait until pups reach one-third the parent’s size before gently removing.
Keep calm—it takes some TLC and patience!
4. BEGINNER BLUNDERS YOU CAN SKIP (TRUST ME)
My friend Olivia called me frantic one day: her Aechmea reeked like pond scum! She admitted topping off the water each week without emptying old liquid—a rot recipe if there ever was one.
Here’s how you can dodge classic pitfalls:
1. Overwatering = instant root rot → let soil dry out between drinks
2. Tap water often causes brown leaf tips → switch to rain/distilled water
3. Direct sun scorches leaves → learn your window’s quirks well
4. Never just “top off” tank water → dump fully and refresh weekly!
5. Don’t yank pups off too soon → patience is key until pups hit at least one-third parent size
Each error is just part of learning—and skipping them means smoother sailing!
5. LEVEL-UP SECRETS FOR ADVANCED GROWERS WHO ARE READY TO PLAY WITH FIRE
After mastering three bromeliads through seasons (and trials), try these tricks to step up your game:
Bloom Boosting Magic
Not a bloomer yet despite all efforts? Try this hack I learned from a horticulturist friend during winter doldrums:
- Place mature bromeliad plus ripe apple inside clear plastic bag for seven days—the ethylene gas jumpstarts flowering within weeks!
Just don’t leave longer than a week—you risk suffocation disasters otherwise.
Propagating Like A Pro
Once pups reach about one-third parent size:
1. Gently remove mother from pot
2. Twist/wiggle pups free by hand or slice cleanly with sterile knife
3. Pot each pup separately into fresh chunky mix
4. Mist daily rather than soaking heavily until roots grab hold (~6 weeks)
Seeds? Take patience goggles off—they take months even to sprout!
Outdoor Experiments & Creative Displays
One summer I mounted Billbergias onto oak branches—hummingbirds showed up at sunrise like clockwork feeding on blooms!
Pro tip: Keep slugs/snails away using copper tape rings rather than nasty chemicals—your garden friends and the environment will thank you.
Indoors: Mix low-growing Neoregelias at base with tall Guzmanias/Aechmeas above to create living sculptures evolving naturally as pups grow.
6. FIELD KIT FOR YOUR BROMELIAD ADVENTURE — WHAT YOU ACTUALLY NEED
After years of trial-and-error gadget buying, here’s what stays permanently on my shelf:
- Long-spout watering can (to reach deep cups without spilling)
- Spray bottle for gentle misting ($6 at hardware)
- Sterile scissors/orchid snips (for grooming & trimming spent flowers)
- Orchid bark/perlite/coco coir bags ($10–15 gets you years’ supply)
- Digital hygrometer ($12 online—not optional!)
Optional fun gear:
- Full-spectrum LED grow light bar ($35–$60)—especially handy in cloudy winters or windowless rooms
Books worth their weight in orchid bark dust:
“Bromeliads: The Connoisseur's Guide” by Andrew Steens: Practical advice wrapped in jaw-dropping photos you'll want framing alongside your art collection
“Growing Bromeliads” by BSA: Every troubleshooting tip I imagined I’d invented is right here!
Where To Buy?
Botanical garden sales > reputable specialty nurseries > trusted Etsy sellers > big box stores only as last resort—with careful inspections for root health and leaf condition every time!
7. FROM MY NOTEBOOK — TRUE STORIES AND TURNAROUNDS
The Wilting Mail Order Guzmania Rescue
Sarah messaged me last March frantic about her new arrival flopping within days (“Is it dead?”). Her tank water hadn’t been changed since receipt…
We flushed fresh distilled H₂O through its cup every day plus gentle misting near her radiator—and five days later new rigidity appeared; bloom lasted two more beautiful months!
The Bromeliad That Finally Bloomed
Carlos inherited his abuela’s Aechmea that never bloomed despite two years’ care! We moved it closer to an east window for brighter light and resumed monthly feedings… Still nothing until he tried placing it with a ripe apple inside a bag overnight six nights straight.
Four weeks later—bam! Neon pink bracts adorned his pride-and-joy—a bloom worth waiting for.
The Soggy Vriesea Fix
Jenna accidentally kept pouring leftover watering can contents daily into her Vriesea's tank (“Didn’t want it thirsty!”). Base went mushy yellow-fast—we swapped potting medium via FaceTime using coarse bark mix and strictly dried top-inch-only watering rules within weeks had fresh growth popping back up.
Air Plant Blues Turned Success
Tom wondered why his Tillandsia leaf tips crisped despite twice-weekly mists—the culprit was stagnant air trapped behind books plus soak time too short!
He switched to soaking weekly for twenty minutes plus set up a tiny USB fan nearby—and boom! New growth emerged in just ten days flat.
8. RAPID TROUBLESHOOTING CHEAT SHEET — WHAT TO DO WHEN THINGS GO SIDEWAYS
| Problem | Likely Cause | Story-Solved Fix |
|---|---|---|
| Brown/crispy leaf tips | Dry air / hard tap water | Switch to rain/distilled H₂O + pebble tray |
| Yellow lower leaves | Aging / root rot | Remove older leaves OR repot into drier mix |
| No blooms | Low light/nutrients | Move brighter + monthly balanced feeds |
| Smelly/stagnant tank | Old standing water | Empty/refill every single week |
| Mushy base | Overwatering | Repot ASAP; trim soft parts |
| Pale/dull foliage | Not enough light | Move closer to good indirect sunlight |
| Leaf spotting | Hard tap/chemical water | Use filtered/distilled H₂O |
| White crusts | Mineral buildup | Rinse thoroughly with distilled before watering |
| Mealybugs/scale | Infestation | Dab Q-tip swabbed with alcohol |
If you suspect pests or disease, our Common Pests and Diseases Affecting Bromeliads and How to Treat Them guide walks you through identification and safe treatment options.
Remember—the biggest difference between panicked beginners and calm experts isn’t magic—it’s knowing which problems need immediate action versus slow adjustments over time!
9. MASTER PLAN FOR LONG-LASTING BROMELIAD SUCCESS — YOUR PERSONAL ROADMAP
If I could rewind today, here’s what I’d do differently—as you start or reset your bromeliad journey:
1. Identify species/type ASAP—it changes everything about care needed
2. Choose location based on true light/humidity measurements (don’t guess!)
3. Repot/mount immediately into airy chunky media suited for roots
4. Water smartly—not blindly by calendar but by feel/finger-test + strict cup routine
5. Boost humidity cleverly using pebble trays/misting/shower proximity as needed
6. Fertilize sparingly during growing season only; step back completely during dormancy
7. Watch closely for pests/yellowing/root rot signs—and act early before crisis hits
8. Celebrate every pup—it means you’ve cracked their care code!
9*. Design displays not just for looks but to make YOU genuinely smile everyday*
10*. Embrace mistakes—they fuel experience even seasoned growers fall flat sometimes.*
Every thriving collection started as someone else’s experiment gone right—or painfully wrong—and yours will be richer because you’re reading real stories like these along the way.
10. THE LONG GAME MINDSET — STAY CURIOUS AND CONNECTED
Even now—with dozens of bromels thriving across shelves and trees—I’m still learning quirks unique to each variety or season shift...
Try these mindset shifts:
- Keep simple notes tracking what works best under YOUR roof/light/humidity cycle
- Add only one or two new types per season so you really get to know their personality
- Join local societies/Facebook groups—brom lovers love troubleshooting rare issues old-school style
- Gift pups/plants generously—it spreads joy exponentially
- Above all... stay curious! Each happy brom has thrived not merely thanks to nature—but because someone dared experiment boldly beyond generic care labels trying new ideas eventually proving myths true (or busted!)
Bookmark this guide—not only as instructions but as inspiration when something strange pops up next season…
From grandma's porch experiments long ago through today’s lush living walls—I promise this brom life gets better year on year.
You’re ready now—go write your own chapter in brilliant bromeliad history!
Happy growing,
Your fellow storyteller-in-the-jungle 🌿🌺
P.S.—Careful observation beats perfection. Plants aren’t robots—they have moods resembling ours more than we’d admit sometimes! Learning their language takes time—but that first pup emerging beneath wilted momma always makes it worth every misstep along the way.
If you'd like, I can also help craft quick visual IDs, steps charts, or even seasonal checklists tailored specifically around your local climate zone—just say the word!


