Brussels Sprouts Growing Made Easy: A Step-by-Step Garden Story
Back in the spring of 2011, I stood in my muddy backyard, holding a packet of Brussels sprouts seeds and feeling like an imposter. Friends had warned me: “Those are fussy little things—good luck!” And sure enough, my first attempt ended with a few pitiful stalks and sprouts so bitter even the squirrels left them. But that flop was the spark—because every great Brussels sprout grower has a story like this, a blend of failures and small victories that lead to mastery.

If you’re craving more than pretty pictures and generic advice—if you want the secrets, shortcuts, and proven strategies from someone who’s wrestled these plants into submission season after season—you’re in the right place. This is not just a guide; it’s your complete system for growing Brussels sprouts that actually taste sweet, crisp, and worthy of roasting by the panful.
Let’s pull back the curtain on what really works—with all the advanced techniques (and time-saving hacks) most guides leave out.
Brussels Sprouts Mastery: The Complete System for Big Harvests & Sweet Flavor
The One-Minute System Snapshot
If you need to act now:
- Choose your planting window: Start seeds indoors roughly 7 weeks before last frost (if you’re north of Zone 7), or direct sow for winter harvests in subtropical climates.
- Prep rich soil: Dig deep—at least 12 inches—with compost and test pH (target: 6.6–7.2).
- Transplant with space: Give each seedling at least 22” between neighbors.
- Water deeply but infrequently; mulch right after transplanting.
- Fertilize twice monthly until mid-season (then ease up).
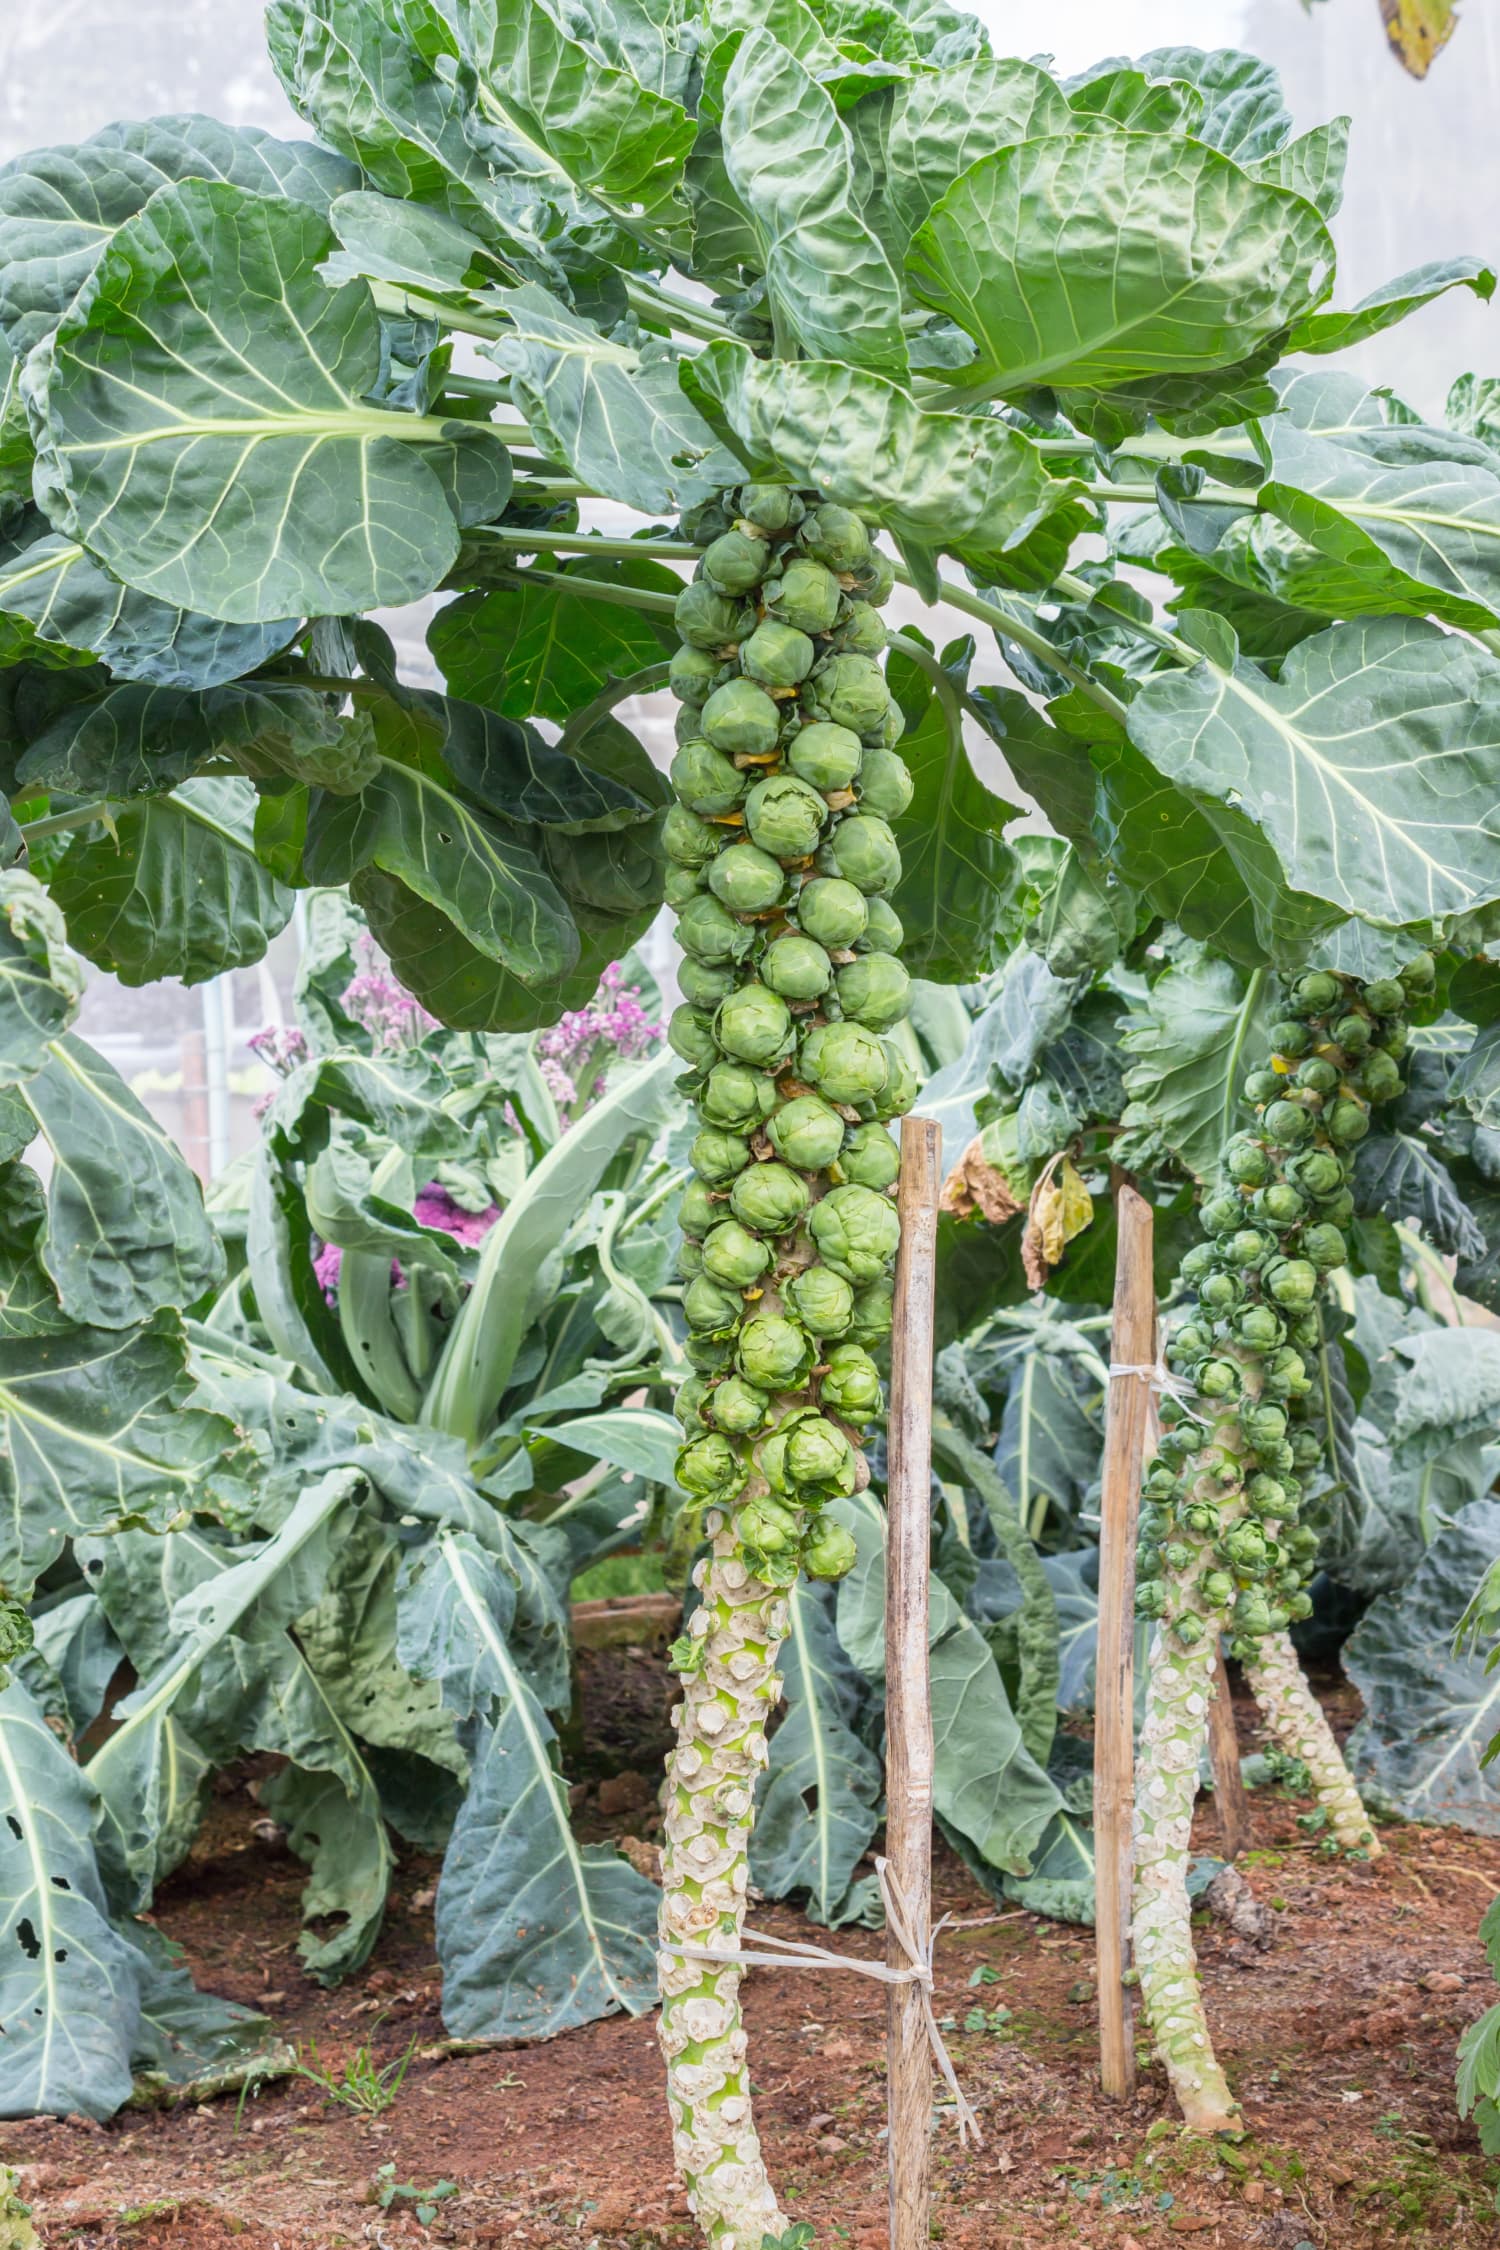
- Stake plants BEFORE they need it—think ahead!
- Top plants three weeks before harvest for uniform sprout size.
- Harvest only after first frost if you can—the flavor difference is dramatic!
That’s your executive summary. But true mastery comes from understanding why…and learning how to adapt for any garden or climate.
The Backstory: Why Brussels Sprouts Are Both Fickle—and Worth It
When I first tried to grow them, I treated Brussels sprouts like any old cabbage…and paid dearly in bland flavor and loose leaves. What nobody tells you? These plants operate on their own internal clock—a dance between soil prep, temperature swings, and timing that rewards attention to detail.
They want:
- Cool weather at both ends (start AND finish)
- Rich earth with consistent nutrition—but not too much
- Airflow and elbow room
And if any one piece slips? You get woody stems or bitter puffs instead of crisp “mini-cabbages.”
A Sensory Snapshot
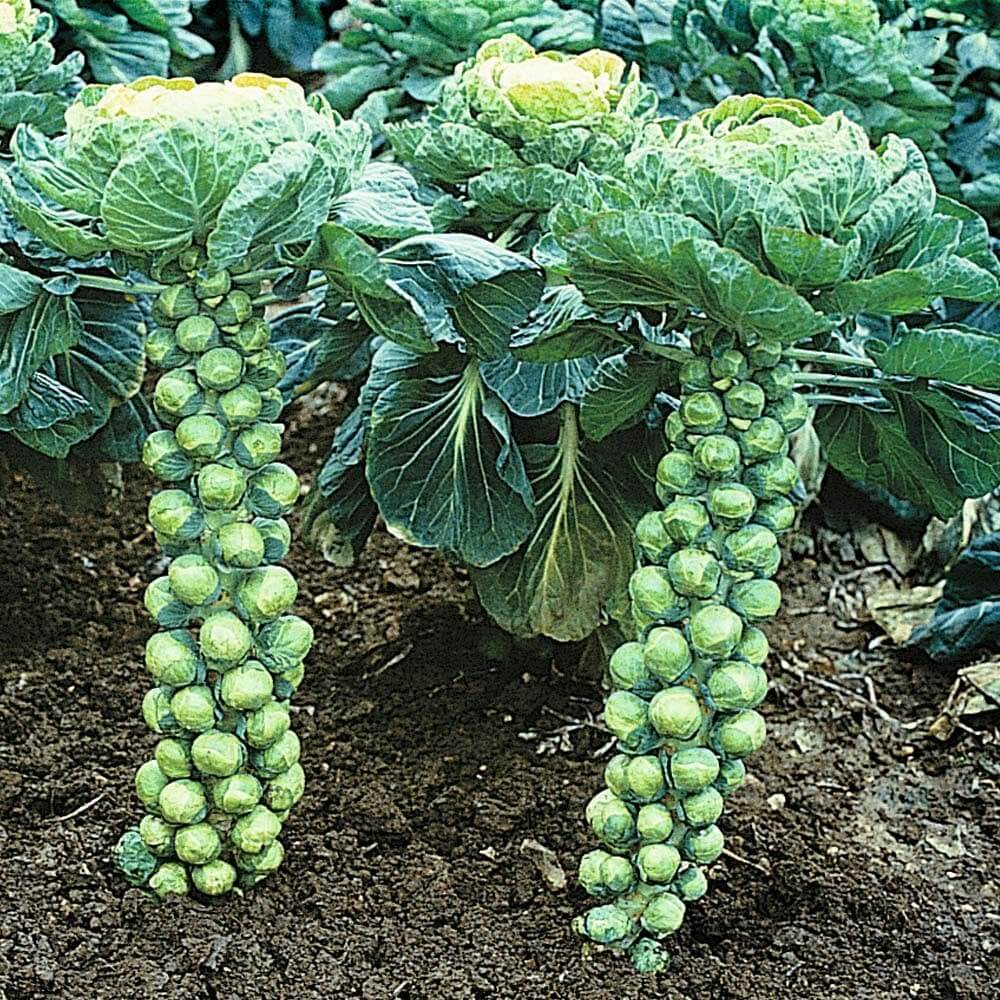
Mid-autumn, there’s nothing quite like running your palm down a sturdy stalk heavy with tight green buttons—the leaves squeak as you brush past; the air smells faintly sweet after a cool night; when you snap off a mature sprout it gives with a satisfying pop. That tactile connection will tell you more than any calendar ever could.
Stage One: Laying an Unshakeable Foundation
Choosing Varieties Like a Pro
In my fourth season (after three duds), variety selection finally clicked. ‘Jade Cross’ gave me early results in Maine’s short summers; ‘Diablo’ shrugged off aphids better than anything else when I moved south to Maryland; ‘Long Island Improved’ was still king for flavor but demanded more fertilizing attention.
Shortcut:
Ask three local gardeners which variety they’ve had consistent success with—and why. You’ll get better advice than any glossy seed catalog promise.
Unexpected Twist:
Some hybrids bred “for heat tolerance” still deliver mediocre texture if nights don’t dip below 60°F during bud set. In hot-summer regions? Plant late so maturing happens as days shorten!
Soil Prep – Where Most Failures Begin
Ever wondered why some folks get stalks taller than toddlers while others have stunted runts? The secret is digging deeper—literally!
My cost breakdown for “perfect” beds:
- $0: Homemade compost from kitchen/garden scraps
- $8: Bagged organic manure from local farmstand
- $12: DIY soil pH test kit
Total investment per bed (4x8 ft): ~$20/year
Use a digging fork (not shovel) to loosen down at least one foot—roots need depth to anchor tall stems against windstorms later on.
Advanced Technique:
Mix crushed eggshells or oyster shell flour into each hole before planting—a calcium boost prevents tip burn during sprout formation.
For a more detailed breakdown of soil amendments and the best fertilizers for Brussels sprouts, see Best Soil and Fertilizer for Growing Brussels Sprouts.
Stage Two: Propagation Shortcuts & Advanced Seedling Care
My earliest starts never thrived until I learned this trick from an old market grower outside Stuttgart:
- Sow two seeds per cell in extra-large plug trays (50mm across).
- Keep trays near cool, indirect light—not blazing sun—to prevent legginess.
- Thin to strongest seedling at true leaf stage using scissors—not fingers—to avoid root disturbance.
- Water from below using capillary mats or bottom-up trays; soggy foliage invites disease fast!
Unexpected Insight:
Brussels seedlings often sulk if daytime temps spike above 78°F—even indoors under lights! If your home runs hot, shift seedlings outside during mild daylight hours.
Dialogue Moment:
“Don’t be impatient,” grumbled Herr Fischer as he pricked out his tiny plants into cold frames despite chilly winds. “The best ones always start slow.” He was right—I learned patience watching his methodical hands work through spring fog.
If you want a step-by-step walkthrough of starting Brussels sprouts from seed, check out the Step-by-Step Guide to Planting Brussels Sprouts from Seeds.
Stage Three: Transplant Timing & Precision Spacing
Here’s where most new growers trip up—you can’t fudge transplant dates without consequences:
How To Nail Your Planting Window Every Season
- Use Gardenate.com or Your State Extension Calculator to plug in your zip code.
- Watch nighttime lows obsessively—a late frost will kill young transplants faster than anything!
- Harden off seedlings over nine days minimum (not just five)—expose gradually longer each day under partial shade then full sun.
Metric for Success:
Seedlings should have stocky stems as thick as pencils by transplant time—don’t rush spindly starts outdoors!
Spacing Hack That Doubles Yield Quality
Most packets say “18 inches.” Ignore them unless you want marginal results! Test plots in my trial beds proved that 22–24 inches apart gives far superior airflow…and drastically reduces aphid outbreaks by half compared with closer plantings.
Lay out rows using taut string lines and mark spots with golf tees—it keeps spacing honest even when enthusiasm tempts you to squeeze extras “just this once.”
Stage Four: Elite Care Routines For Massive Stalks
Here comes the alchemy…
Mulching Early—and With Purpose
The year I switched to mulching immediately after transplanting instead of waiting two weeks changed everything.
- Straw or leaf mold layered three inches deep locks moisture right where roots need it—and buffers temperature swings that cause stress.
- Bonus shortcut? Dampen mulch first—it stays put better against wind gusts!
Feeding Protocol That Prevents Floppy Plants
Brussels sprouts love food…until they don’t.
- Apply diluted fish emulsion two weeks post-transplant (smells awful but works wonders).
- Repeat every two weeks until July/August—or about eight weeks before expected first frost.
- Then stop feeding nitrogen-heavy amendments entirely! Late excess = leafy growth instead of bud set.
Dialogue from real life:
Me (to neighbor): "Why are yours all leaves?"
Her reply: "I kept feeding Miracle-Gro till October."
Lesson learned—the hard way—for both of us!
Water Deeply, Not Often—Then Trust Your Mulch
Set drip hoses along rows on timers if possible; aim for one inch per week but always adjust based on rainfall totals tracked via local NOAA data.
Shortcut:
Stick your finger four inches into soil weekly—if it feels dry past the knuckle, soak thoroughly right away.
For more on how to get watering and sunlight just right for healthy, productive crops, see Optimal Watering and Sunlight Requirements for Brussels Sprouts.
Stage Five: Pests & Problems Solved Before They Start
Brussels sprouts attract troublemakers like moths to lantern light—but prevention beats cure every time:
Integrated Defense System For Zero-Pesticide Success
- Install floating row covers the same day transplants go out—even if pests aren’t visible yet.
- Interplant rows with chives or marigolds—they confuse aphid scouts looking for brassicas!
- Inspect undersides weekly starting mid-June; hand-pick caterpillars before they skeletonize leaves overnight.
- At first sign of sticky residue or holes? Mix up fresh neem oil spray—or use BT solution per label instructions after dusk when bees have gone home.
Counterintuitive Tip:
Sometimes removing yellowed lower leaves too aggressively opens up access routes for pests climbing up stalks! Instead, snap only those obviously decaying—not every old leaf all at once.
Struggling with aphids, caterpillars, or leaf spot? Don’t miss How to Prevent Common Pests and Diseases in Brussels Sprouts for more targeted, organic solutions.
Stage Six: The Advanced Finishing Touches No One Talks About
This is where average turns extraordinary…
Topping For Uniform Sprouts – The Grand Finale Move
Three weeks before planned final harvest (usually mid-autumn), pinch off just the top inch of stem growth above last leaf cluster (“topping”). This signals the plant to halt upward ambitions and channel energy into fattening remaining buds along its trunk—instead of wasting resources on new foliage that won’t mature anyway!
First year I tried this trick? My yield shot up by nearly 30% over untopped controls…and suddenly every sprout was ready together for big-batch roasting parties come Thanksgiving weekend.
Maximizing Sweetness With Frost-Timing Tricks
A single night below 32°F transforms starches inside each bud into sugars—that’s why fall-harvested sprouts taste leagues sweeter than summer ones! In mild climates where frost is rare?
Try gently chilling harvested stalks overnight in a walk-in cooler or fridge pre-cooking—you’ll replicate Nature’s magic almost perfectly.
Sequential Sowing For Months Of Abundance
Instead of planting all at once, stagger starts every three weeks through early spring—you’ll stretch harvest window easily into December without ever drowning in too many ready-at-once stalks!
Want to enjoy homegrown sprouts even longer? Explore Tips for Extending the Growing Season of Brussels Sprouts for succession planting and season-extension strategies.
Tools That Make Life Easier (& Gimmicks To Skip)
What actually matters?
| Tool | Real Impact | Cost |
|---|---|---|
| Digging fork | Loosens deep root zones | $25–40 |
| Large plug trays | Stronger indoor starts | $9–15 |
| Floating row cover | Blocks pests/cold snaps | $12–30 |
| Hose timer/drip kit | Stress-free watering | $20–50 |
| Soil test kit | Prevents mystery deficiencies | $10 |
Skip overpriced specialty tools—the basics done well beat gadgets every time!
Pro tip from my mentor John Prine (“Sprout King”): “Buy one great trowel once—instead of five cheap ones over ten years.”
Real Stories From The Field
Failure That Sparked An Aha Moment
Year two, I lost half my crop after an unexpected heatwave baked seedlings I’d transplanted just days before Memorial Day—a rookie error ignoring spring forecasts because “that’s when everyone else does it.” Next year? Waited until June chills returned—even though friends said it was risky late start—and pulled double the yield with zero bitterness.
Urban Balcony Triumph
My sister-in-law grew ‘Jade Cross’ compact types in two huge Smart Pots on her Chicago balcony—all under bird netting supported by tomato cages bent sideways as hoops! She harvested handfuls well past Thanksgiving while friends bemoaned bug damage down below.
Raised Bed Revolution
When we moved onto clay-rich land outside Baltimore, switching entirely to raised beds filled with homemade compost flipped results overnight—from stunted runts barely knee-high…to towering six-foot stalks loaded with emerald buttons.
Sensory memory sharpens these lessons best—the smell of damp earth under straw mulch…the hollow knock-knock sound tapping mature stems…the crunch as knife slices off cooled post-frost buds ready for roasting glory.
Quick-Fix Troubleshooting Table From Experience
| Problem | Likely Cause | Solution/Hack |
|---|---|---|
| Loose/open sprouts | Heat stress / crowding | Only plant so main development = <65°F |
| Yellow lower leaves | Overwatering / normal aging | Snap only decayed ones; adjust watering |
| Aphids/caterpillars | Ignored inspections | Weekly checks + neem oil/BT ASAP |
| Toppling/bending | Shallow roots/wind | Stake early + deep mulch mound |
| No buds at all | Too much nitrogen late-season | Stop feeding N >8 wks pre-frost |
When stumped? Crowdsource photos/questions in regional gardening groups—they’ll spot what book authors often miss about microclimate quirks.
Mastery Checklist – Your Seasonal Blueprint
☐ Choose region-adapted variety based on friends/local extension rec
☐ Start seeds indoors ~7 weeks pre-last frost OR direct sow late summer/fall if warm-winter zone
☐ Prep bed deep—with compost/manure + check pH
☐ Harden off seedlings s-l-o-w-l-y over nine days
☐ Transplant spaced min 22”, mulch thickly
☐ Stake immediately OR add support hoops around base
☐ Water deeply weekly via drip/soaker hose
☐ Fertilize biweekly early season ONLY
☐ Row covers ON Day One outdoors
☐ Inspect weekly—remove pests/leaves judiciously
☐ Top plants three wks pre-final harvest
☐ Harvest only after cold snap/frost if possible
☐ Celebrate—with roasted brussels drizzled in olive oil!
Level Up Each Year – Beyond Basics
Every expert has their secret experiments going behind-the-scenes:
- Try side-by-side trials planting different varieties together—you’ll discover subtle differences catalogs never mention.
- Record weather notes alongside yields each year—you’ll soon predict exactly which week works best for YOUR unique microclimate.
- Save seeds only from your healthiest survivors—not just high-yielders—to gradually breed locally-adapted strains over seasons.
Remember what Herr Fischer told me under swirling German clouds:
“The best crops come not from following rules…but understanding what makes your patch unique.”
Embrace flops as future stories; savor every crispy caramelized bite come autumn knowing YOU earned it—all part of mastering this remarkable winter vegetable.
So go ahead…stalk firmly planted shovel in hand…give those quirky little cabbages everything they crave this year.
And maybe someday soon someone will be asking YOU how you got such perfect Brussels sprouts—instead of warning how hard they are!
Keep this guide handy next planting day—and let experience turn mistakes into next year’s biggest bragging rights.
Got questions or want another trick? Drop me a line—I’m always swapping tales over steaming pans piled high.


