Cactus Landscaping Made Simple: A Complete Guide for Stunning Gardens
Staring at a patch of sunbaked dirt, you might not see a future filled with drama and resilience—but that’s exactly what cactus landscaping can deliver. I’ve watched total beginners transform desolate yards into vibrant, living galleries using nothing but cacti, gravel, and a bit of know-how. My first attempt? A single golden barrel plopped in the middle of compacted clay—no mulch, no plan. It rotted within months (and honestly looked like a spiky basketball someone had lost in the sand). Ten years on and many experiments later, my own front garden is now a conversation-starter that’s survived monsoon downpours, rogue soccer balls, and two curious dogs.

Here’s the master class: from rookie mistakes to advanced strategies even professional designers use—plus tips you’ll never find in a generic landscaping manual.
Cactus Landscaping Master Class: From Blank Slate to Spectacular
Level One: Core Principles for Every Beginner
Why Cactus?
Cacti aren’t just “plants that survive neglect.” They’re precision-engineered by nature for extremes—sun pounding down at noon, bone-dry soils that crack underfoot, temperature swings you feel in your teeth. If your climate throws curveballs (sudden heatwaves or bursts of rain), these plants shrug it off.
Sensory detail time: Stand beside a mature saguaro at dusk—the air almost hums with stored heat radiating from its pleated sides; tiny bats slip between arms as desert blooms open when the world cools.
Cactus landscapes deliver:
- Maintenance freedom (in the right soil)
- Serious water savings—I cut my monthly bill by 40% after switching out thirsty turf
- Visual impact year-round, not just in bloom
But here’s what most online guides skip: The real artistry lies in designing for problems, not just aesthetics.
Debunking the Myths
In my first year as an Arizona homeowner, a neighbor swore his cacti “never needed water.” A deadly freeze later proved him wrong—he’d lost three chollas and an agave overnight. Hardiness zones matter.
Another early lesson: Decorative rocks over hardpan don’t magically make good gardening soil. Roots suffocate if they can’t breathe—and once rot sets in, it spreads faster than gossip at a neighborhood BBQ.
Bottom line:
- Match species to your zone (use USDA Plant Hardiness Map)
- Drainage is non-negotiable
- Water when dry—not on schedule
Level Two: Designing Like You Mean It
Assess Your Microclimate Like a Pro
Every successful cactus garden starts with close observation. When I consult for clients, I insist on spending one afternoon onsite—shadows creep differently in winter vs summer; reflected heat from driveways bakes nearby beds; gutters create accidental “rain deserts.”
Quick assessment drill:
- Photograph your plot every hour between sunrise and sunset.
- Map out sun and shade patterns.
- Test drainage: Dig twelve inches down; fill twice with water—the second fill should vanish within two hours max.
If your soil clings together like Play-Doh? Time for amendment (my personal ratio: 60% native soil, 30% pumice/gravel—not pea gravel which compacts—and 10% well-rotted compost).

Planning Before Planting
Sketch first—even if it’s just chicken scratch on scrap paper.
- Pick one or two anchor species (a saguaro or big agave).
- Cluster smaller varieties in odd numbers—threes and fives beat straight lines every time.
- Leave open space—it looks bare at first but saves you major rework as plants expand (think three feet minimum around fast-growing prickly pears).
True Story:
My “successes” always start with restraint. The worst designs happen when I impulse-buy sale rack cacti and cram them together—they look great for six months then turn into tangled green blobs needing heavy gloves and regret to untangle.
Level Three: Species Selection – Beyond the Obvious
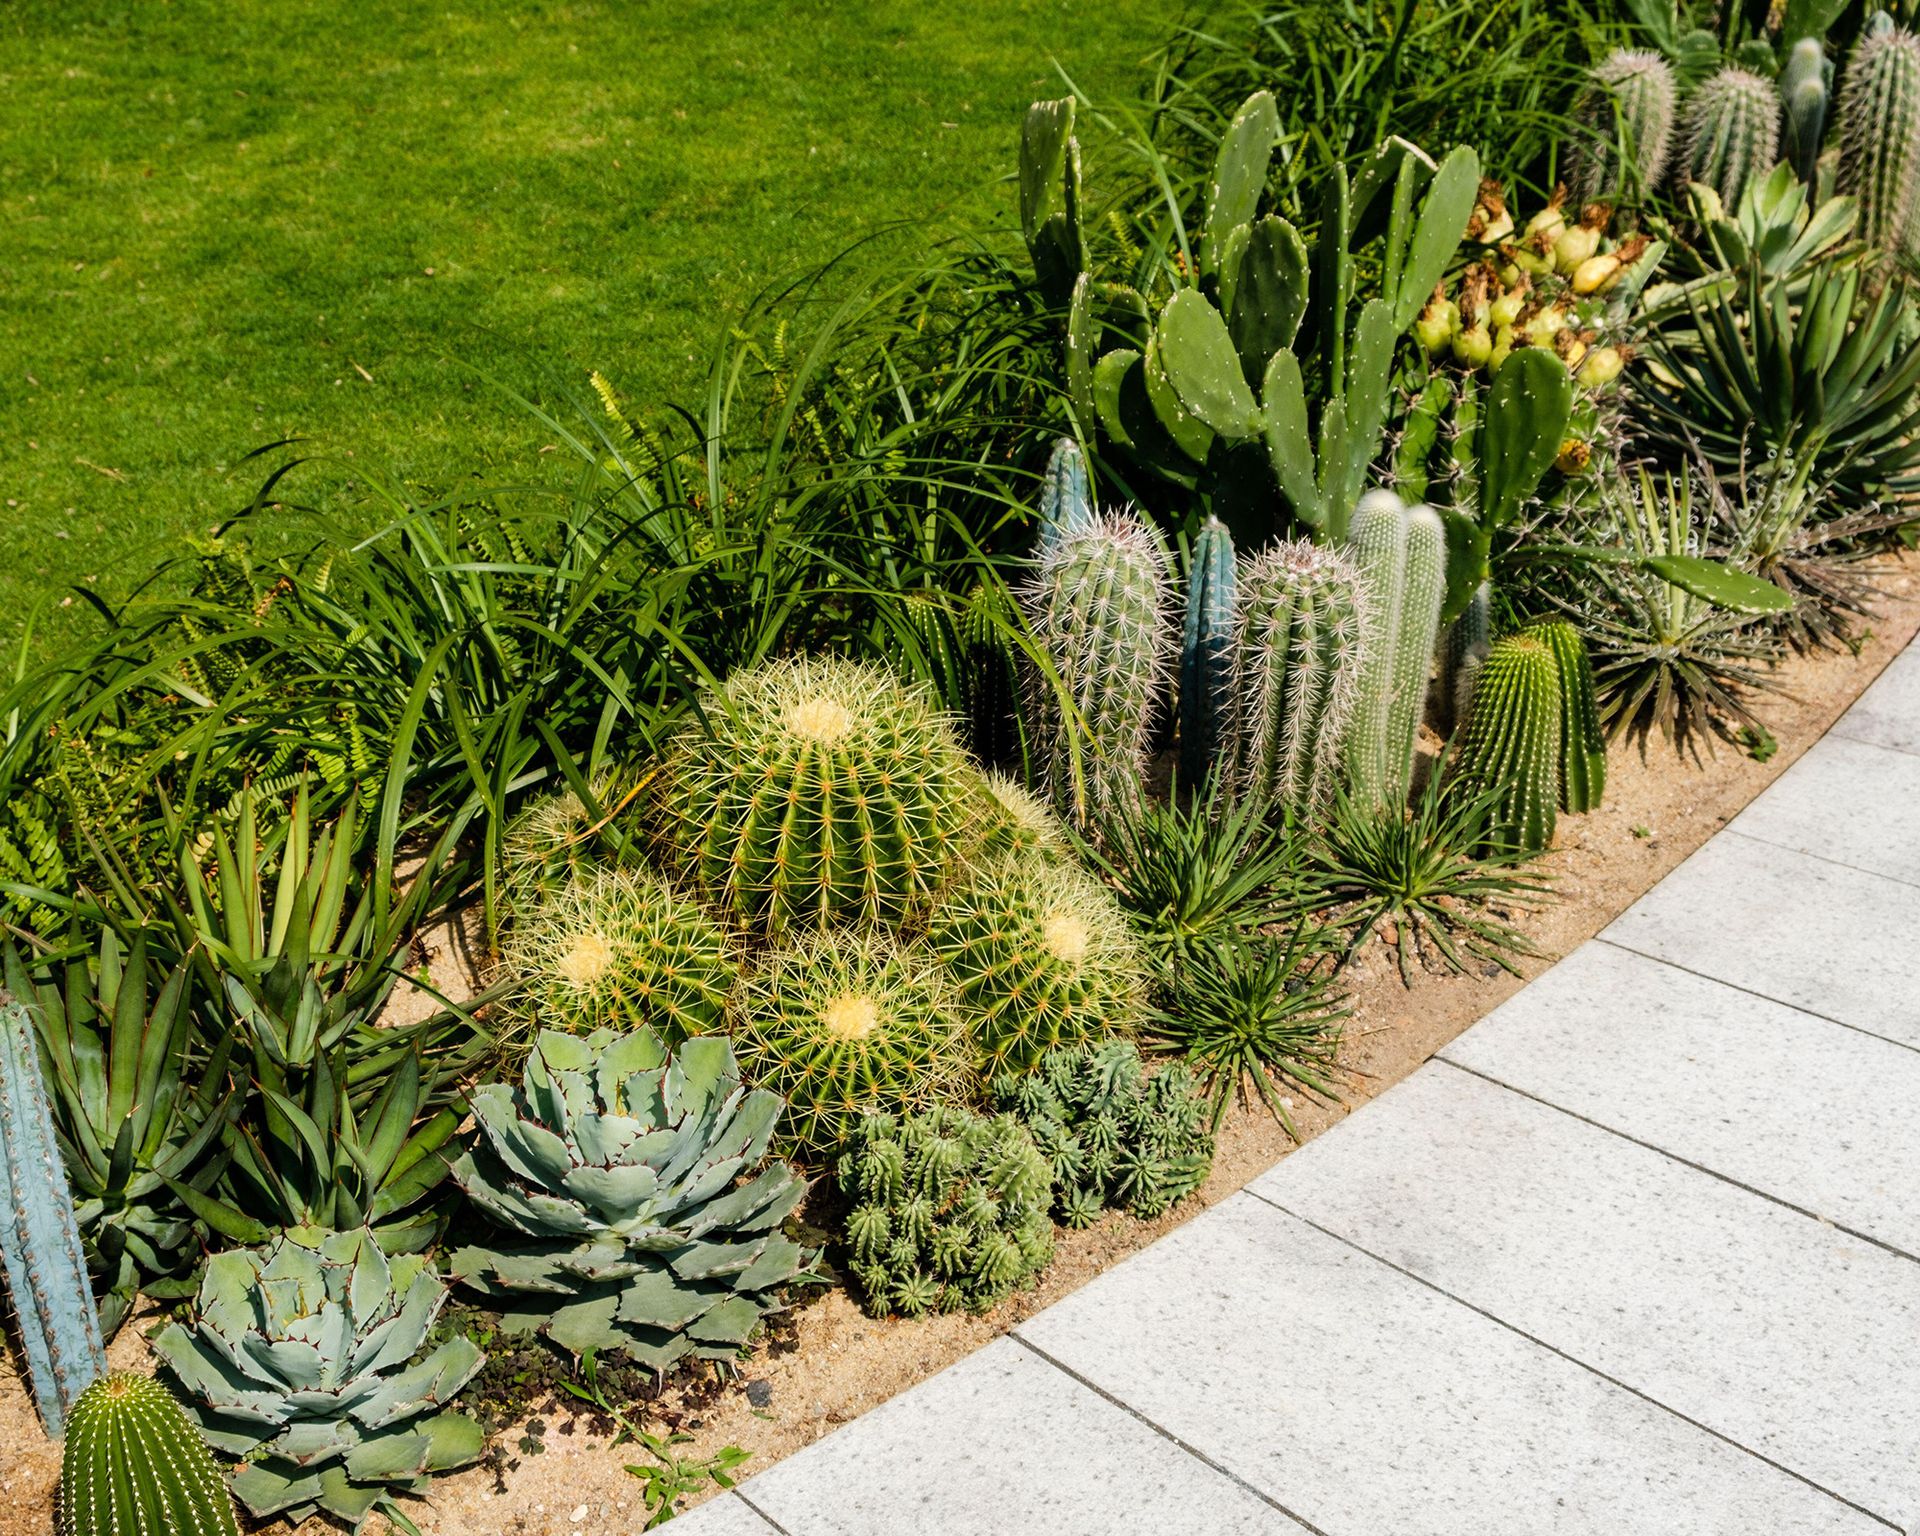
Building Diversity That Lasts
For every iconic barrel cactus there are dozens of unsung heroes perfect for color contrast or tough microclimates:
| Species Name | Matures At | Survives To | Special Role |
|---|---|---|---|
| Golden Barrel | 2’ width | ~14°F | Sun-catching spheres |
| Santa Rita Prickly Pear | 18”–4’ | ~15°F | Purple pads all winter |
| Cholla (Cylindropuntia) | variable | some -10°F | Wildlife interest + structure |
| Hedgehog (Echinocereus) | <1’ tall | -10°F | Neon blooms mid-spring |
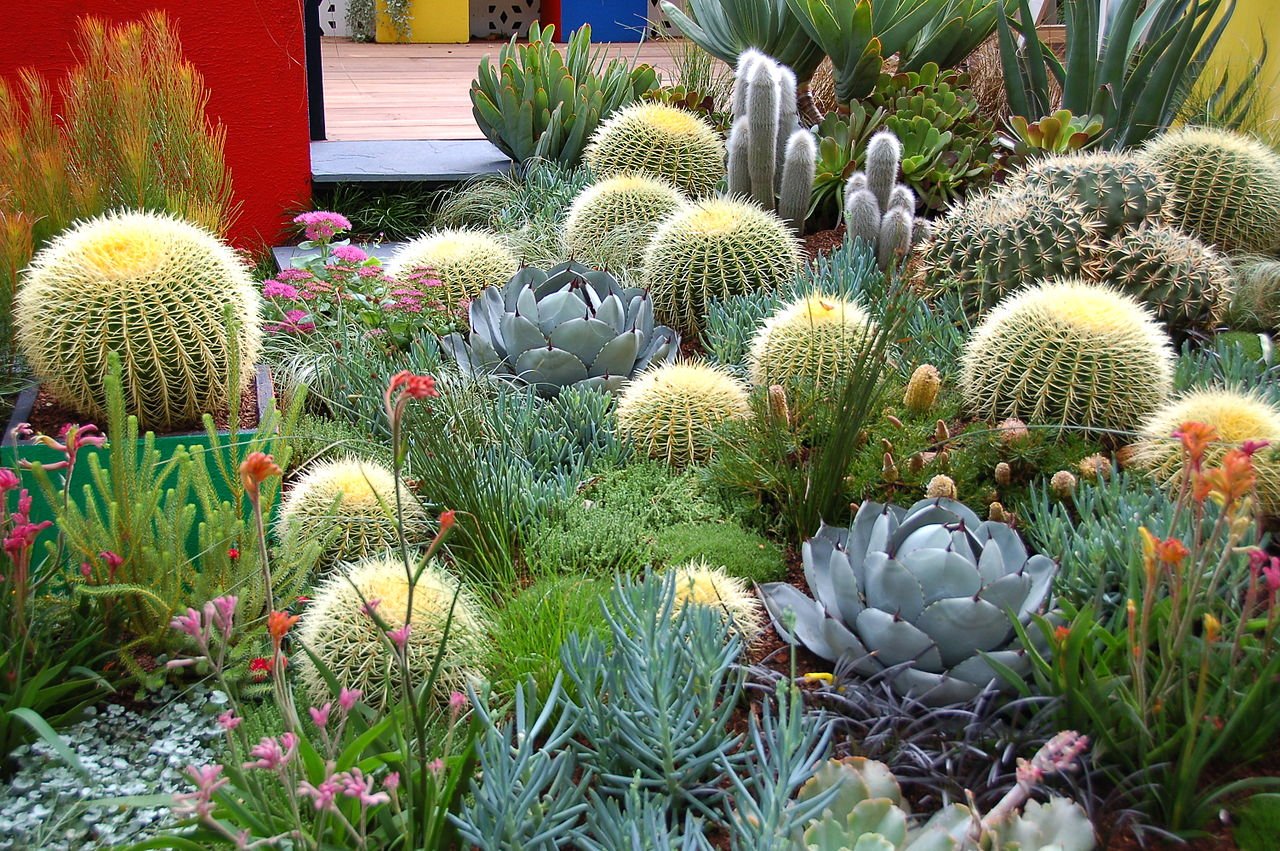
Counterintuitive tip:
Mix cacti with non-cacti succulents for softer textures! For north-facing patios where sun is filtered? Echeveria or blue chalk sticks thrive alongside low-growing hedgehogs—visual dynamite plus more safety near play spaces.
Unsung heroes:
- Hesperaloe parviflora (red yucca) — airy spikes waving amid barrels
- Muhlenbergia grasses — purple plumes soften edges
- Artemisia ‘Powis Castle’ — shimmering silver against deep greens
Find regionally grown specimens at local nurseries—the survival rate is double compared to mail-order greenhouse plants forced into artificial dormancy.
Level Four: Advanced Site Prep & Planting Techniques
Drainage Mastery
In 2017, after record monsoons flooded my urban plot for three days straight, every cactus was fine except those planted below grade without added grit—they turned to mush within weeks. Since then:
Standard recipe:
- Raised beds or gentle mounds (+6–8") above grade for main groupings
- Soil blend: native topsoil + 35% coarse pumice/gravel + minimal organic matter
- No landscape fabric directly under root zone—it traps moisture!
Install edging before planting—that keeps mulch crisp and stones from migrating during rains.
Safe Handling Secrets
Injuries are common! For anything taller than six inches:
- Use newspaper wraps folded thickly around trunks—or BBQ tongs—for positioning.
- Always wear rose gauntlets AND eye protection; spines have an uncanny way of finding soft spots above glove cuffs.
Never plant too deep—a half-inch above existing soil line prevents crown rot after heavy storms.
What failed me once:
I used straight bagged ‘cactus mix’ outdoors because it worked so well indoors… big mistake! In-ground conditions evaporate slower; amendments must be chunkier outside to keep roots truly dry between infrequent rains.
Level Five: Achieving Show-Stopping Design
Layered Visuals That Last
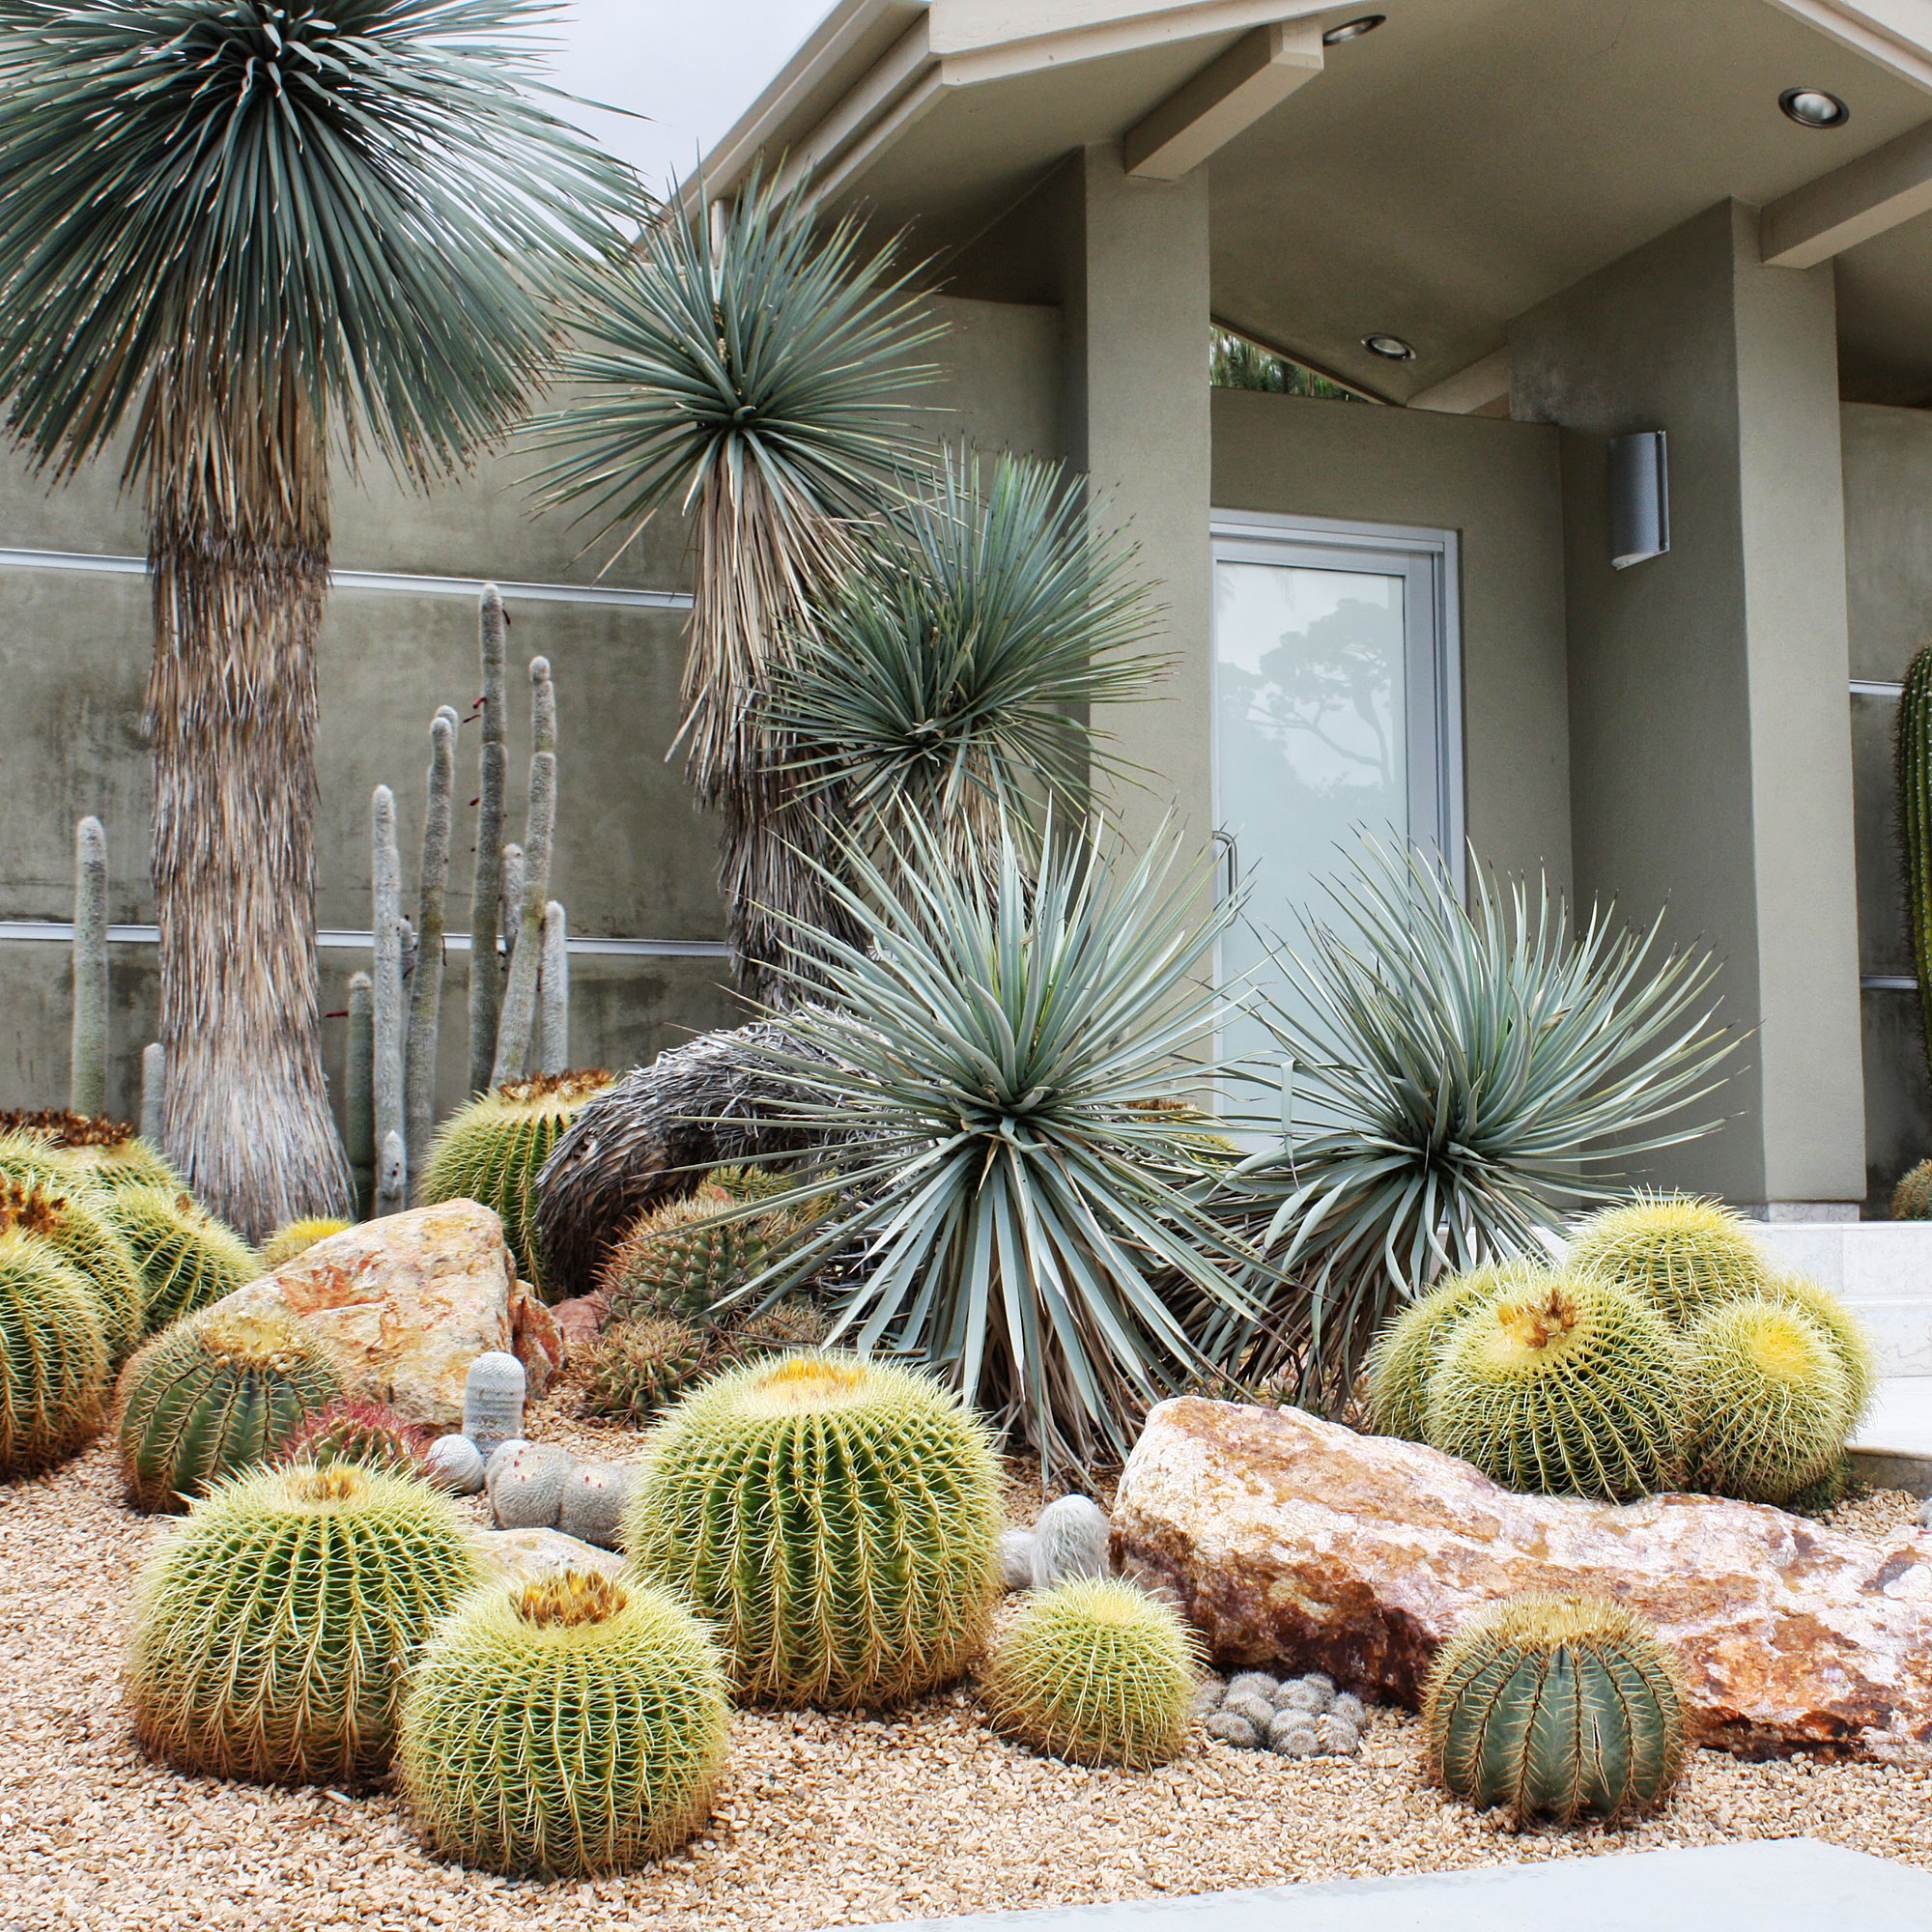
Landscape architects swear by this trio:
- Boulders first: Place sculptural stones as anchors before adding any plants—I use basalt chunks locally scavenged ($0 cost vs $120/ton store price).
- Bloom calendars: Mix spring-flowering hedgehog species beneath late-blooming opuntias for color succession.
- Curved paths over straight lines: Even narrow beds look bigger if you snake gravel paths through clusters instead of rigid rectangles.
Dialogue with myself while designing my own yard:
“Does this grouping look intentional—or like leftover nursery stock dumped randomly?”
“If I sit here at sunset, will there be something interesting to catch light?”
The best landscapes reward exploration—with small surprises tucked amid larger showpieces.
Level Six: Problem-Solving Like an Expert
You will encounter rot or pests sooner or later—even veteran gardeners lose plants occasionally! The key is rapid diagnosis and targeted response:
Most Common Challenges + Fixes
Rotten base after rain?
Dig out immediately; let wound callous indoors up to five days before replanting higher—with grittier backfill this round.
Sunburnt patches?
Happens when moving nursery-grown cacti outdoors too soon or trimming away protective shade suddenly. Acclimate new arrivals by exposing to morning sun only for their first week before full blast exposure.
Mealybugs/webbing?
Early detection helps: Rub affected pads gently with cotton soaked in 70% rubbing alcohol; repeat weekly until clear (avoid systemic pesticides—you want pollinators!).
Weeds through rock mulch?
Best combo I’ve found: Overlap two layers of commercial-grade weed barrier fabric except within eight inches of any main stem (allows airflow). Top that with two inches crushed granite—not river rock which slides everywhere—and touch up after heavy windstorms each season.
Level Seven: Transformations – Real Case Studies With Lessons Learned
Urban Patio Edition – LA Rental Miracle
Raj had zero ground space but wanted maximum drama minus pet risks.
He used large concrete bowls ($45 each from Habitat ReStore) filled with custom soil blend,
planted spineless bunny ear cacti alongside Senecio serpens,
and topped everything off with black lava rock mulch for visual pop.
The entire setup moves easily by handcart—a crucial trick since he moves apartments year-to-year!
Phoenix Suburbia – From Dirt Lot to Oasis
Ana’s backyard began as flat caliche wasteland.
She splurged on one large saguaro ($400 investment!), flanked it with golden barrels salvaged from Craigslist listings ($20 apiece),
then let kids help install red yucca divisions along pathways.
One mistake? Too much initial crowding—as barrels grew she needed to dig up half her new plants the next spring!
Lesson learned: Small today means massive tomorrow!
Rocky Hillside Stabilization – Texas Hill Country Rescue
Maria faced relentless erosion until she terraced beds using scavenged limestone chunks,
filling pocket-pockets with Opuntia engelmannii,
then underplanted everything with drought-tough Artemisia ‘Silver Queen’.
Now her slopes hold firm during flash floods—and every spring brings clouds of wild pollinators eager for nectar-rich blooms among the thorns!
Essential Gear List – Tools Worth Owning
Most-used items across all projects:
- Rose gauntlet gloves & safety glasses ($25/set)
- Long-handled tongs (~$12)—life savers when wrestling cholla stems!
- Japanese Hori Hori knife (~$30): cuts roots/soil cleanly without disturbing root ball structure
- Sturdy wheelbarrow ($70)—crucial when hauling rock/amendments over uneven ground
- Drip irrigation kit (~$40): only add if you want absolute hands-off summer travel convenience; otherwise manual soakings do fine!
For site prep? Pumice sold by cubic foot ($15/bag) beats perilously sharp construction sand every time—and won’t compact over years like river sand inevitably does around roots.
Next-Level Tactics & Ongoing Enjoyment
Once established? Maintenance shrinks dramatically—all I do now is spot-water two dozen mature specimens about every three weeks May–September unless we get freak storms (then zero).
Hard-won wisdom:
- Take monthly photos—growth sneaks up on you quicker than expected!
- Rotate containers seasonally if frost threatens—you’ll learn microclimate quirks unique to YOUR property over time.
- If something dies? Don’t stress—each failure teaches more than any how-to video ever could.
Join local Facebook groups or cactus societies—they’ll flag area-specific threats early (“Watch out! Agave snout weevils are hatching!”) plus offer free swaps when someone tires of their fast-spreading prickly pear patch.
When ready to level up further? Dabble in LED uplighting among boulders—the interplay between shadows/spines/glow transforms even plain containers into night-time magic shows ($80 starter kits cover most suburban yards).
Your Personal Cactus Landscape Blueprint – Step-by-Step Summary:
1️⃣ Spy on your site: Track sun/shade/drainage over several days
2️⃣ Draw/design intentionally: Choose focal points AND leave breathing room
3️⃣ Source wisely: Buy local stock acclimated already + essential amendments
4️⃣ Prepare ground correctly: Raise beds/mound if needed; amend thoroughly
5️⃣ Plant safely & shallowly: Use tongs/newspaper wraps/gloves without fail!
6️⃣ Mulch immediately: At least 2" crushed granite—not pea gravel/riversmooth stones
7️⃣ Water smartly: Wait post-transplant; then soak deeply only when dry
8️⃣ Catch problems early: Remove weeds/pests promptly; let wounds callous before replanting failures
Your reward isn’t just fewer chores—but also daily reminders from hummingbirds checking blooms or moonlight casting wild shadows through branching arms right outside your door.
No cookie-cutter approach will ever outlast local experimentation—embrace tinkering, expect occasional casualties…and watch your “yard” become something neighbors slow their cars to admire long after other gardens have gone dormant in drought or frost!
So grab those gloves—it’s time not just to plant but to permanently change how you experience outdoor living. This isn’t maintenance—it’s mastery built one prickly lesson at a time.