Unlock Garden Magic: Your Ultimate Guide to Thriving Climbing Plants!

If you’ve ever stared at a blank fence or the empty side of your house, feeling that itch to bring it alive—but had no idea where to begin—let me open the backstage door to the world of climbing plants. This isn’t just another “how-to” list. After more than two decades wrangling wisterias, battling bougainvillea, and coaxing reluctant clematis up everything from chicken wire to custom steel cables, I’ve learned what works, what fails spectacularly (hello, collapsed trellis 2014), and how to turn vertical spaces into living masterpieces.

You’ll find plenty of advice online about vines and climbers. But if you want the kind of real-world shortcuts, cautionary tales, and creative hacks that only come from hands-in-the-dirt experience—read on. This is my comprehensive insider’s guide: every lesson earned through muddy boots, sunburnt afternoons, and more than one “why won’t this thing flower?” meltdown.
Climbing Plants: The Ultimate Insider’s Guide
1. What Really Makes a Climber? Beyond Textbook Definitions
Forget the textbook diagrams for a moment. At heart, climbing plants are opportunists—plants that refuse to stay put. Some twist like determined dancers (honeysuckle), some shoot out sticky pads with all the subtlety of a sci-fi alien (Boston ivy), and others simply lean until gravity gives them a nudge (climbing roses). Every time I watch a young tendril grope its way along a wire in spring—a slow-motion hunt for support—I’m reminded these plants are master problem-solvers.
Insider insight:
The method of climbing isn’t just botanical trivia; it dictates your entire support strategy. You can’t force a twiner onto flat mesh or expect aerial rooters to politely avoid painted fences. When I ignored this early on with sweet peas on thick wooden poles… they flopped like overcooked spaghetti.
Types at a Glance:
- Self-Clingers: Stick directly onto walls (Boston ivy, climbing hydrangea)
- Twiners: Spiral around supports (wisteria, jasmine)
- Tendril Bearers: Use wiry arms for thin wires/mesh (grapevine)
- Scramblers/Ramblers: Need tying in; otherwise become wild thickets (roses)
Why Bother With Climbers?
Let me paint you two scenes:
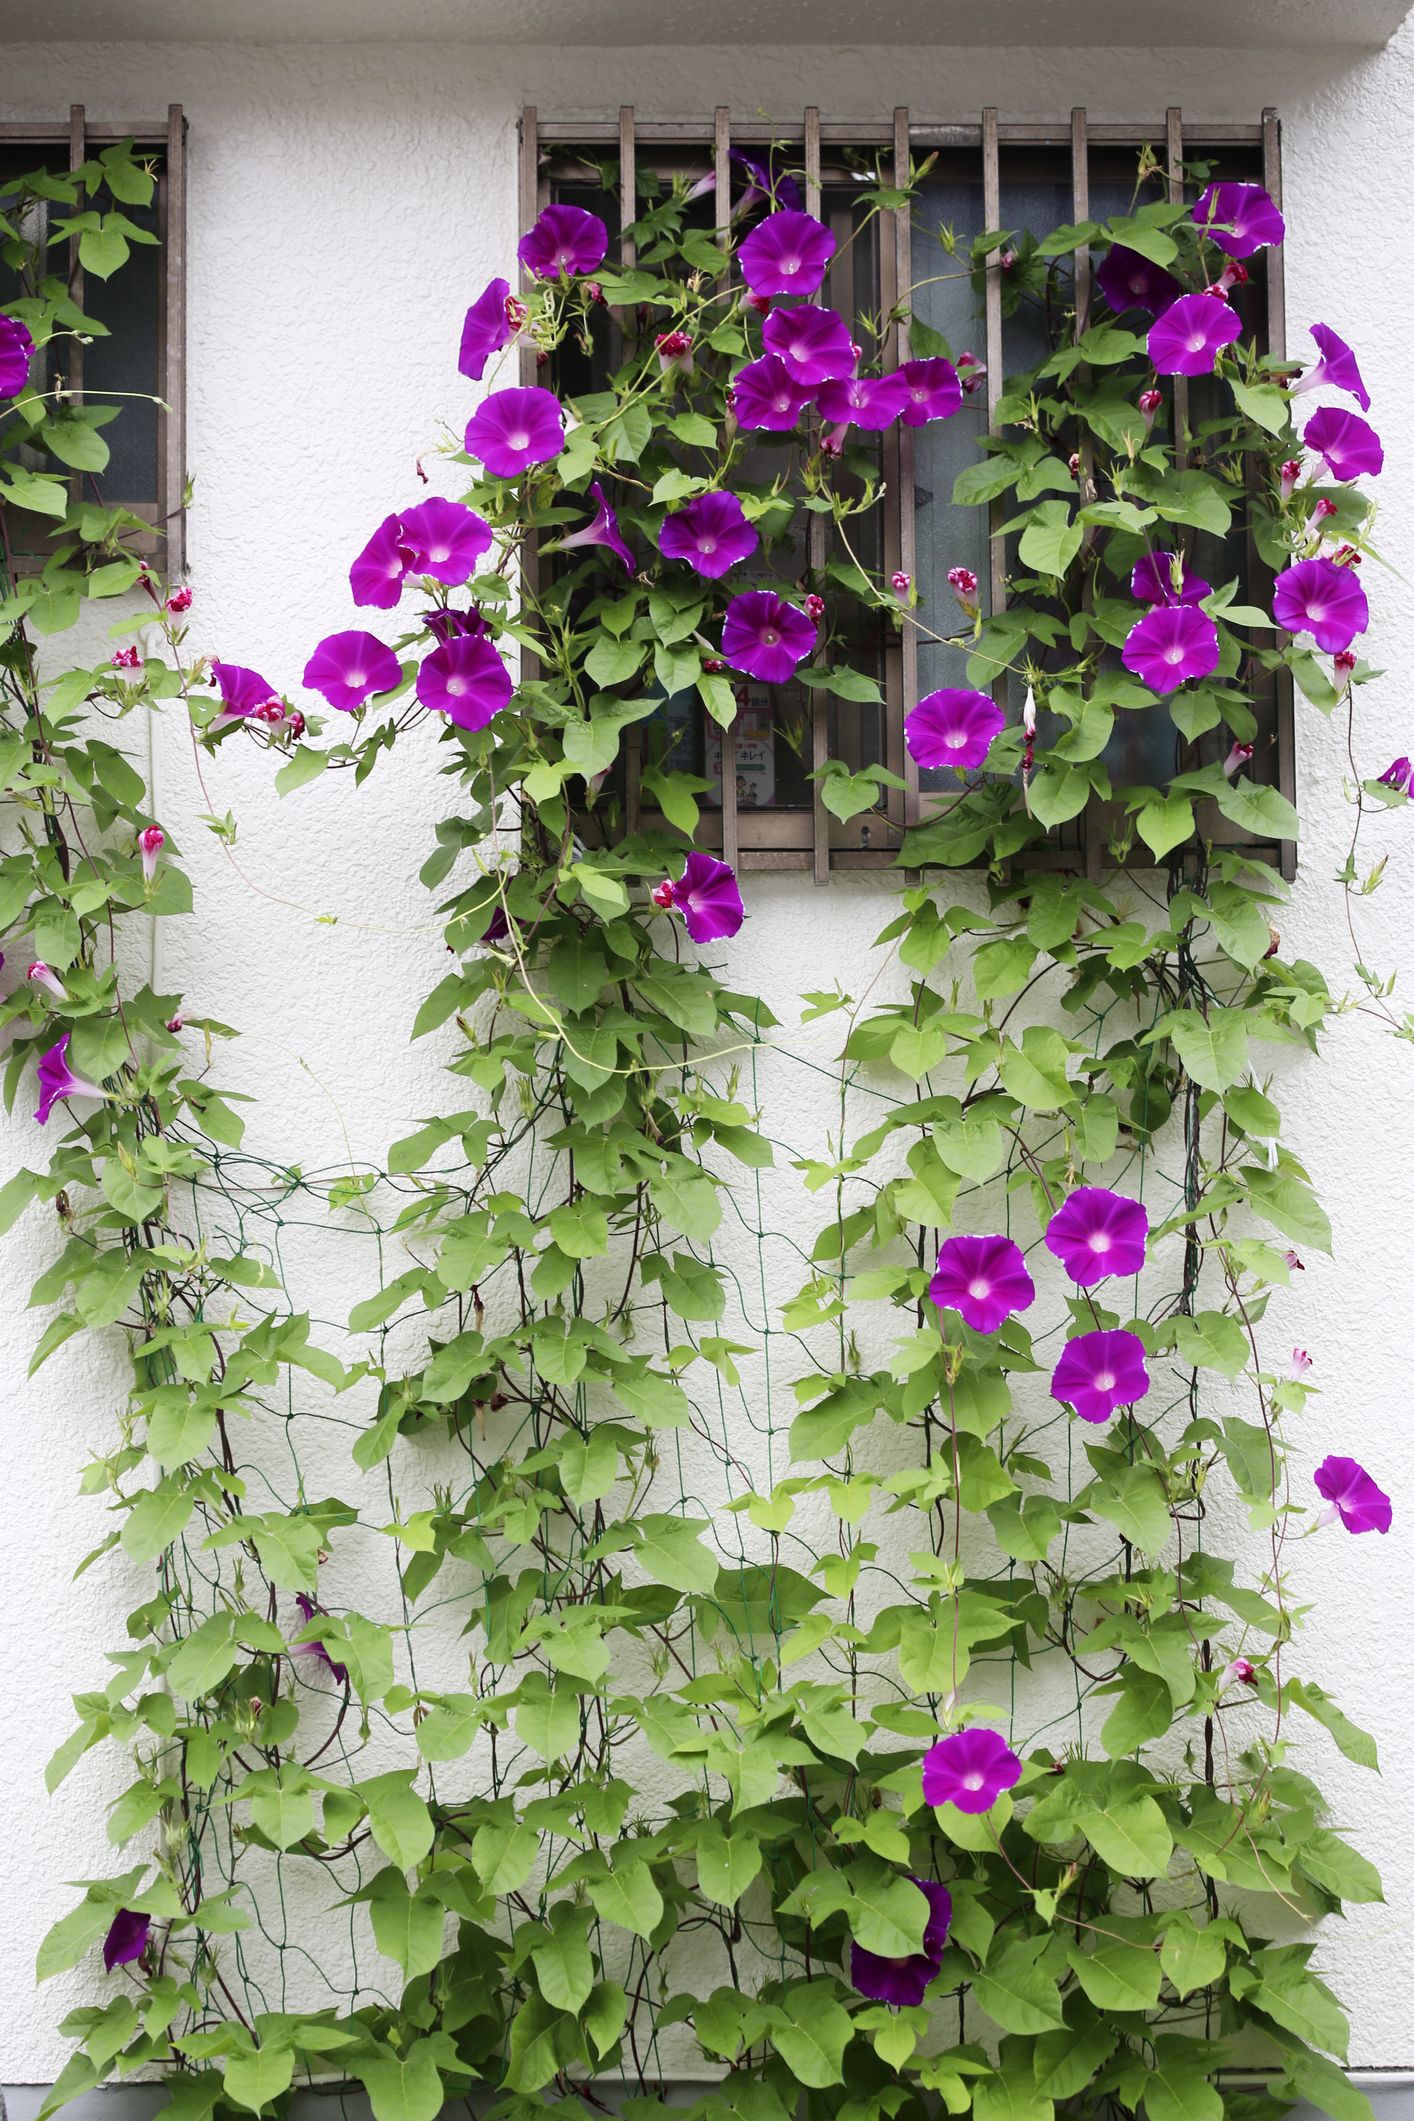
- My first rental balcony—concrete cube overlooking another concrete cube—transformed in one season when I trained morning glory up fishing netting. Suddenly I had privacy and hummingbirds.
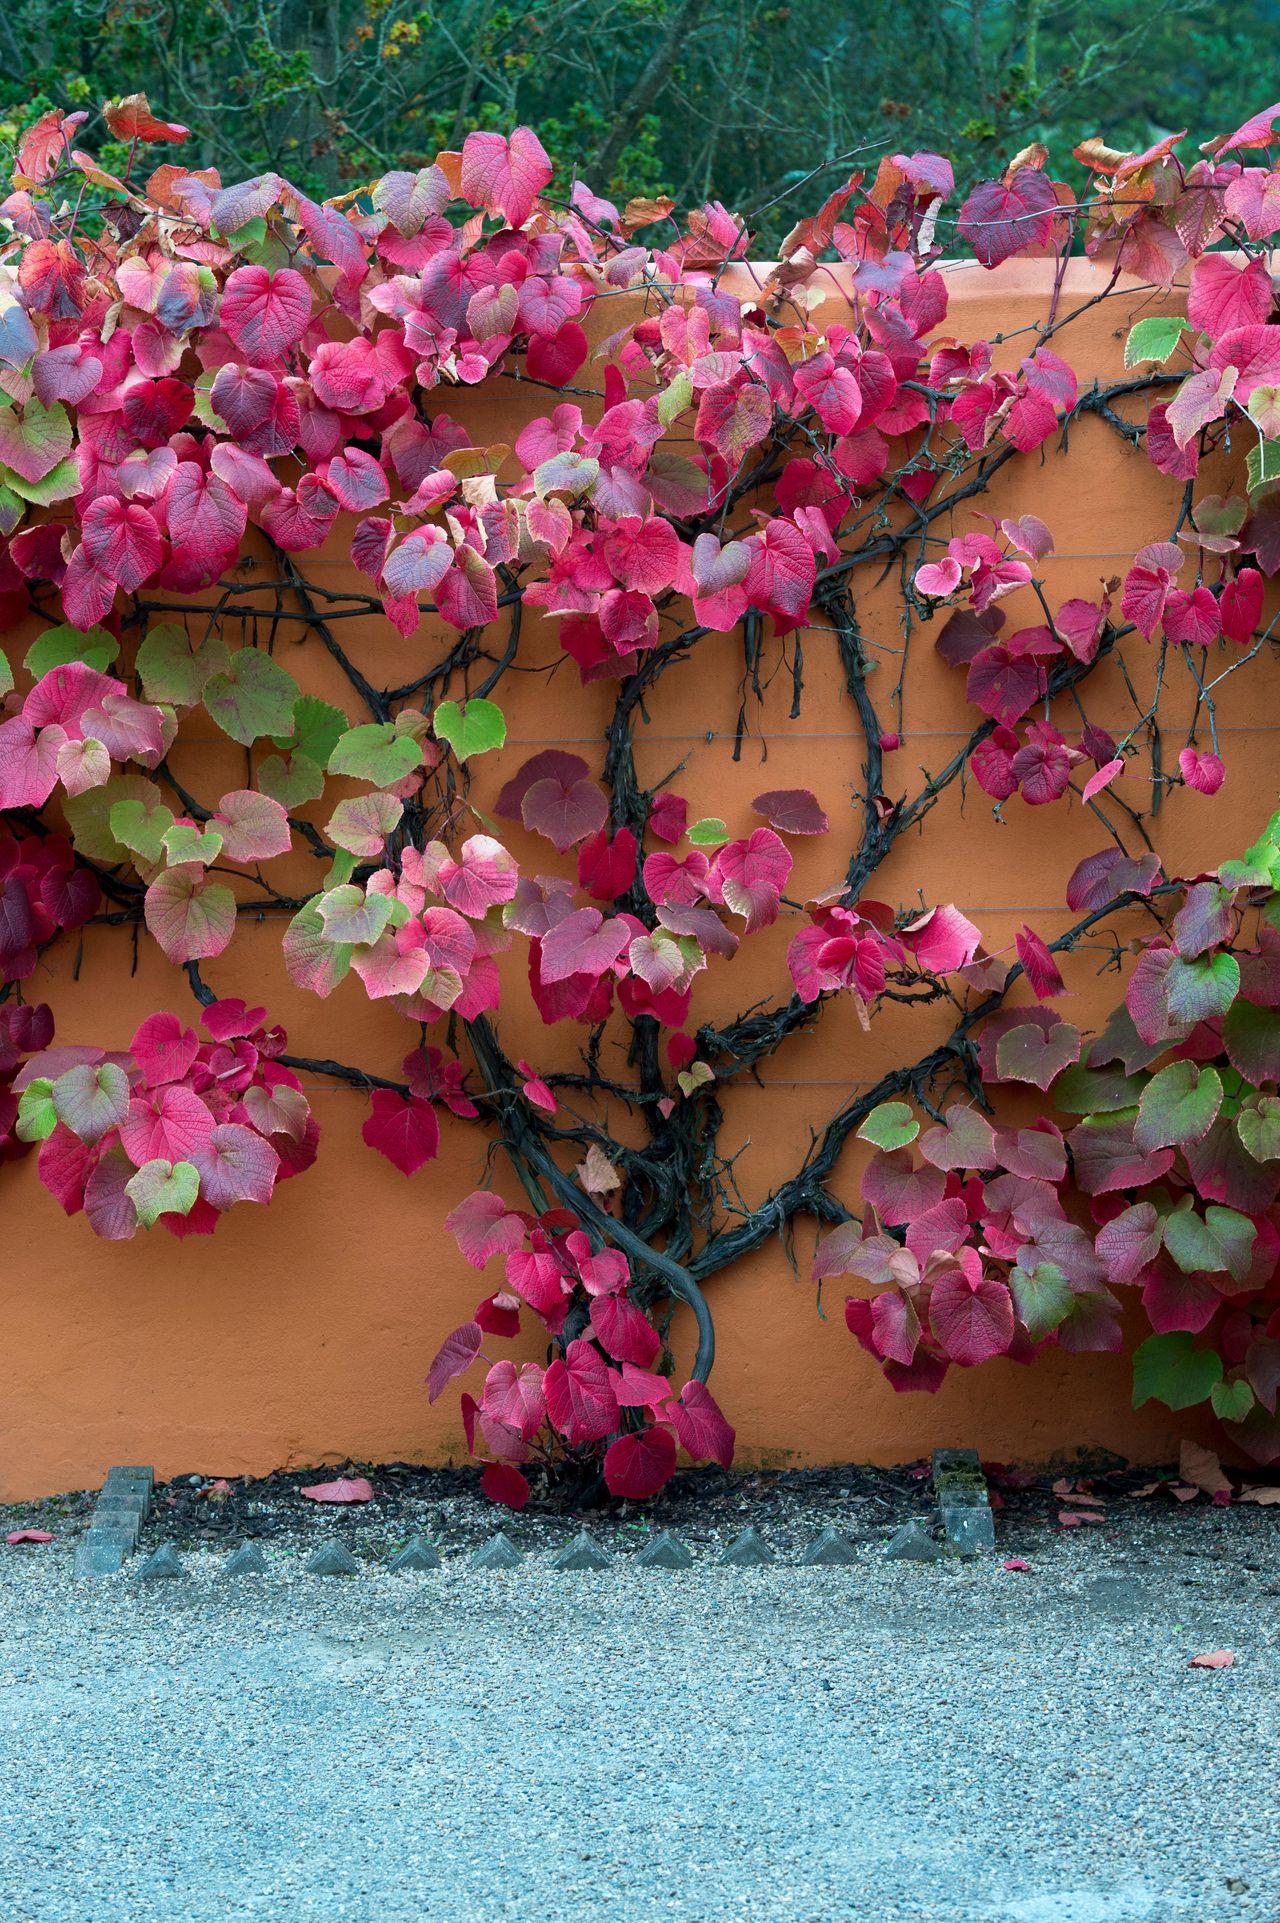
- An old garden wall at my parents’ place went from graffiti target to neighborhood photo-op with nothing but three years’ patience and Boston ivy.
Climbers do what shrubs can’t: turn vertical space into living art.
2. Choosing The Right Climber For YOUR Situation
This is where most people go wrong—not by picking “bad” plants per se, but by matching the right plant to the wrong place or purpose.
The Four Golden Rules From My Years In The Field:
- Match Growth Habit To Support
- Wisteria will snap lightweight trellises like toothpicks after year three.
- Clematis needs something thin enough for its leaf stems; ignore this and you’ll spend hours reattaching it after every windstorm.
- Check Sun & Climate Like A Hawk
- Don’t trust generic tags (“full sun”)—ask local gardeners or use PlantMaps.
- Example: Star jasmine thrives in my Zone 9b yard but sulked in my friend’s foggy coastal plot.
- Be Honest About Maintenance
- Fast growers = frequent pruning.
- Aggressive spreaders (English ivy) can become neighborhood disputes if unchecked.
- Purpose Over Pretty Pictures
- Want fruit? Grapevine or passionflower.
- Need shade? Wisteria—with proper fortifications!
- Pure flowers? Clematis hybrids (‘Jackmanii’ is legendary).
Quick Reference Table – My Go-To Choices
| Purpose | Winner(s) | Special Note |
|---|---|---|
| Privacy Fast | Star Jasmine, Boston Ivy | Jasmine smells divine in summer |
| Flowers | Clematis ‘Nelly Moser’, Bougainvillea | Clematis needs cool roots |
| Edibles | Concord Grapevine | Needs sturdy wires |
| Shade | Wisteria | Heavy! Build accordingly |
| Indoors | Pothos, Heartleaf Philodendron | Tolerates low light |
3. Setting Up For Success: Step-By-Step With Real Numbers
Step 1: Map Your Space & Calculate Load
First thing I do before buying anything? Sketch out measurements—even if it’s rough chalk lines on brickwork or painter’s tape indoors.
- Measure width/height of intended area
- Estimate mature size of your chosen plant
- Research “mature weight”—for example:
- A well-established wisteria easily tops 50–70 lbs per main stem after five years
- Annual morning glory rarely exceeds 5–10 lbs per running meter
I learned this hard way circa 2017 when my bargain trellis splintered under year-two honeysuckle growth during an April storm…
Step 2: Prep Supports BEFORE Planting
Every failed climber project I’ve ever rescued shared one trait: floppy or undersized supports installed after planting.
Options That Last:
- Steel cable systems: Expensive upfront ($30–$60 per panel area) but indestructible
- Pressure-treated wood trellis: $15–$40 each; will need replacing every 6–8 years
- Wire mesh/netting: $10–$25; best for super-light annuals only
For containers/balconies:
- Bamboo teepees (<$12) work wonders for annuals
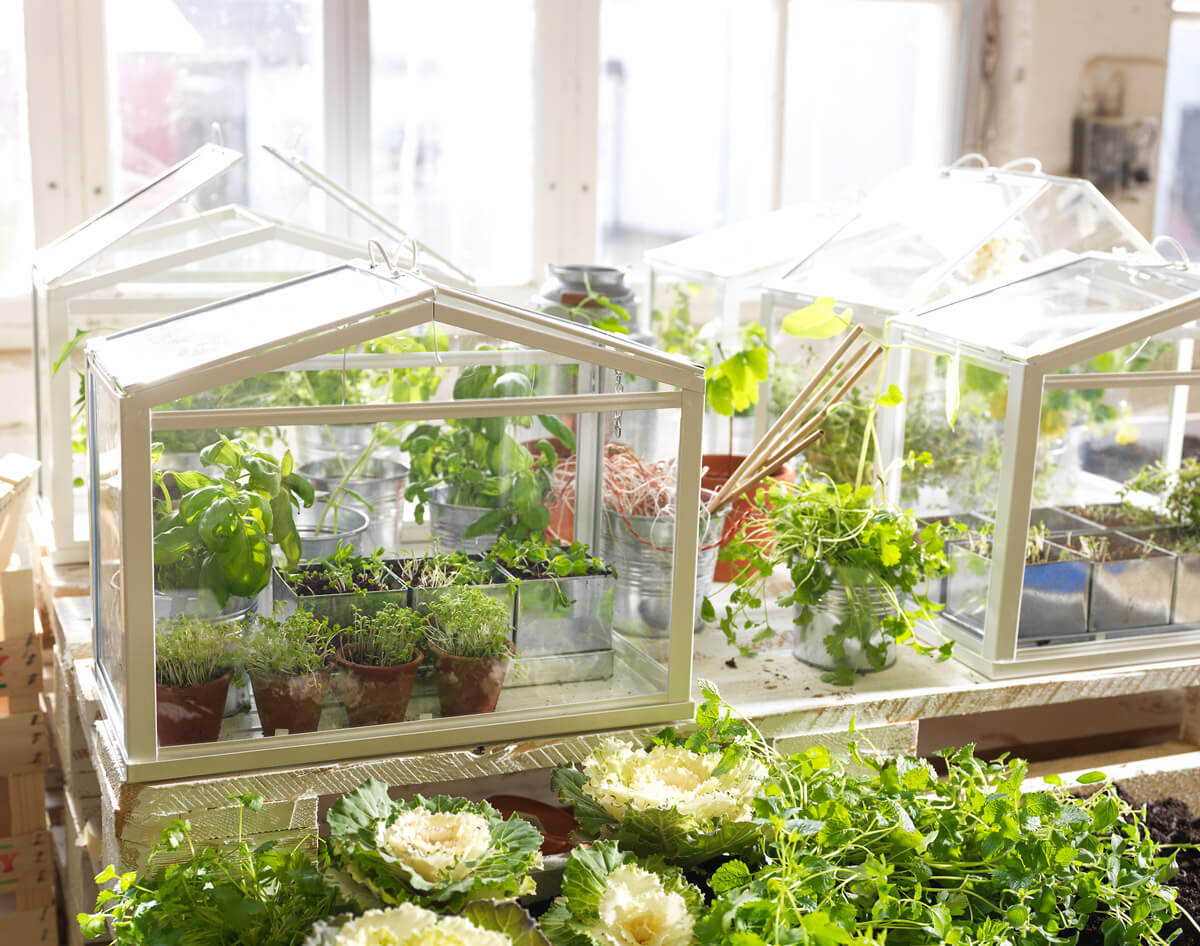
- Modular grid panels (IKEA SKÅDIS + S-hooks = $20 DIY indoor jungle)
Tip from ’19: Always leave at least 2 inches between wall & support for airflow—prevents mold and lets roots breathe.
Step 3: Soil Matters More Than You Think
Skip the miracle cures—rich compost + slow-release organic fertilizer trumps chemical cocktails every time.
- Outdoor ground planting: Dig twice as deep as rootball; mix in aged compost ($5/bag)
- Containers: Use premium potting mix + water-holding granules ($8 total adds months between waterings)
If you’re tight on budget? Mix leaf mold into native soil—it works nearly as well as bagged stuff.
4. Planting & Training – What No One Tells You
Planting Day:
- Remove lower leaves so stems don’t rot at soil line.
- Water deeply until it seeps from base—even drought-tolerant varieties need this head start.
- Mulch heavily around base (wood chips/cocoa hulls)—keeps moisture stable and suppresses weeds.
First-Year Training:
Think of yourself as an air traffic controller for shoots:
Spring ’21 — My new passionflower tried escaping sideways off its trellis three times before I started weekly check-ins with soft jute ties ($3/roll). It finally understood where “up” was by June!
Golden Rule:
Tie loosely! Leave room for stems to fatten—or risk strangling your prized vine by midsummer.
Prune out weak/doubled shoots early so energy goes into strong leaders—not random side growth destined for snipping later anyway.
5. Dodging Classic Pitfalls – War Stories & Fixes
Mistake #1 — Underbuilding Supports
If you build it flimsy… they will fall! Steel cable saved my pergola from collapsing under wisteria in ’15 after two wooden beams split mid-bloom.
Mistake #2 — Ignoring Microclimates
That sunny spot may bake clematis roots unless shaded/mulched—a trick borrowed from English gardens is planting shallow-rooted groundcover at their feet (try violas or creeping thyme).
Mistake #3 — Overcrowding
Three climbers jammed together look lush… until year two when none have room left to thrive (seen too many tangled messes at clients’ homes).
Spacing rule-of-thumb: Minimum 18 inches apart outdoors—even if it looks sparse year one.
6. Advanced Moves For Jaw-Dropping Displays
Ready to step beyond basic green walls?
Double-Up For Season-Spanning Impact
Pair evergreen star jasmine with purple-flowering clematis on an archway—the jasmine keeps winter interest while clematis brings fireworks May-July.
Espalier Like A Pro
Flat-train grapevines against warm south walls using eye bolts + galvanized wire spaced every foot ($15–$25 materials). Not only saves space—but ripens fruit earlier thanks to reflected heat!
Indoors: Living Walls On A Dime
Three IKEA pegboards + coconut planters = instant jungle for under $40; pothos thrives even under standard LED bulbs near windowsills.

Sensory Bonus:
In summer evenings when star jasmine blooms outside my window—the scent fills our whole kitchen within minutes after sunset.
7. Tools That Actually Make Life Easier
Here’s what’s always within arm’s reach in my shed:
- Razor-sharp Felco pruners ($35)—worth every penny after ten years without hand cramps
- Soft Velcro tape rolls—for tying without bruising stems ($7)
- Old yoga mat pieces—to kneel comfortably during marathon training sessions
- Wire cutters/drill—for fixing mesh/cables securely
- Gauntlet gloves—especially crucial wrangling thorny roses or bougainvillea!
Pro tip from last summer:
Keep a labeled bucket just for training supplies—you’ll save endless frustration searching amidst unrelated tools.
8. Troubleshooting Curveballs – Real Solutions From The Field
Problem: Vines Refuse To Attach Or Flop Off Support
Usually means support is too thick/smooth—or too far away (>6"). Add finer mesh/wires closer together so tendrils can grab hold immediately; tie-in new shoots weekly until established habit forms.
Problem: Patchy Growth Or Yellow Leaves
Nine times out of ten? Roots drying out or competing with grass/weeds below base.
Remedy = annual mulch refresh + monthly feeding during high-growth seasons.
Problem: No Flowers On Otherwise Healthy Vines
Could be insufficient sunlight OR juvenile impatience (wisteria sometimes takes up to seven years!). If containerized, try moving plant gradually toward brighter exposure next season.
9. Real-Life Transformations – Lessons From Successes And Fails
Case Study #1 — Balcony Jungle On Shoestring Budget
My sister’s rental balcony went from drab railings to tropical hideaway using nothing but dollar-store netting + six packs of morning glory seeds ($12 total). By July she had full privacy—and neighbors asking her secret!

Case Study #2 — Shedding The Shed Eyesore
A faded backyard shed became a garden centerpiece when we attached lattice panels two inches off siding then planted three types of clematis staggered across seasons (‘Nelly Moser’, ‘Jackmanii’, ‘Sweet Autumn’). Every month brought new color—and nobody noticed the peeling paint anymore!
Case Study #3 — Indoor Living Art Wall
During lockdown winter ’20 I turned an empty hallway into a living mural using modular felt pockets plus trailing pothos cuttings rooted in water jars first (“insurance policy” against failure). By spring guests were posing selfies against our green backdrop.
10. Action Plan – How To Start This Week
Day-by-Day Blueprint:
Day One: Walk your space—notebook/phone handy—note sun patterns/microclimates/support options
Day Two: Research best-fit species based on zone/sun/existing structures (local nursery staff are goldmines here!)
Day Three: Source supplies/plants/tools—don’t skimp on quality supports!
Day Four: Install supports firmly before any digging begins
Day Five: Prep soil/site thoroughly; water deeply pre-transplant
Day Six: Plant carefully; tie-in initial shoots gently
Ongoing Weekly: Check progress/tie-in new growth/prune excess side shoots/mulch base
Within four weeks you’ll see real transformation—and within six months most annuals/perennials will make their ambitions clear!
Final Thoughts From Decades In The Vertical Trenches
If there’s one lesson that stands above all others—it’s this:
Don’t be afraid to experiment boldly and prune ruthlessly when needed! Perfection isn’t required; curiosity is rewarded far more than hesitation ever will be.
Whether you’re turning blank apartment walls into leafy jungles or letting ancient wisterias claim their rightful throne atop an arbor—the magic lies not just in growing taller…but growing smarter each season.
So grab those pruners… pick your first climber… and let nature show you how wild vertical life can get!
And remember—the only true mistake is never starting at all.
(Resources mentioned above include RHS guides, Derek Fell's "Vertical Gardening," Felco pruners [my go-to], plus apps like PictureThis if you're stumped by mystery seedlings.)
Ready? Your first green curtain awaits—and trust me, once those tendrils take hold… so will your addiction!