Master Cordyline Care: Easy Steps for Vibrant, Thriving Plants
Cordyline Care Mastery: The Definitive System for Thriving Color & Effortless Growth

There’s plant care, and then there’s cordyline care—a next-level experience that transforms your space with swathes of magenta, lime, and deep emerald. Cordylines aren’t just another pretty leaf. They’re your expressive sidekick—flashing reds when you nail their needs, sulking with browning tips when you miss a detail. If you want not just survival but wild success (think lush foliage and easy propagation), you need more than generic advice. You need a system—one built from real-life wins, the odd stumble, and clever shortcuts.
I’ve killed my first Ti plant (twice), rescued a leggy Cabbage Tree from storm trauma, and now keep a thriving home jungle that gets compliments from every visitor—and even my mail carrier! Here’s everything you need to level up your cordyline skills, from setup to advanced mastery.
1. Understanding Cordylines: Not “Just” Houseplants
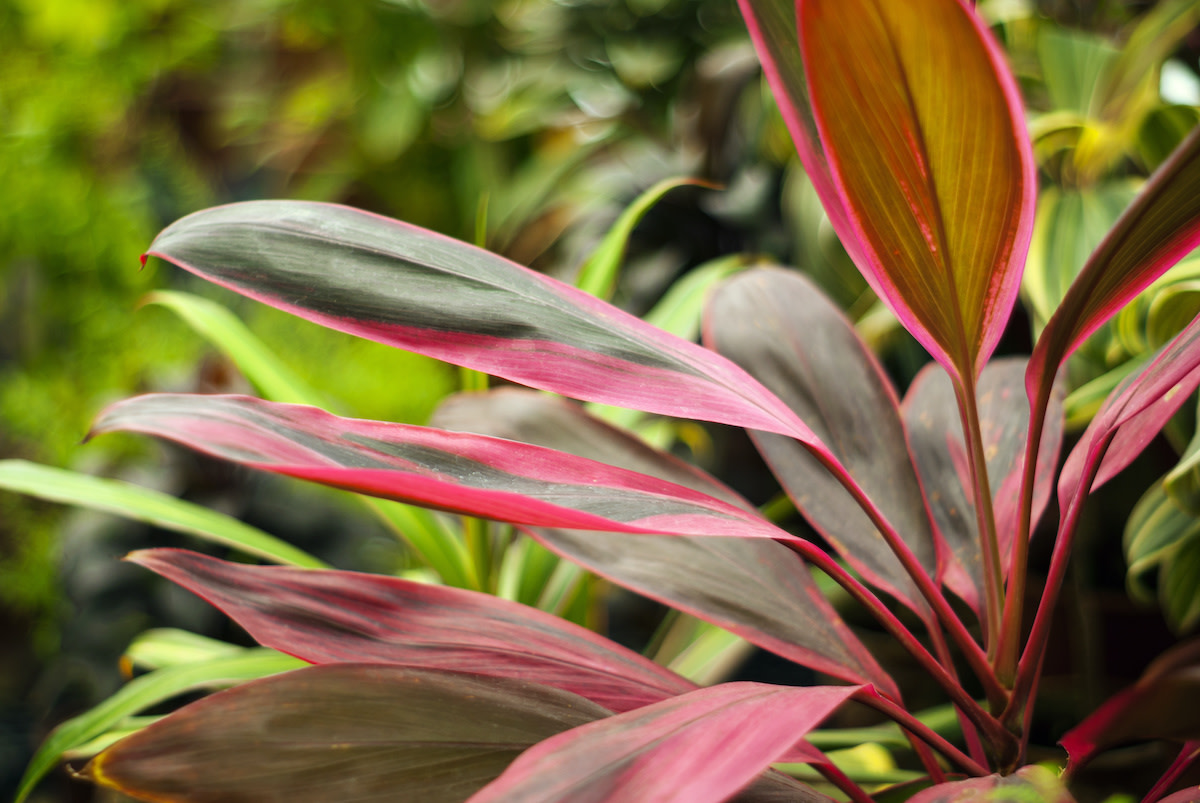
To me, choosing cordylines is like picking out statement art—they come in gradients of hot pink (‘Red Sister’), kiwi-green/yellow (‘Kiwi’), or architectural spikes (‘Australis’). But unlike art? Your attention actually changes their color intensity!
Varieties That Deserve the Spotlight
- Cordyline fruticosa: The drama queen—epic color indoors.
- Cordyline australis: Garden hero, hardy enough for chilly nights.
- Cordyline banksii & hybrids: Rare finds—worth hunting for if you want something nobody else has!
Here’s what separates the seasoned cordyline grower from the casual water-and-wait crowd: It’s all about tuning in to what each variety wants, and creating microclimates that hit their sweet spot.
2. The Complete Cordyline Master System
Imagine learning guitar without tuning or knowing any chords—you’d never hit those epic notes! Cordylines are similar; they reward fine-tuning. Here’s my step-by-step system honed through trial (and too many crispy leaves):
Step 1: Strategic Placement—The “Goldilocks” Principle
Forget the myth that any bright window will do. I once scorched a ‘Firebrand’ by putting it in direct afternoon sun—it looked like faded upholstery within days!
Shortcut:
For vivid colors? Aim for bright, filtered light—an east-facing window works wonders.
For green-leaved types outdoors? Dappled shade is your friend (try under taller shrubs or beside north-facing walls).
Advanced move: Rotate pots 90° weekly so all sides get equal exposure. It sounds basic but prevents lopsided growth and keeps colors consistent.
Step 2: Soil Science—Engineered Drainage
Generic potting mix is a gamble! My current winning blend:
- 40% peat-free potting soil
- 30% perlite (extra chunky)
- 20% pine bark fines (orchid bark)
- 10% worm castings for slow-release nutrients
Why this recipe? Fast drainage + root aeration = no more root rot panic after accidental overwatering.
Field-tested hack: Add two tablespoons of horticultural charcoal per gallon of mix—it absorbs toxins and moderates moisture swings like magic.
Step 3: Watering Without Guesswork
Here’s where most first-timers crash:
My failed approach: Sticking rigidly to weekly watering left one plant bone-dry by Thursday...while another sat soggy for days.
System upgrade:
- Use a cheap moisture meter OR go tactile—soil should feel lightly cool at an inch down before watering.
- Always drench until water exits drainage holes—but dump saucers after five minutes.
- In winter? Let it verge on dry before re-watering; humidity matters more than wet roots!
Step 4: Humidity Hacks for Color Power
In my experience, humidity is the shortcut to maximum vibrancy—better than fertilizer alone.
What works:
- Place plants atop pebble trays filled with water—but ensure pots never sit IN the water!
- Grouping several plants together bumps local humidity by up to 12%
- For problematically dry homes (<40% RH): Vornado EV100 humidifier set on low nearby does wonders (seriously—they’re quiet and last years).
Unexpected insight: Spritzing leaves FEELS helpful but only raises surface moisture briefly; sustained humidity trumps quick mists every time.
Step 5: Fertilizer Timing & Type—Less Is More
I used to nuke mine with high-nitrogen feeds thinking I’d get faster growth...cue burnt tips everywhere.
My refined protocol:
- In growing season (March–September): Fertilize every three weeks with half-strength balanced liquid feed (10-10-10 or Espoma Indoor Plant Food).
- Skip feeding October–February unless under strong grow lights.
Pro shortcut: Flush pots every third feeding with plain water—that prevents salt buildup which shows as yellow ringed spots or dead tips.
Step 6: Pruning That Supercharges Growth
Don’t fear the shears! Regular grooming redirects energy into new shoots instead of tired old leaves—and keeps pests at bay.
Advanced technique:
- Always cut right above a healthy node (where a leaf meets stem)
- Wipe blades between cuts with rubbing alcohol
- Remove no more than one-third of total foliage at once to avoid shock
Want bushier plants? Pinch out topmost shoot tips late spring—they’ll branch out vigorously by July.
3. Avoiding Rookie Mistakes With Pro Fixes
I’ve made nearly every mistake possible—you don’t have to:
| Mistake | What Happens | The Fast Fix |
|---|---|---|
| Overwatering | Mushy stems/leaves | Repot ASAP; trim rot; switch to airy soil |
| Underestimating humidity | Brown crispy edges | Boost RH w/ tray or humidifier |
| Direct sunblast | Faded/bleached color | Move promptly; curtain filter |
| Ignoring pests | Specs/webbing/pits on leaves | Weekly inspection! Neem oil regimen |
Counterintuitive insight: Sometimes less intervention = better recovery, especially after stress events like cold snaps; let new shoots emerge before hacking away damage!
4. Advanced Techniques That Set You Apart
Ready for true mastery? These are my tried-and-tested methods that moved me from frustrated beginner to foliage fanatic:
A) Lightning-Fast Propagation Shortcuts
Stem cuttings in soil can take ages—or fail if you skip crucial steps!
Most reliable approach I’ve found:
- Use sharp razor blade—not scissors—for cleanest cuts below nodes
- Dust end generously in Clonex Rooting Gel
- Stick cutting in damp perlite/coco coir blend—not standard potting soil!
- Place under clear ziplock tent with tiny air holes near heat mat at ~75°F (~24°C)
Results? Healthy roots inside three weeks, almost guaranteed—even during spring rush when other propagations languish!
Pro-level tip: Start three cuttings at once—odds are at least two will thrive while one struggles or fails.
B) Air Layering Like An Expert
This method let me clone my cherished six-foot ‘Pink Diamond’ without risking the main trunk:
- Use clean serrated knife to slice upward into woody stem about one-third through
- Dust wound with rooting powder + pack damp sphagnum moss tightly around it
- Wrap securely in plastic wrap + twist ties above/below
- Check weekly for root formation (~6–8 weeks typical)
When roots peek through moss? Snip below layer and pot up your new tree!
C) Seasonal Adaptations Few Know About
Winter survival isn’t just about moving indoors—it’s about micro-adjustments:
Indoor tweaks:
- Drop watering frequency by half starting mid-November
- Stop feeding altogether till light increases naturally or via LED grow lamps
Outdoor tricks: - Wrap trunk/focal canes loosely in frost cloth secured with Velcro tape
- Mulch deeply but leave space around base so crown doesn’t stay wet
5. Tools & Resources Worth Their Weight in Gold
After wasting money on duds over the years, these are must-haves that make life easier:
Top Tools
- Fiskars Precision Shears ($17)—flawless cuts even on fibrous stems
- XL Pebble Trays from Gardener’s Supply ($13)—outlast DIY versions
- VIVOSUN Digital Hygrometer-Thermometer ($11)—checks environment at-a-glance
- Miracle-Gro Performance Organics Mix (peat-free version!)—great structure + sustainable
And yes—I swear by Espoma Indoor Plant Food for gentle monthly feeding that won’t burn sensitive roots.
Where To Learn More
Online forums like “Cordyline Enthusiasts” Facebook group saved me multiple times; members ID weird issues instantly via snapshots.
Local plant swaps are goldmines—you’ll find rare varieties PLUS real talk advice.
6. Real Stories From My Plant Room Jungle
Nothing beats learning from messy reality…
When My Ti Plant Dropped Its Leaves Overnight…
The culprit wasn’t obvious until I noticed condensation pooling beneath the pot after watering too close to midnight—a classic case of cold root shock compounded by stagnant air.
Rescue protocol:
- Removed all mushy leaves/stems
- Moved plant closer to heat source but away from direct draft
- Added fan-on-low nearby for circulation
Within four weeks—not only recovering but sending up two fresh shoots!
Neighborhood Kids vs My Outdoor Australis…
Windstorm snapped off younger canes—but instead of trashing them I stuck them straight into moist perlite + left them beside compost bin out back…believe it or not, two rooted despite neglect! Now they anchor my porch containers as wind-tolerant anchors.
7. Troubleshooting Fast Lane – Rapid Diagnostic Table
You see THIS… Do THIS fast…
| Symptom | Probable Cause | Solution |
|---|---|---|
| Edge browning | Low humidity/minor salt excess | Boost RH/mist/distilled water flush |
| Yellow lower leaves | Overwatering/natural aging | Check root ball/cut back H₂O |
| Pale colors | Too little light | Relocate nearer window/grow lamp |
| Sticky residue/rough bumps | Scale insects | Wipe off + treat w/neem oil |
Rule-of-thumb: If things look off overnight? Don’t rush drastic fixes—instead check ALL variables against this table first!
8 & Beyond – From Good To Legendary
Once basics click into place…here’s how true enthusiasts keep raising their game:
- Experimentation station! Try mixing different varieties together—‘Kiwi’ flanks ‘Red Sister’ beautifully.
- Keep detailed notes—a small notebook tracking changes made vs results speeds learning curve tenfold.
- Quarterly “health audits”—pull each plant out of its sleeve/pot fully twice yearly for hidden pest/disease checks.
Want extra challenge?
Join online propagation contests (“Biggest Ti Offshoot!”). Trust me—the camaraderie plus trade opportunities ramp up excitement AND results.
Final Word — Why Cordylines Are Worth Obsessing Over
No other houseplant gives such rapid feedback when conditions shift—or bounces back quite as dramatically after setbacks—as cordylines do when cared for intentionally using systems above.
You’ll find yourself checking morning leaf sheen before breakfast; marveling as new color gradients emerge seemingly overnight after dialing in light/humidity tweaks; and beaming when friends gasp at potted displays bursting like tropical fireworks midwinter.
Master these routines—and make them your own—and soon enough you’ll be gifting homegrown cuttings instead of buying replacements…and maybe even writing your own chapter in Cordyline lore.
Ready? Fill that pebble tray, tune up your shears…and join those of us who know there’s an exhilarating world behind every fiery frond.
Here’s to vibrant leaf crowns—and the mastery that makes them inevitable!


