Mastering Culinary Edible Flowers: Practical Tips for Flavor & Beauty

The Problem-Solver’s Definitive Guide to Culinary Edible Flowers
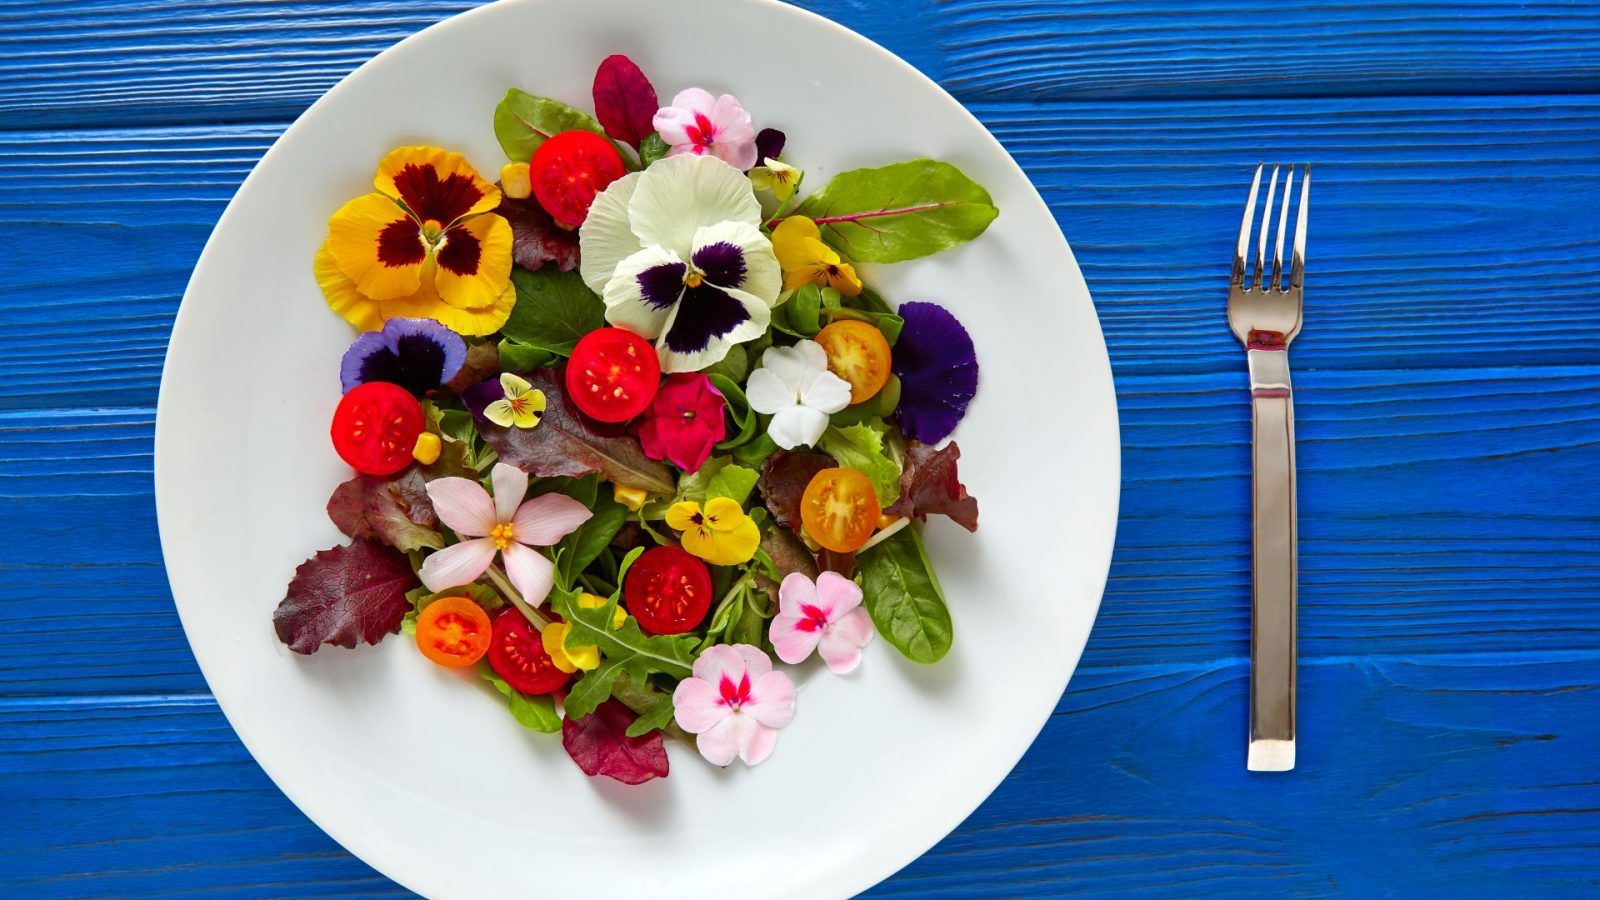
Whenever I see a sprinkle of violet or marigold on a plate at a fancy restaurant, my first thought is never just, “Oh, pretty!” Instead, it’s usually: “How do they know that’s safe to eat? And are these flowers actually adding flavor or texture—or are they just there to look nice?” I’ve been there myself—once accidentally nibbled an azalea at a garden party (yes, avoid that!). After years of testing and learning—through trial, error, and more than one failed batch of candied petals—I know edible flowers are so much more than garnish. They’re tools for flavor layering, texture contrast, and even chemistry in the kitchen. But only if you really know what you’re doing.
If you want to go beyond the basic salad sprinkle and use edible flowers like a pro—safely and confidently—this guide is your new best friend. It’s packed with insights from my kitchen experiments, interviews with chefs and horticulturists, and practical advice about what works...and what definitely doesn’t.
Ready? Let’s dig in.
1. Why Use Edible Flowers? More Than Just Looks
Sure, edible flowers brighten up dishes visually—but that’s only the start. The real magic happens when you tap into their textures, flavors, and aromas. Flowers aren’t just decoration; they’re ingredients with personality.
Here are some quick examples from around the world:
- Kyoto chefs use cherry blossoms for their subtle bitterness—a delicate counterpoint to savory dishes.
- In Oaxaca, squash blossoms bring creamy softness balanced by a light crunch inside quesadillas.
- Parisian pastry chefs candy violets for their sweet aroma that lifts desserts without extra sugar.
What else can flowers do?
- Add crunch: Calendula petals give risotto a surprising crispy bite.
- Spice things up: Nasturtium leaves deliver a peppery punch that wakes up sandwiches.
- Infuse aroma: Lavender steeped in milk creates floral notes in ice cream within minutes.
But here’s the catch: using the wrong flower—or one treated with pesticides—can ruin your dish or worse. So before you grab any bloom off your windowsill... pause. Safety first.
2. Safety by Design: Your Non-Negotiable Checklist
That azalea nibble taught me one hard lesson: NEVER eat any flower unless you’ve absolutely confirmed it’s safe and clean. Here’s exactly how I vet every bloom I use:
Step 1: Confirm Edibility With Trusted Sources
I never rely on hearsay or Pinterest lists alone. Instead:
- Check two authoritative sources independently. My favorites are:
- The Royal Horticultural Society (RHS) edible plants list
- The North American Mycological Association (for fungi but sometimes plants too)
Make sure both agree on edibility—and you can confidently identify the plant yourself.
Step 2: Always Use Organic or Home-Grown Flowers
Florists often coat blooms with systemic pesticides you cannot wash off—no exceptions here. If it’s not organic or from your own garden, don’t risk it.
Step 3: Harvest Early Morning
Research from UC Davis Food Science shows volatile oils (which deliver flavor) peak right after dawn when petals are freshest and coolest. Wait too long and sun-wilting dulls taste.
Step 4: Don’t Forage Roadside or Unknown Wild Plants
Pollution accumulates near roadsides; misidentification is common with wildflowers—and mixing up edible vs toxic species can be deadly.
Step 5: Allergy Safety Protocol
If you’re serving guests for the first time, test one petal yourself first—especially if anyone has pollen allergies or food sensitivities.
3. Which Flowers Actually Work? Flavor & Texture Breakdown
After dozens of kitchen taste-tests (and some regrettable failures—I’m looking at you, bitter dandelion), these are the top reliable edible flowers I recommend:
| Flower | Flavor Notes | Texture | Best Uses | Handle-With-Care Tips |
|---|---|---|---|---|
| Nasturtium | Peppery-radish | Crisp | Salads/Sandwiches | Potent flavor; don’t overpower mild greens |
| Borage | Cool cucumber | Juicy | Cocktails/Salads/Ice | Bruises easily; use fresh within hours |
| Chive Blossom | Mild onion | Silky | Compound butter/savory dishes | Remove base stem before plating |
| Calendula | Lightly bitter/saffron-like | Chewy | Rice/Egg dishes | Only petals; calyx is bitter |
| Squash Blossom | Delicate vegetal | Tender | Stuffed/baked dishes | Check inside for insects |
| Rose | Sweet & perfumed | Velvety | Syrups/jams/cream | Remove white base to avoid bitterness |
| Violet | Sweet-grassy | Fragile | Dessert decor | Wilts fast—keep refrigerated |
| Hibiscus | Tart/cranberry | Meaty | Teas/compotes | Dried petals intensify tartness |
Real-world tasting notes:
In blind tastings last spring with kids and adults alike, nasturtium consistently scored highest for "unexpected zing," while borage was praised as "refreshing...like biting into cool cucumber." Roses split opinions—a few found raw petals soap-like but loved rose syrup steeped slowly in desserts.
Fun Surprise About Calendula
Calling calendula “poor man’s saffron” isn’t just poetic—it’s practical! Powdered dried calendula adds subtle earthiness to rice pilaf without turning bitter like whole petals sometimes do. So grinding flowers into powder can unlock new uses beyond fresh garnishes.
4. Prep Pitfalls & What Most Guides Miss
Let me confess something: my first attempt at candying petals was an unmitigated disaster. Using coarse sugar resulted in gritty blossoms crunchy like... gravel. Lesson learned? Always use superfine sugar for delicate crystallization!
Here are prep steps that actually make a difference:
- Shake flowers gently outside to remove dirt/insects/pollen.
- Rinse briefly (no more than 30 seconds) in cold water.
- Drain on mesh racks—not stacked—to avoid bruising fragile petals.
- Trim stems/calices/stamens as needed (some parts taste bitter).
For storage: sandwich petals between slightly damp paper towels inside airtight containers; most varieties stay crisp up to 48 hours if handled gently.
Sensory tip: Fresh nasturtiums smell faintly peppery close up—a sign they’re flavorful enough to hold up in vinaigrettes but could overwhelm dairy dishes if overused.
5. Application Deep Dive – From Simple To Sophisticated
Edible flowers work at every skill level—from beginners tossing them in salads to pros crafting complex infusions.
Beginner-Friendly Ideas
- Toss torn calendula or borage into mixed greens (limit: no more than 10% flower volume).
- Press violets onto cookies before baking—they flatten beautifully without losing color.
- Freeze pansies inside ice cubes made with boiled then cooled water for crystal clarity.
Intermediate Moves
- Whip chive blossoms finely chopped into unsalted butter with lemon zest—a compound butter perfect on grilled bread or steamed veggies.
- Infuse simple syrup with rose or lavender by heating sugar-water until steaming, removing from heat before adding petals; cover & steep 20 minutes then strain.
- Quick-pickle daylily buds (rice vinegar + salt + pinch sugar)—a tart complement for cheese boards or charcuterie.
Advanced Techniques
Candying Without Raw Egg White
Many recipes call for egg-white brushing but this risks salmonella unless pasteurized eggs are used—not always practical at home. Pastry chef Amy Lee shared an elegant vegan hack:
Dissolve 1 gram agar powder in 50 ml hot water, brush thinly over each petal surface, then dust superfine sugar immediately—a crisp finish without raw egg worries!
Petal Powders as Seasonings
Dehydrate calendula, lavender, or rose at under 40°C (~104°F) until brittle; blitz in spice grinder; store airtight away from light.
Use these powders sparingly as dustings over truffles or folded into soft cheese spreads—a technique inspired by Nordic tasting menus since around 2020 that adds layers of floral complexity without overwhelming freshness of whole petals.
6. Real Problems You’ll Encounter & How To Fix Them
Problem #1: Flowers Wilt Right After Harvest
Fix: Immediately dunk them into an ice water bath for two minutes post-harvest before drying on mesh racks—they rebound almost magically! Learned this trick watching Chef Noah Sandoval at Oriole Chicago work his magic with nasturtiums and borage.
Problem #2: Unexpected Bitterness Ruining Your Dish
Fix: Always taste-test each batch raw before cooking—environmental factors like drought can make normally sweet blooms turn tannic or too bitter suddenly. When that happens? Toss the batch rather than risk bitterness spoiling your dish.
Problem #3: Guests Too Nervous To Eat Flowers
Fix: Show guests a trusted source confirming edibility right at the table via QR code link—or serve flowers on familiar favorites (think potato salad topped lightly with nasturtium). Let them sniff and touch first—it builds comfort through curiosity instead of fear.
7. Tools & Resources That Make Life Easier
You don’t need fancy gear but these basics save time and headaches:
- Dedicated scissors/snips labeled “Flowers Only” ($12–$25)—keeps blooms pristine during harvest/prep.
- Micro-mesh basket strainer ($10–$18)—perfect for gentle rinsing without bruising delicate petals.
- Airtight deli containers lined with damp paper towels ($6–$12 per pack)—best storage combo I’ve found so far.
- PlantNet App—great for double-checking IDs on the go but always cross-reference locally.
- Books like Edible Wild Plants by John Kallas remain invaluable references—I still refer to mine often (bought back in Portland winter 2019).
Seed cost snapshot (2024): Nasturtium about $3 per packet (~30 seeds), Calendula $2 (~25 seeds), Borage $4 (~20 seeds). Each plant produces enough blooms weekly all summer for daily garnishes plus experimental batches of syrups or candies—even small gardens yield plenty!
8. Field Notes From Real Kitchens & Gardens
Maria’s Birthday Cake Redemption Story
First season Maria used florist roses on cakes ended badly—the icing had “bitter perfume” bitterness so strong her guests complained loudly (“What is this soapy stuff?”). She switched next year to organic edible roses trimmed carefully to remove all white petal bases based on my advice—and her cakes turned stunning visually and tasted beautifully floral instead of off-puttingly bitter.
Chef James’ Nasturtium Timing Trick
James struggled when his salad wilted under hot kitchen lights repeatedly—but switching his game plan so nasturtiums were harvested last-minute and added atop immediately before serving changed everything (“Timing really is everything,” he texted me after three tries).
Ms Patel’s Classroom Safety Drill Success
In her cooking class, Ms Patel used color-coded flashcards alongside real plants so kids could learn which parts not to eat safely—a hands-on approach sparking curiosity about pickling dandelion buds (“They taste sour like tiny capers!” beamed one student). Teaching safety upfront made everyone more confident about trying new flavors later on.
9. Troubleshooting Cheat Sheet
Petals limp instantly?
Use an immediate ice bath + fridge storage combo within five minutes post-harvest; swap paper towels daily if storing longer than 24 hours to keep moisture balanced.
Guests hesitant?
Encourage sniffing/touching first; offer tiny sample bites atop bland crackers so they experience flavor alone without distraction or pressure.
Color fades during baking?
Reserve delicate blooms strictly as post-bake garnishes OR try crystallized versions where sugar locks color under a protective layer—ideal for decorating cupcakes/cookies attractively without dullness.
10. Step-by-Step Mastery Roadmap — What Would An Expert Do Next?
1️⃣ Map out which varieties thrive locally year-round—and try container gardening if you have no yard space (nasturtiums love sunny pots!).
2️⃣ Create your own mini field guide photo journal noting unique taste/aroma/prep successes/failures—and share it with friends!
3️⃣ Join monthly online forums like r/foraging where passionate ID experts swap tips—you’ll learn faster by asking questions regularly than going solo forever!
4️⃣ Grow/test one new variety per season—even a windowsill planter counts toward expanding your palette!
5️⃣ Challenge yourself quarterly: create one dish where flowers contribute true flavor — not just looks — whether that means infusing syrups or folding powders into sauces!
6️⃣ Teach someone else safe flower-eating practices once per year—it sharpens your knowledge better than any guidebook ever will!
7️⃣ Stay curious about regional wildflowers—but always double-check multiple authoritative sources BEFORE tasting anything unknown—even experienced cooks get fooled sometimes!
The Bottom Line: Eat Boldly AND Safely
Edible flowers aren’t some secret culinary club—they’re accessible ingredients once you treat them with proper respect and care. Think of every bloom as worthy of curiosity, caution, experimentation—and above all delicious potential.
Follow these simple principles religiously:
🌱 Identify meticulously — don’t guess!
🌸 Prep carefully — preserve freshness & flavor
🥄 Experiment boldly — don’t fear failure; try new combos often
Next time someone asks if those pretty flower sprinkles are worth eating? You’ll answer confidently—with experience-backed assurance—that yes, absolutely they can be culinary stars…not just pretty faces on plates.
Happy problem-solving—and bon appétit!
If you want an instant takeaway right now:
Quick Start Top Five Edible Flowers:
- Nasturtium: Peppery crunch perfect on sandwiches/salads
- Borage: Cucumber-cool refreshment great in drinks & salads
- Calendula: Slight bitterness ideal powdered over rice/dishes
- Rose: Sweet aroma amazing infused into syrups/desserts
- Violet: Gentle sweetness perfect fresh/decorative desserts
Start small—taste each flower raw first—and build confidence by layering their flavors gradually rather than overwhelming other ingredients from day one!
Remember—it takes practice but turns ordinary meals into memorable experiences worth sharing again and again.
Feel free to reach out anytime with questions about specific flowers or tricky techniques—I’ve been down many wrong paths so hopefully can save you some time along your edible flower journey!