Culinary Mushroom Growing: A Clear, Step-by-Step Guide for Beginners

The Insider’s Playbook to Culinary Mushroom Growing: Wisdom from Years in the Trenches
If you’ve ever pried open a plastic-wrapped tray of limp button mushrooms at the supermarket and wondered, “Could I grow these better myself?”—the answer is yes, and it’s easier (and more satisfying) than you think. After a decade spent coaxing oyster clusters out of buckets in my laundry room, wrestling shiitake logs through New England winters, and troubleshooting every possible mold disaster, I’m laying out everything I wish someone had told me on day one.
No glossed-over steps. No recycled advice. This is hard-earned knowledge: what actually works, what fails spectacularly (I've composted more batches than most people start), and how to turn your kitchen or backyard into a reliable source of gourmet mushrooms—whether you're aiming for home cooking glory or eyeing the farmers’ market.
1. What It Really Takes to Grow Mushrooms at Home
Let’s cut through the mystique: growing culinary mushrooms isn’t about high-tech labs or mystical green thumbs. It comes down to three essentials:
- A species that fits your space and patience
- A substrate they can digest
- Cleanliness bordering on obsession
My first attempt? A $40 kit shoved behind a couch—half-hearted misting, no thermometer, zero clue about contamination. Result: fuzzy white growth…then the unmistakable scent of gym socks and green mold. Lesson learned: skip any of these basics and you’ll be tossing out more substrate than you harvest.
The winning formula:
- Pick an easy species (oysters are forgiving; shiitakes demand patience; buttons are surprisingly tricky).
- Prep a clean “mushroom food” base.
- Mix with fresh spawn (think “mushroom starter”).
- Keep humidity high (85–95%), temperature steady (60–75°F), air fresh but not drafty.
- Wait for mycelium—the invisible engine—to colonize everything before fruiting.
- Harvest at peak freshness for flavor supermarkets can’t touch.
2. Underground Science: What’s Happening Under the Surface
The Mushroom’s Secret Life Cycle
Forget gardening analogies for a moment—mushrooms aren’t plants and don’t play by those rules.
- Spores are like seeds but invisible to the naked eye.
- Mycelium forms an underground/under-substrate network that looks like white cobwebs.
- Colonization happens as mycelium digests its chosen food source, transforming it into something it can fruit from.
- Fruiting is when mushrooms emerge—nature’s way of sending spores far and wide.
Here’s what surprised me early on: all the real action happens before you see a single cap form. If your mycelium isn’t thriving—dense, bright white, sweet-smelling—you won’t get so much as a pinhead later.
Key Terms You’ll Actually Use
- Spawn: Mycelium grown on grain or sawdust—a shortcut past unreliable spores.
- Substrate: The “soil”—straw, sawdust, coffee grounds—that feeds your mushrooms.
- Inoculation: Mixing spawn into your substrate; where hygiene matters most.
- Pasteurization/Sterilization: Killing off competitors so only your fungus wins the race.
- Fruiting Chamber: Any space with controlled humidity/air/light for mushroom production.
3. Your First Batch: Foolproof Steps That Actually Work
I’ve seen beginners overcomplicate things with pressure cookers and lab coats—or underdo it by skipping sterilization entirely (ask me about my infamous blue-green bucket disaster). Here’s what consistently delivers results:
Step 1: Species Selection That Matches Your Lifestyle
Fastest Success — Oyster Mushrooms
I recommend Pleurotus ostreatus to everyone starting out:
- They’ll eat almost anything fibrous (straw, cardboard—even phone book pages in a pinch).
- They grow fast enough that errors show up quickly—less waiting means faster learning cycles.
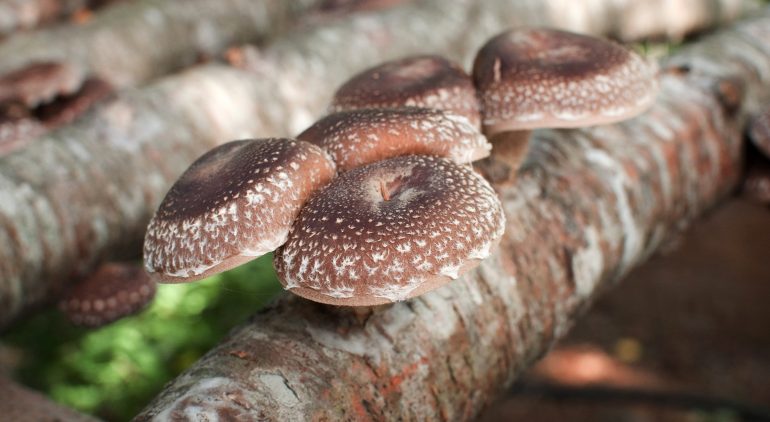
For Patience & Flavor — Shiitake
Perfect if you’re willing to wait months rather than weeks:
- Needs hardwood logs or compressed blocks—not ideal for apartments unless you’re adventurous.
Tricky But Classic — Button/Portobello
Surprisingly fussy! Compost-based substrate is prone to contamination; not worth it until you've mastered oysters or shiitake.
Step 2: Gear Up Without Breaking the Bank
Barebones setup for oyster mushrooms:
- Fresh grain spawn ($10–$15/quart from North Spore or Field & Forest)
- Straw pellets ($5/bag at feed stores) or rescued coffee grounds
- Food-grade bucket with holes drilled OR large filter patch bag ($2–$5 each)
- Large pot for pasteurizing
- Spray bottle
Optional but useful: - Cheap digital thermometer/hygrometer combo ($12 online)
Total investment? Under $30 yields several pounds per flush once dialed in.
Step 3: Substrate Prep – Where Most Failures Begin
Skip this step at your peril—I lost two entire months’ work because I believed straw straight from the bale was “probably fine.”
Straw Method:
- Chop straw (<3" pieces helps colonization).
- Soak in water heated to ~165°F for 60 minutes (use meat thermometer!).
- Drain thoroughly; let cool until just warm to touch—not hot!
Sawdust Pellet Method:
Easier cleanup:
- Pour boiling water over pellets in a clean tub; cover until fully expanded/cool (~30 min).
The goal? Outcompete bacteria/mold without nuking beneficial fungi already present.
Step 4: Inoculation – Clean Hands = Happy Mushrooms
This step feels like surgery—and should be treated as such:
- Wash hands thoroughly; wipe surfaces with alcohol wipes.
- Crumble spawn evenly into cooled substrate (“think chocolate chips in cookie dough,” an old mentor used to say).
- Load loosely into bag/bucket—don’t compact!
- Seal up but allow filtered airflow (filter patches/slits).
Step 5: Incubation – Mycelium Bootcamp
Stash inoculated containers somewhere dark-ish (~70°F). Within days you’ll see white threads weaving through—the sign of healthy colonization.
By week three? Substrate should look solid white and smell earthy-sweet—not sour/musty/greenish! Any color other than white/off-white? Toss it outside immediately; contamination spreads fast indoors.
Step 6: Fruiting Time – From White Blocks to Dinner Plates
When fully colonized:
1 Move container somewhere bright-but-not-sunny (bathroom windowsills work wonders).
2 Cut slits in bags/drill extra holes in buckets for baby mushrooms (“pins”) to emerge.
3 Mist sides daily—never let surfaces dry out!
Humidity drops below 80%? Expect stunted fruits or none at all.
Step 7: Harvest Like You Mean It
Harvest when caps flatten but haven’t curled upwards—a window measured in hours, not days! Cut gently at base with sharp knife/scissors; avoid pulling which can disrupt subsequent flushes.
Pro tip from too many soggy batches washed under taps: just brush off debris if harvesting young/fresh—waterlogging ruins texture fast.
4. Avoid These Rookie Mistakes—I’ve Made Them All So You Don’t Have To
Every failed batch has taught me something no instruction sheet mentions:
Skipping Substrate Pasteurization
Result? Fuzzy green mold beats your mycelium every time.
Solution: Pasteurize every batch—even if straw looks clean enough to eat off!
Old Spawn = Weak Results
Don’t use spawn that’s been sitting around since last season—it loses vigor fast after shipping/storing more than six weeks even refrigerated.
Dirty Inoculation = Disaster
Early on I’d mix spawn/substrate while chatting with friends…until clouds of Trichoderma green showed up days later.
Now? Gloves on, mouth shut, surfaces wiped down religiously during inoculation hour.
Allowing Substrate To Dry Out
Mushrooms are mostly water! Miss two days misting during fruiting phase, especially indoors in winter heat—and yields drop by half overnight.
5. Advanced Moves For Real Yields & Variety Junkies
Once you’re confident with basic oysters...
Martha Tent Fruiting Chambers
For less than $100 total investment:
Build a Martha tent—a wire shelving rack draped with plastic sheeting plus ultrasonic humidifier inside gives commercial-level control over environment without needing spare bedrooms converted into labs.
| Method | Difficulty | Yield Potential | Cost |
|---|---|---|---|
| Kits | Easiest | Low | $20–$40 |
| DIY Buckets | Easy | Moderate | $25–$50 |
| Martha Tent | Medium | High | $80–$150 |
For serious output (>10 lbs/month), automation pays off fast—a basic Wi-Fi humidistat lets you monitor temp/humidity from your phone anywhere.
Experiment With Unusual Species/Substrates
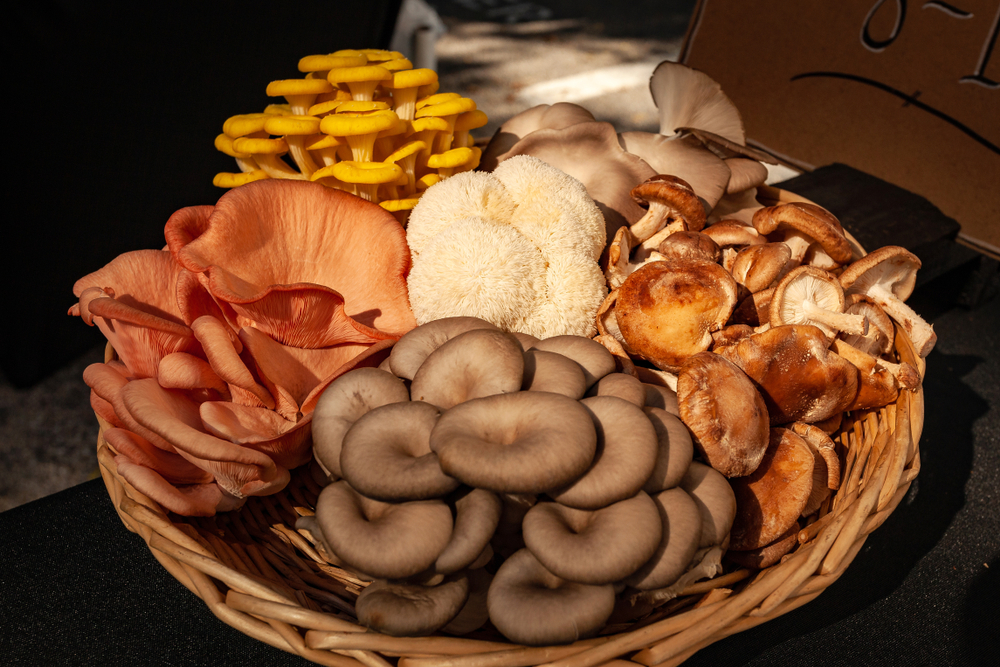
Try lion's mane (Hericium erinaceus) on enriched sawdust blocks—the taste is otherworldly and fetches premium prices locally ($16/lb retail as of Spring 2024).

Or try wine caps (Stropharia rugosoannulata) outdoors under wood chip mulch—they’ll naturalize beneath shade trees year after year with almost no input once started.
6. Tools & Resources Worth Every Penny—And Which Are Overhyped
After wasting money on fancy meters that broke within weeks and pressure cookers too small for bulk prep…
Must-haves:
- Food-grade buckets/grow bags ($5 each)
- Reliable digital hygrometer ($10–$20); replace batteries quarterly
Nice-to-have if scaling up: - Pressure cooker (for homemade grain spawn expansion): $60+
- Ultrasonic humidifier + timer plug (~$45 total)
Where I shop:
- North Spore – consistent quality US spawn & kits
- Field & Forest Products – best log plug spawn selection
- Reddit r/mycology / r/shroomers – real-time troubleshooting/advice
Top book pick still remains Stamets’ Growing Gourmet & Medicinal Mushrooms, but supplement with active online forums whenever possible—the crowd-sourced wisdom there saved me countless times when facing weird molds or slow growth.
7. Case Studies & Real-Life Wins (& Losses)
Nothing beats seeing how others have solved problems—or failed forward:
Sarah's Studio Apartment Oysters
She started her first batch perched atop her fridge (“the warmest spot I could find”). Two weeks later she texted me photos of thick blue oyster bouquets bursting from side slits in her bag—with not one hint of contamination thanks to obsessive hand-washing before every step.
Ben's Backyard Shiitake Logs
After storm damage left him awash in oak branches, Ben drilled rows along each log (“felt like woodworking class”), hammered shiitake plugs deep inside then sealed them with beeswax melted over his grill burner—a trick he picked up after his first batch dried out when wax cracked midwinter.
Café Collective Coffee Ground Growers
A local café saves spent grounds daily now—the owner distributes them among regulars who add oyster spawn at home (“smells like espresso heaven,” one volunteer said). Their staff lunch menu now features house-grown pink oysters nearly year-round!
8. Troubleshooting Table – When Things Go Sideways...and They Will!
| Problem | Cause | Quick Fix |
|---|---|---|
| Green mold on surface | Poor pasteurization | Discard whole batch ASAP; sanitize area |
| Stalled colonization | Old/wet/cold substrate | Start fresh w/fresh spawn/drier material |
| Mushrooms stop growing | Low humidity/temp | Boost misting/move container |
| Flimsy/thin fruits | Not enough fresh air | Add slits/open lid more |
Don’t panic if things look odd early—it took me four tries before getting an entire flush without some minor issue cropping up!
9. Roadmap From First Flush To Confident Cultivator
If starting again tomorrow here’s my exact plan:
Week One: Order fresh spawn + prep workspace/tools
Week Two: Pasteurize substrate → cool → inoculate → seal bags/buckets
Weeks Three-Four: Stash somewhere dark/warm → peek daily after day seven
Week Five+: Move fully-colonized blocks somewhere brighter/humid → cut slits → mist regularly
Harvest when caps flatten → repeat cycle w/new notes/improvements each time!
Keep records—a cheap notebook tracking dates/species/results will teach more than any blog post ever could.
10.Next-Level Growth—for Kitchen Mastery Or Small Business Dreams
Ready for more?
Try two new species side-by-side this season—you’ll learn nuances textbooks never mention (“shiitakes love cooler temps”; “lion’s mane hates stagnant air”).
Source local waste streams—coffee grounds from cafés/straw bales post-harvest/sawdust from lumberyards—all fair game as long as they’re chemical-free!
Share lessons learned with friends/family—they’ll spot blind spots you missed (“why didn’t we label those buckets?” still haunts one group grow years later).
If scaling commercially beckons? Volunteer at local mushroom farms—or take an online course focused on business models/logistics/legalities unique to fungi sales.
Above all else? Embrace failures—they’re tuition payments toward future bumper crops
And remember—the best-tasting mushrooms always come from setups where curiosity led the way
So roll up those sleeves…your next flush awaits!
Happy growing—from someone who knows both sides of every success…and every compost pile along the way