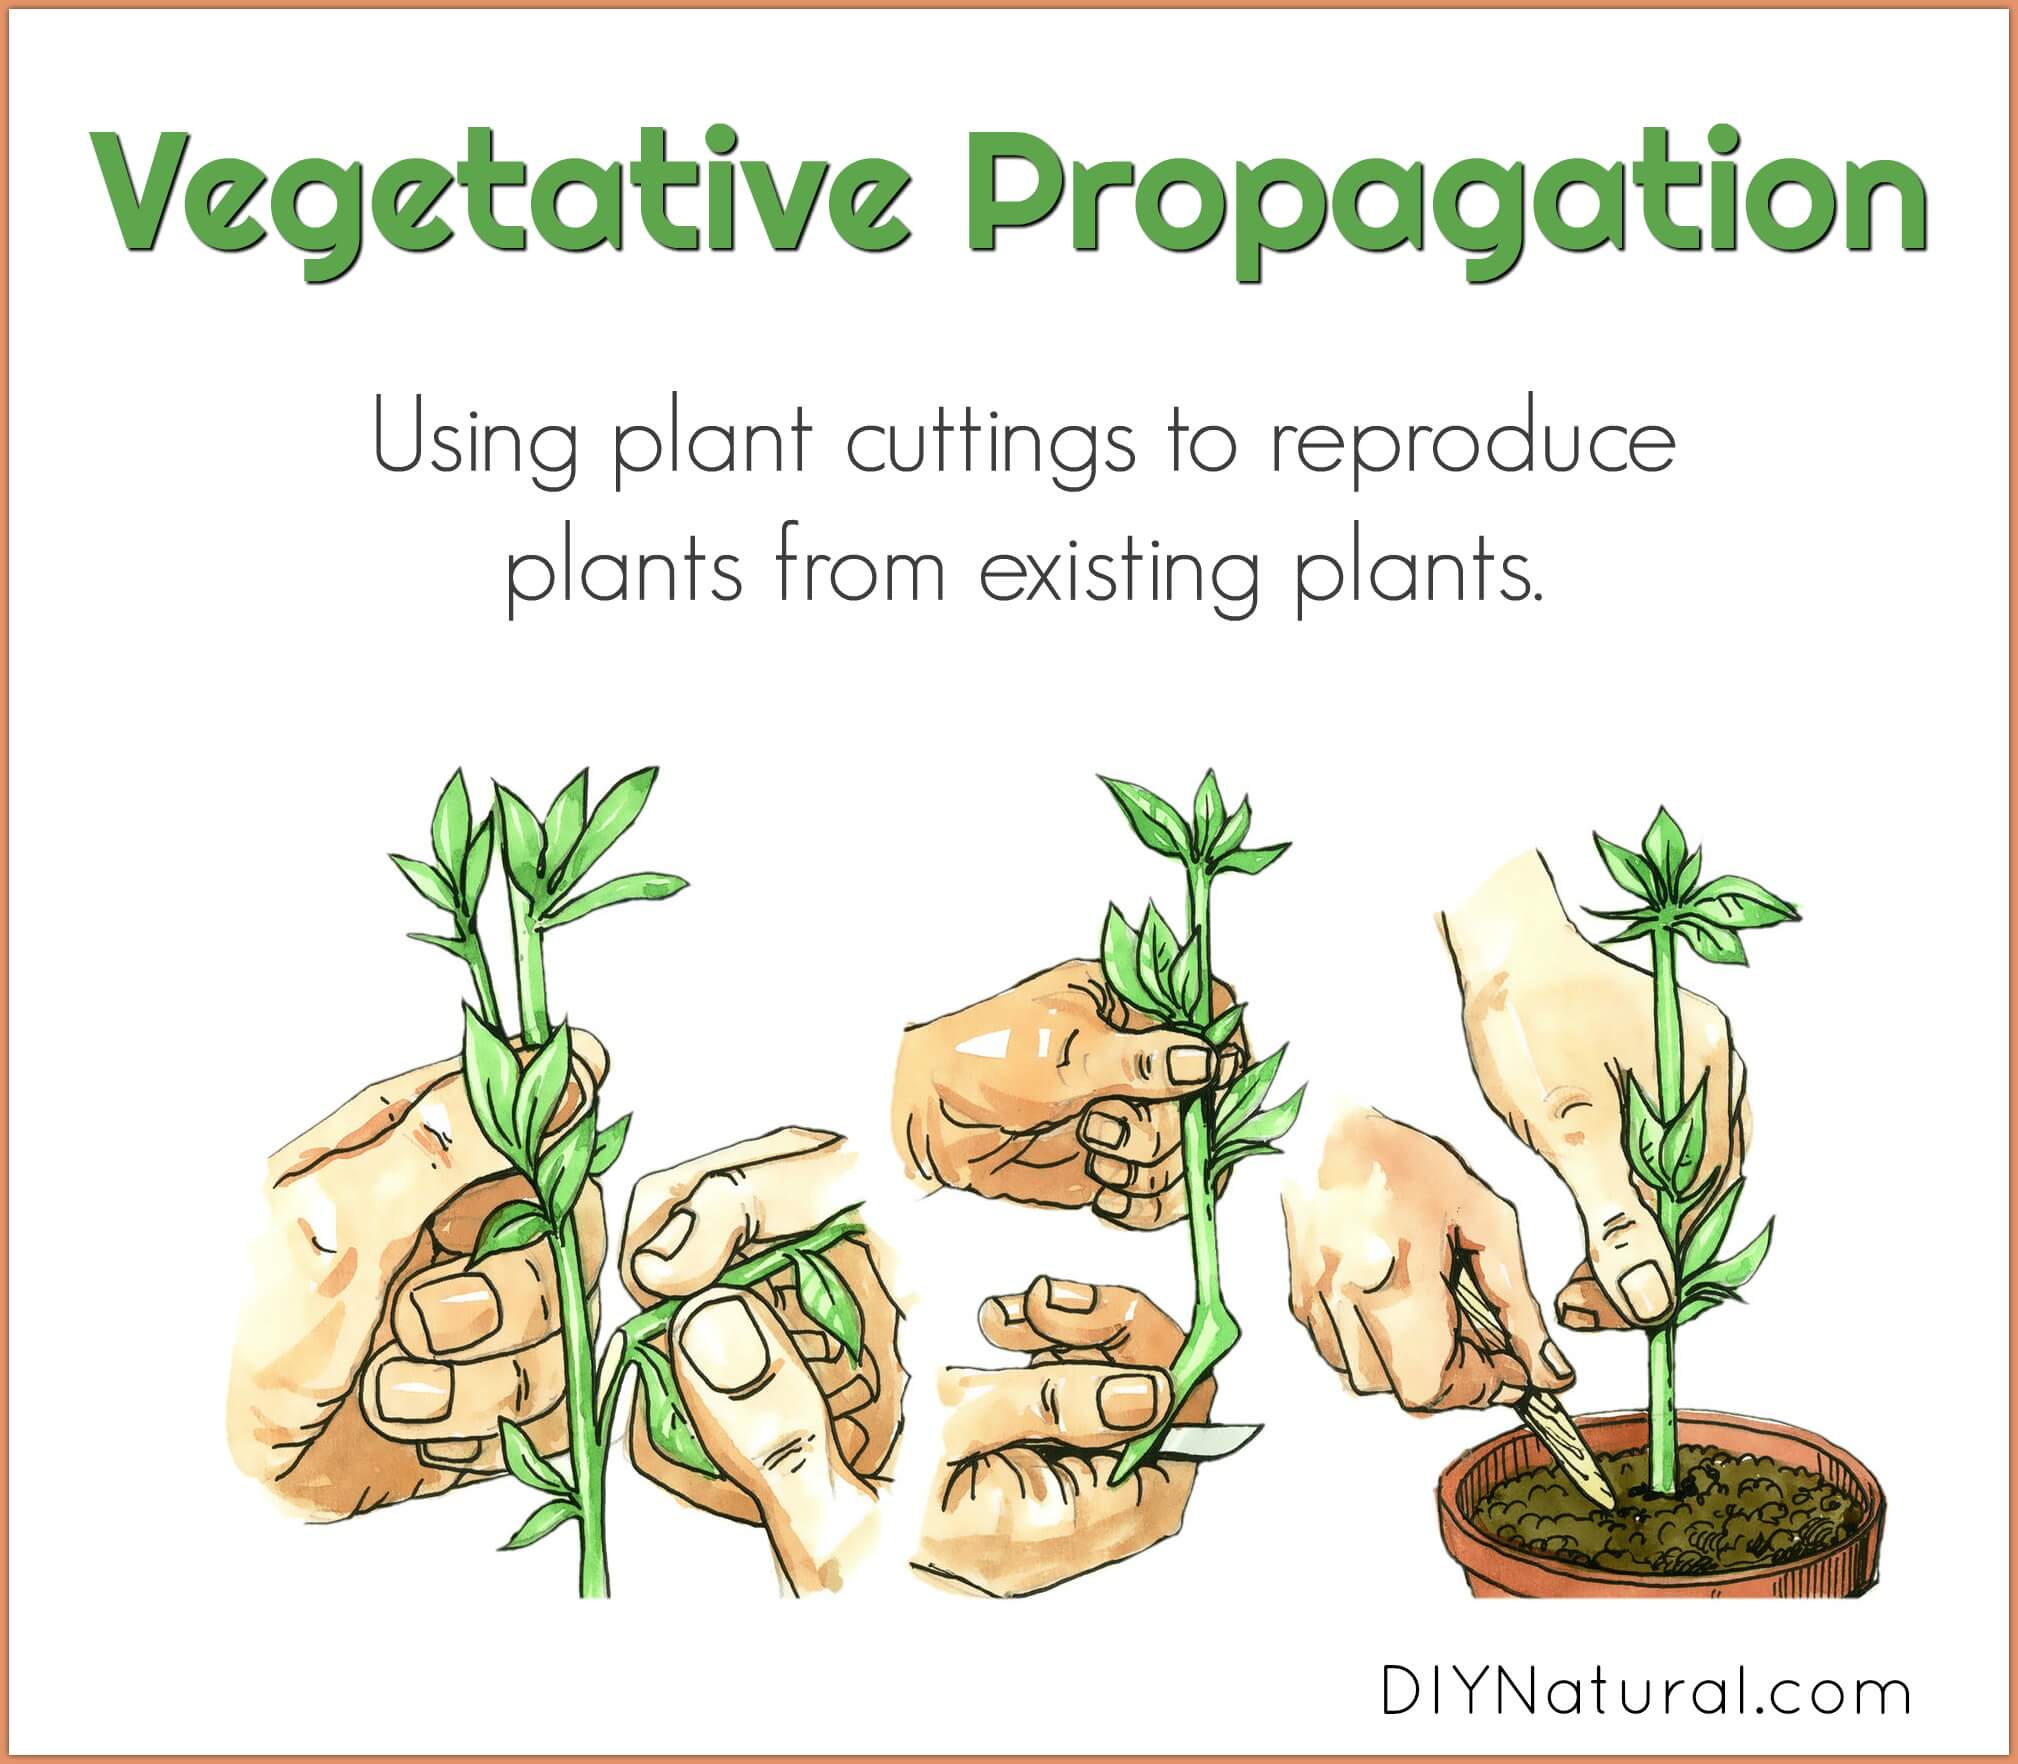
Rooted in Growth: The Ultimate Guide to Mastering Cuttings Propagation
When it comes to cuttings propagation, most guides skim the surface—just enough for easy wins with pothos or mint. But what happens when your prized camellia refuses to root, or every rosemary cutting seems destined for the compost? That’s when you need more than a checklist; you need a troubleshooting playbook built on real experience and relentless problem-solving.

Below is your ultimate troubleshooting guide: part myth-busting, part hands-on tactics, and part confessional from years of trial and error in propagation trenches. Whether you’re nursing a single stem in a windowsill or managing trays of rare shrubs for a community garden, this guide covers every scenario—so you can rescue failures, scale up successes, and become the go-to propagator in your circle.
The Realities Behind Cuttings Propagation: What Textbooks Don’t Tell You
Cuttings propagation isn’t just about slicing stems and waiting for roots. Every failed attempt is a clue—if you know how to read it. Let’s dig into the biology (and psychology) behind why cuttings thrive…or crash.
Why Do Cuttings Sometimes Just “Sit There”?
If you’ve ever stared at an unchanging cutting for weeks, there’s usually one of three silent culprits:
- Energy Deficit: That stem only has so much stored sugar. If rooting takes too long (often due to low temperature or humidity), it starves before it can sprout roots.
- Hormonal Block: Some species hoard their natural auxins where they want them—not where you made your cut. No hormone signal = no root formation.
- Invisible Infection: Fungal spores are everywhere; one invisible hitchhiker can sabotage an entire tray.
Pro tip: Label each batch with date/type/location. When something fails, compare conditions side-by-side—pattern recognition is your secret weapon.
Advanced Diagnostic Table: Every Symptom Decoded
| Problem | Likely Cause | Solution |
|---|---|---|
| Leaves wilt within hours | Low humidity / delayed planting / overexposure | Prep media first; insert cutting immediately after snipping; use humidity dome or clear bag |
| Stem base turns black/slimy | Fungal/bacterial infection from dirty tools/containers OR overwatering | Sterilize tools between cuts (70% alcohol); use new media; let top of medium dry slightly between mistings |
| Roots form but then rot away | Media too dense; insufficient airflow | Add perlite/sharp sand; ventilate daily; bottom-water instead of overhead |
| No roots after 4+ weeks (healthy-looking) | Too cold / wrong season / dormant parent stock | Use heat mat (~22°C/72°F); take cuttings during active growth season only |
| Mold on surface | Zero airflow under cover / overcrowded tray | Ventilate briefly daily; thin out crowded pots/trays |
Troubleshooting by Plant Type: Custom Solutions
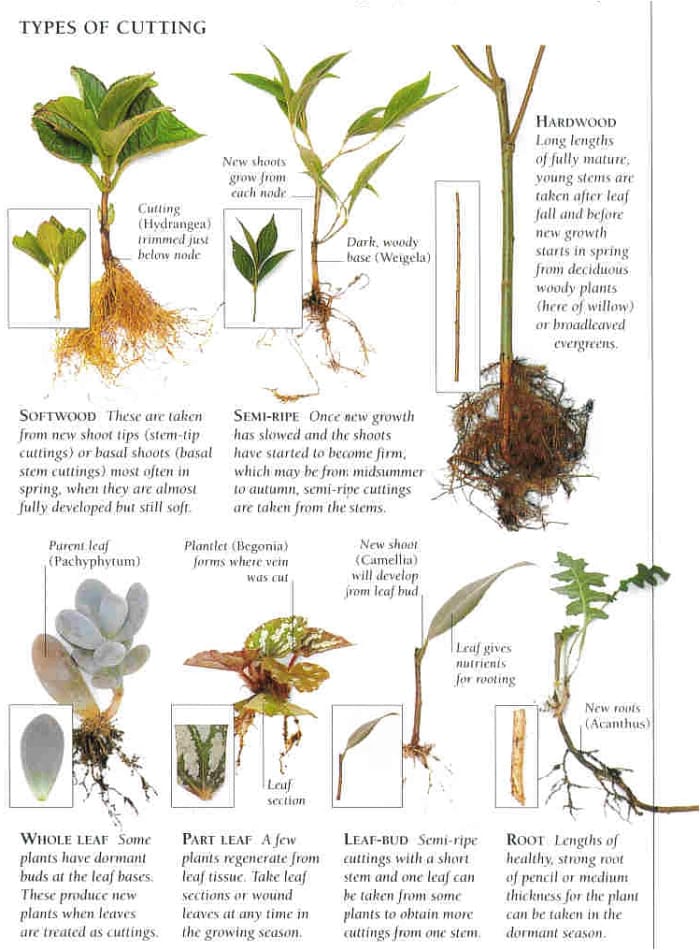
Softwood Stars (Pothos, Coleus, Basil)
Common issue: Rapid wilting.
Fix: Crank up humidity instantly—clear plastic cup domes work better than bags for single pots (they don’t touch leaves). If propagating in water and leaves dip below waterline? They’ll rot fast—trim so only nodes are submerged.
Woody Warriors (Rosemary, Camellia, Grape)
Common issue: Stems look alive for weeks…then shrivel.
Fixes that actually work:
- Wound the base lightly with a clean razor—expose green cambium ring beneath bark to boost rooting cell activation.
- Use powdered cinnamon as antifungal before rooting hormone application if past batches succumbed to blackening.
- Bottom heat is non-negotiable in cool seasons—the difference between 10% take rate and 80% can be as simple as a $30 seedling mat.
Succulents & Cacti
Classic trap: Planting too soon after cutting = mushy collapse.
Hard-won lesson: After slicing, leave stalks exposed on dry paper towel until callused over—a full 48 hours minimum (I once lost an entire tray by skipping this step during a humid summer).
Decoding Rooting Hormones: When More Is Less
Here’s what most guides gloss over: too much rooting hormone stunts root initiation just as badly as none at all—and some plants hate synthetic dips! I once doubled up gel AND powder on camellia cuttings thinking “more must be better”—100% failure rate that round.
Practical rule:
- For softwoods: skip hormone unless it’s notoriously tricky (fuchsia).
- For hardwoods/semi-hardwoods: dust lightly with IBA-based powder OR dip in willow water (DIY natural auxin solution).
Bonus experiment from last year: Three parallel rosemary batches—
- No hormone = 15% success
- Commercial IBA powder = 65% success
- DIY willow water soak = 62% success
Cost difference? Willow branches were free!
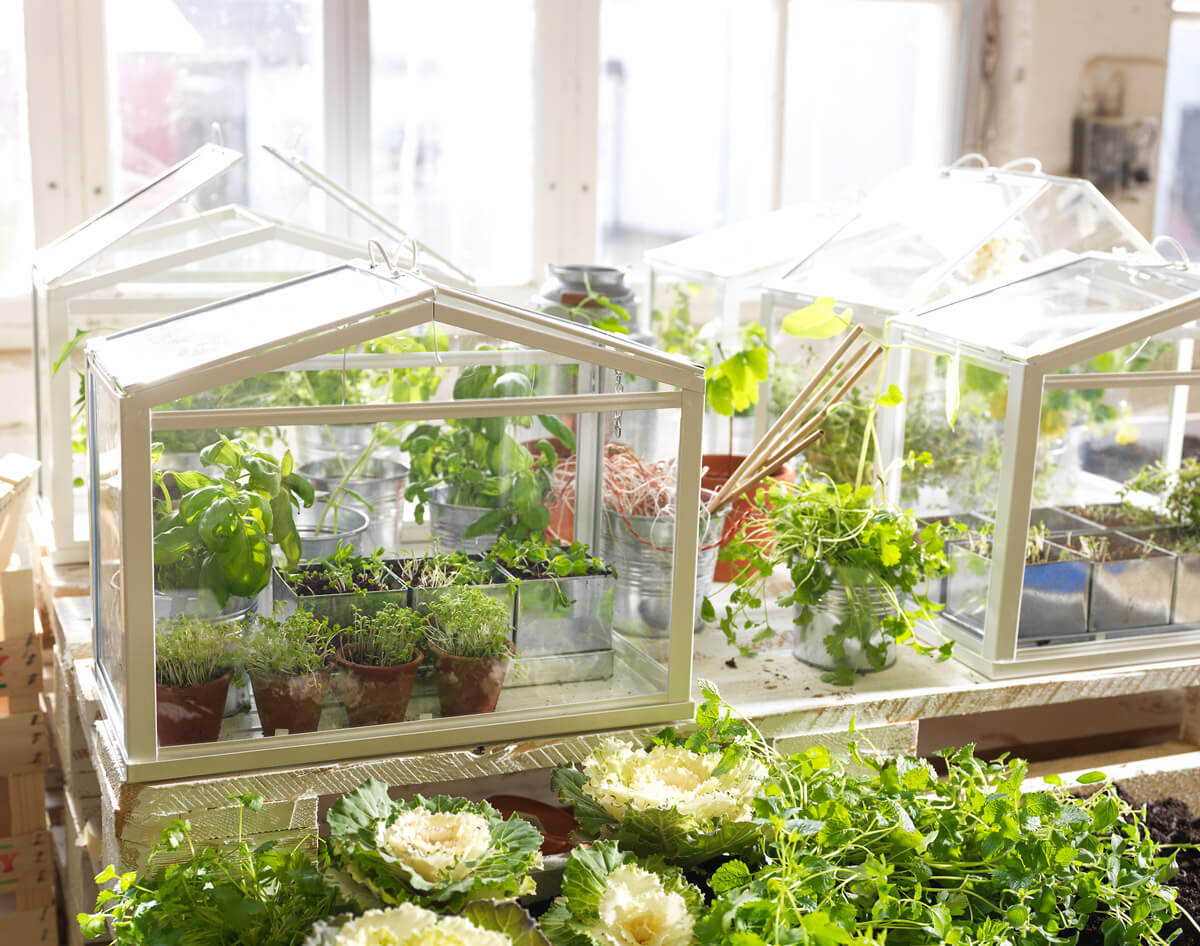
Humidity Hacks: Precision Moisture Control
The single biggest variable I’ve measured across hundreds of trials isn’t sunlight—it’s microclimate humidity at the leaf surface:
- Too little: Leaves crisp up before roots form.
- Too much/no ventilation: Rot/mold wins.
Unexpected fix for small-batch propagation?
A two-liter soda bottle cut in half makes an airtight mini-greenhouse—with lid off for one hour morning/evening to prevent fungal buildup.
For large trays: Cheap plastic storage bins turned upside down create pro-grade humidity tents for less than $10 each—just don’t forget tiny air holes near the top edges!
Water vs Soil vs Perlite vs Aero-Cloning Chambers
Every medium has its quirks—and risks:
- Water jars: Fastest visual feedback but highest risk of stem rot long-term unless changed every few days (I add aquarium charcoal chips now).
- Soil/perlite mixes: Best root structure but hidden progress—use clear cups/pots whenever possible so you SEE development.
- Aero-cloners/mist systems: Industrial-level consistency…but break down without regular cleaning (algae loves warm mist). Check pump filters weekly!
Back in spring 2020, I ran side-by-side basil trials:
- Tap water jars = 60% rooted
- Perlite + plastic dome = 85%
- Aero-cloner chamber = 98%, but required scrubbing biofilm every week
Time investment often trumps extra gadgets unless scaling up for profit or heavy gifting!
Temperature & Light: The Variables that Sneak Up On You
A classic beginner mistake is sticking cuttings on the sunniest windowsill “for best growth.” Harsh light dehydrates faster than any other stressor—even indoors!
Roots form fastest at soil temps around 21–23°C (70–74°F)—not necessarily air temp—and indirect bright light beats direct sun every time.
In late winter here in New England, my first batch of fuchsia sat at ambient room temp (~18°C/65°F): zero roots after three weeks despite perfect moisture/humidity! Moved them onto heat mat set at exactly 75°F—roots visible within seven days.
Scaling Up Without Losing Your Mind—or Your Plants
Once you’re juggling dozens or hundreds of cuttings:
- Switch from hand-misting to automated timers or capillary mats.
- Batch-label everything by species/date/source plant—a permanent marker on masking tape beats memory every round!
- Sterilize EVERYTHING between rounds: bleach solution rinse followed by clean water soak saves more plants than any gadget ever will.
- Stagger batches two weeks apart during peak season so if one round fails due to weather/infection/timing miscalculation—you always have backup material en route.
When prepping volunteer days at our local community greenhouse last May, we prepped two entire duplicate flats per species—the second became our insurance policy when our primary rosemary batch caught botrytis mid-rooting thanks to three rainy days with no airflow.
Case Files From the Field – Lessons Only Failure Teaches
Nothing hammers home theory like watching mistakes unfold across different setups:
The Basil Bottleneck
Year one growing basil commercially—I lost five trays’ worth because we forgot to open dome vents on day three during a sudden heatwave; stems cooked inside like spinach in steam baskets! Now I prop domes open with bamboo skewers from day two onward if forecast calls for temps above 80°F inside propagation area.
The Spider Plant Surprise
One friend swore spider plant pups wouldn’t root despite “textbook” care. Turns out her municipal tap had sky-high chlorine—which killed roots before they even began forming! Solution was switching to filtered rainwater collected from gutters…and suddenly she couldn’t give away babies fast enough.
The Unexpected Tool Upgrade
I used kitchen scissors far too long before investing $15 in bypass pruners that came apart easily for cleaning—they slice stems cleanly instead of crushing tissue…and disease rates plummeted almost overnight!
Ultimate Troubleshooting Checklist – Diagnose Any Problem Instantly
Whenever something goes sideways:
- Inspect parent plant health FIRST – pests/diseases linger unseen!
- Double-check cleanliness – sterilize tools/media/containers always.
- Review environmental log – temperature/humidity swings kill silently overnight.
- Assess media moisture DAILY—not weekly.
- Test rooting depth/location – nodes must be buried/submerged appropriately depending on method/species.
- Swap out water/media if odor/slime develops—even if roots barely started!
- Wait longer than feels comfortable—but not forever! Mark calendar reminders based on species average timespan plus one week fudge factor (e.g., softwoods check after ~10 days; hardwoods wait four weeks min.).
- Try again—but tweak ONE variable per round so cause/effect stays crystal clear next cycle!
Practical Action Plan – From Single Stem To Serial Propagator
Here’s how I’d tackle propagation today if starting over—with lessons learned from years spent rescuing doomed cuttings:
- Pick robust parent stock AFTER checking under leaves/stems with magnifier (aphids/spider mites hide well!)
- Use sharp pruners wiped between EACH plant source—not just batch start/end
- Prep all containers/media/domes BEFORE making first cut
- Take multiple types/sizes per plant if unsure which works best yet (“insurance policy” method)
5a.Optional Soak woody bases overnight in warm willow tea/natural auxin solution pre-hormone dip
6b.Optional Dip succulent/cactus ends in cinnamon + allow hard callus formation >48hrs before planting horizontally atop gritty mix
7c.Optional Run side-by-side tests (“plain tap vs rainwater,” “domed vs vented,” etc.) — notes/photos help!
8d.Mandatory Label everything clearly by date/species/source/medium/temp/humidity observed!
9e.Daily Air out domes/trays briefly + inspect base/leaves closely under good light
10f.Weekly Swap out hydroponic water/change position/review progress logs + adjust environment proactively not reactively
Within three rounds using this approach—instead of sticking rigidly to generic instructions—you’ll solve almost any propagation puzzle thrown your way…and impress everyone from housemates to horticultural mentors along the way!
Going Pro-Level: Building Resilience Into Your Propagation Routine
True mastery comes from systemizing what works—and being brutally honest about failures:
- Create dedicated “Mother Plant Banks”: keep healthiest specimens solely for ongoing cloning rounds rather than risking main display plants each year
- Keep a spiral notebook/log app handy EVERY time you start new batch—not just final results but conditions/tweaks tried (“Moved off window ledge after Day 3 due overheating”)
- Share both successes and disaster stories with local clubs/forums—collective knowledge multiplies solutions faster than solo tinkering ever could!
- Invest time teaching others—from neighbor kids keen on science fair projects to seasoned garden club members hunting elusive heirloom clones—the questions they ask will spark fresh ideas even veterans never considered…
And finally—the most important lesson I’ve learned through thousands of attempts? Every failed cutting teaches more than ten successful ones ever could…provided you treat each setback not as defeat but as valuable data pointing straight toward your next breakthrough round.
Are you stuck right now? Hit me with specifics—I guarantee there’s an angle we haven’t tried yet together! This isn’t just about growing plants…it’s about becoming unstoppable when facing ANY challenge head-on—with logic, adaptation, and stubborn optimism leading the way.
Happy troubleshooting—and may your next round yield more lush new clones than ever imagined!