How Cranberry Bogs Are Designed and Built: A Simple Step-by-Step Guide
The first time I stood knee-deep in a half-finished cranberry bog, shovel in hand and boots caked with muck, I realized none of the textbooks had prepared me for what actually makes or breaks a bog’s design. Over the last decade, I’ve seen “by-the-book” projects fail and scrappy, unconventional setups thrive—usually because someone paid attention to details that never make it into generic guides.

Let’s break open how real-world cranberry bogs are designed and built, focusing on the insider moves that separate long-term success from expensive mistakes.
Why Bog Design Is Where Most Growers Win—or Lose
I can’t count the number of times I’ve been called out to diagnose a sickly bog, only to find the roots of the problem (sometimes literally) buried in bad site prep or water management. The truth: cranberries are picky about their environment in ways you won’t appreciate until you’ve watched a harvest ruined by an inch of misplaced water or a dike that leaks like a sieve.
The best growers I know approach bog construction like setting up a chessboard—they think five moves ahead. Here’s what they do differently.
1. Site Selection: What Matters More Than Soil Tests
Everyone says “choose sandy, acidic soil with good water access,” but here’s where experience kicks in:
- If your water table isn’t consistent year-round (18–24" below surface is ideal), you’ll spend thousands every season trying to compensate. In 2017, we retrofitted French drains into an old bog after two dry summers cost us almost half our yield—lesson learned.
- Never trust historical data alone; walk your site during both wettest and driest months. The smell and squish underfoot will tell you more than any report.
- If your pH is off (above 5.5), sulfur amendments work—but budget for annual re-testing; local groundwater can creep your numbers up faster than expected.
Insider tip: Before buying truckloads of sand, talk to nearby sand pits about off-spec loads—many offer discounts on material not suitable for construction but perfect for bogs.
2. Dike Construction: Build It Once, Build It Right
A rookie mistake? Underestimating how much water pressure those dikes will face—not just during harvest floods but after heavy spring rains or sudden thaws.
- Always use a well-compacted clay core inside your dikes—even if it means importing material from miles away.
- Don’t settle for “good enough” height; set your dike crests 2–3 feet above maximum flood level plus another six inches as insurance.
- On my own site, we made the error of skipping geotextile fabric beneath one corner—by year three, muskrats burrowed through and we lost several rows before catching it.
Pro move: If you’re working near wildlife corridors (think beaver/muskrat country), add hardware cloth along the inner face of vulnerable dike sections.
3. Water Management: The Real Secret Sauce
No two sites manage water exactly alike—and this is where most new growers get tripped up. Here’s what veteran growers obsess over:
- Multiple water sources beat one big pond every time. After getting caught by surprise droughts twice, I invested in both electric pumps AND gravity-fed systems as backup.
- Install more control points than you think you’ll need: flumes at every ditch intersection save hours when adjusting levels during unpredictable weather swings.
- Test your drainage before planting—run a full flood/drain cycle using temporary boards and cheap pumps so you can spot dead zones or backflows now, not during first harvest.
One Massachusetts grower told me he times his spring frost floods by watching not just air temps but soil thermometers six inches down—knowing when root zones hit critical temps lets him react before visible frost even forms.
4. Sanding & Leveling: The Unsexy Step That Pays Dividends
Laser leveling changed everything for us—a single pass with modern equipment gave us better drainage than years of hand grading ever did. But here’s the detail nobody tells you:
- Use washed concrete sand (not masonry sand). Finer particles can compact too much over time; coarser grades keep things loose around runners.
- Don’t skimp on thickness—4–6 inches is standard now for commercial operations because it suppresses weeds far longer and anchors young vines better.
- Apply fresh topdressing annually post-harvest; we found that even just ½ inch each year cut weed pressure by nearly 40% compared to untreated plots (based on our own field notes from 2020–2023).
5. Planting Vines: The Devil Is In The Details
There’s an art to spreading vine cuttings evenly—I’d argue it takes more finesse than most realize:
- For bare-root runners: toss handfuls lightly across sand before pressing them in with tractor tires (old-timers call this “feathering”). Too thick = rot; too thin = patchy coverage.
- Plug planting works best on small acres or specialty hybrids—but factor in nearly double labor costs per acre compared to runner pressing.
After planting, don’t rely solely on overhead irrigation! We supplement with mist lines during dry spells—the difference in establishment rates was night and day when we switched over in 2019.

Real Lessons From The Field
In my third year running a Cape Cod renovation project, we misjudged a slight slope near one corner—every spring thaw sent runoff pooling against our eastern dike until vines yellowed from root rot. Fix? We trenched out an emergency sub-drain mid-season (cost: $4K) but saved that entire quadrant from total loss.
Another grower I mentor swears by dye-testing his entire ditch network every April—watching colored runoff trace its way across the beds exposes hidden blockages or low spots instantly.
And don’t overlook local wisdom: one retired neighbor taught me to listen for frog choruses at dusk—they cluster where drainage is poor!
Troubleshooting With Data
Every problem leaves clues if you track them:
- Slow drainage after flooding? Check inflow/outflow rates with simple float tests—it takes less than an hour but pinpoints whether grading or debris is at fault.
- Sudden vine stress? Keep annual logs of pH readings and fertilizer apps; patterns often reveal themselves only after comparing multiple seasons side by side.
- Weed outbreaks? Our records showed they spiked whenever fresh sand topdressing lapsed even one season—a direct cause-and-effect many miss without tracking closely.
Your Action Plan—From Analyst Experience
- Get hands-on: Walk your field after heavy rain—you’ll learn more about flow patterns than any survey map shows.
- Budget realistically: Expect $8K–$15K/acre for initial setup if trucking in sand/water infrastructure; plan contingencies for unexpected issues like buried rocks or wildlife damage.
- Network locally: Join regional grower groups or extension roundtables—the best advice comes from neighbors who’ve fought similar battles with local conditions.
- Embrace iteration: No system is perfect out of the gate! Build flexibility into every step—from modular pump setups to extra-wide dikes ready for reinforcement as needed.
- Record everything: Keep detailed logs by date/condition/response—the cumulative insights become invaluable within just a few seasons.
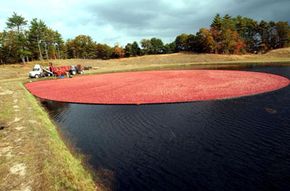
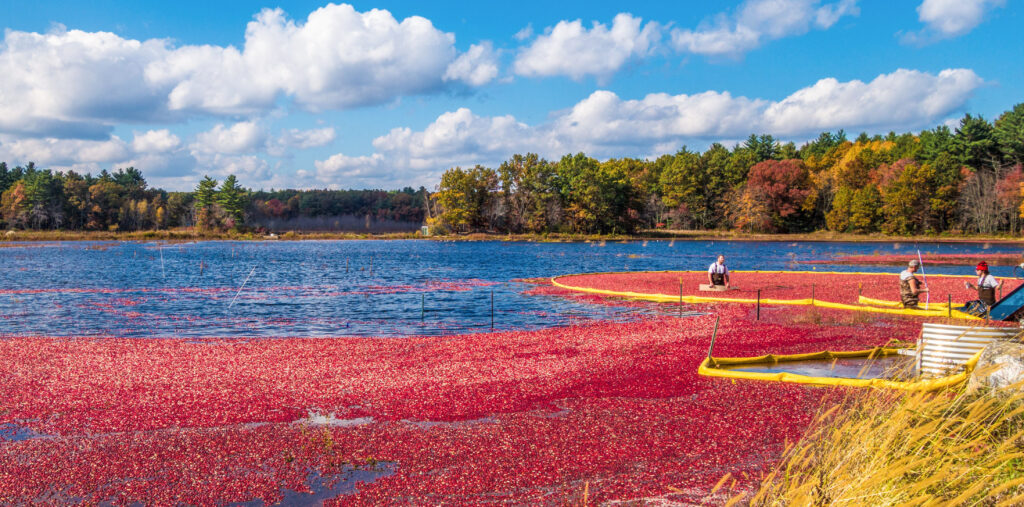
Building cranberry bogs isn’t glamorous work—it’s muddy boots at dawn and late nights fixing pumps before frost sets in—but few sights compare to those first scarlet berries floating under autumn sun. Get these foundational steps right—with some hard-earned tricks thrown in—and your bog will pay dividends long after others have given up hope.
If you’re facing tough calls or want feedback on plans tailored to your acreage, reach out—I’m always game for troubleshooting alongside fellow growers who value doing things right from day one.


