Indoor Plant Wall Ideas: Expert Guide to Design, Care & Benefits

If you’d told me, back in 2008, that I’d one day have a rainforest scaling my living room wall—and that every guest would ask how I made the magic happen—I would’ve laughed and pointed to my stubbornly brown-thumbed history. My first attempt? A heartfelt but hapless parade of ferns clinging to a wobbly wire rack in my kitchen. They went crispy by Christmas.
But fifteen years, five apartments, and more than a few botched experiments later, indoor plant walls have become not just my obsession but a core part of my home’s soul. Along the way, I’ve learned which systems fail spectacularly (never trust cheap suction cups), which plants will thrive even when forgotten for a week, and most importantly: how anyone—green thumb or not—can create an indoor plant wall that transforms their space from “meh” to memorable.
This isn’t another listicle. This is the story-driven masterclass—the kind of guide I wish someone had handed me at the start. So unroll your measuring tape and let’s chart your path from blank wall to lush vertical Eden.
1. What IS an Indoor Plant Wall (and Why Should You Care?)
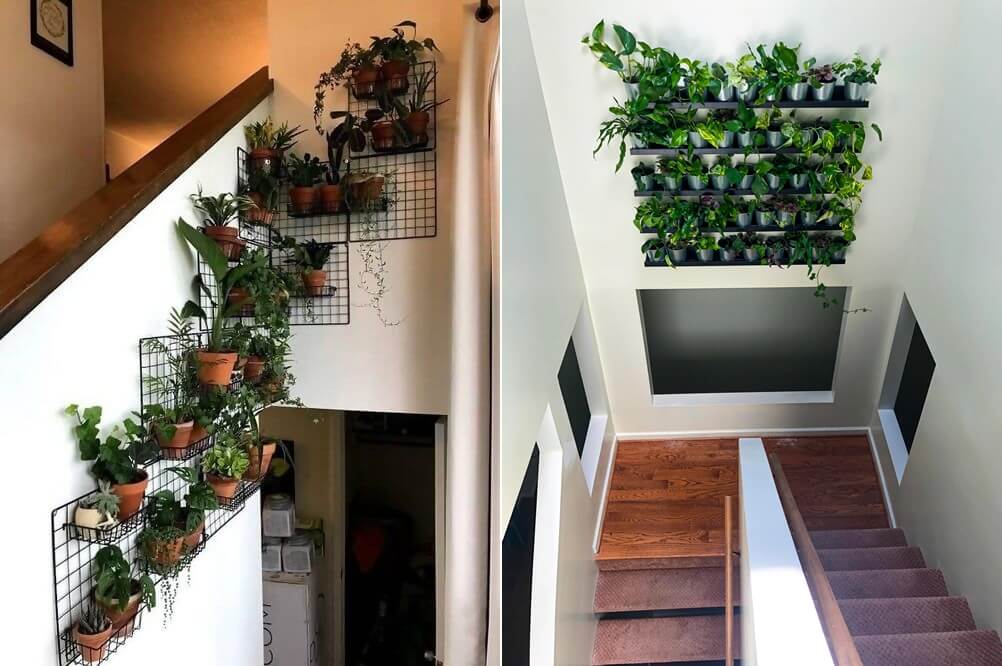
Picture this: It’s Sunday morning. Your coffee steams in hand as you sink into the sofa… but instead of staring at drywall or a tired old painting, your eyes meet a vibrant jungle—a tapestry of green alive with glossy leaves and trailing stems catching the sunlight. That’s what an indoor plant wall really is: nature woven into your daily life, changing with the seasons and rewarding you with cleaner air, better moods, and endless visual intrigue.
You might hear them called “living walls,” “vertical gardens,” or “green panels.” Don’t get hung up on terminology; focus on purpose:
- Maximize small space: My micro-apartment days taught me vertical beats horizontal every time.
- Make a statement: When friends visit for the first time? Expect awestruck silence before they ask, “How did you DO this?”
- Improve well-being: There’s science—and lived experience—behind greenery reducing stress and boosting creativity.
- Customize endlessly: Whether you crave minimalist modernity or boho jungle chaos, there’s a plant wall technique for you.
The Secret Ingredient
Every winning setup needs four things: sturdy framework, compatible plants (think roommates who like similar lighting), consistent light source (not just sun—more on grow lights soon), and manageable irrigation. Miss one? You’ll soon know why!
2. Laying Foundations: Insights You Won’t Find in Most Guides
The first time I tried mounting pots directly onto drywall—with dollar-store anchors—I spent two hours sweeping up shattered ceramic after gravity taught me its lesson. Here’s what years of trial-and-error revealed:
Survey Like Sherlock
Wall strength: Knock-knock test won’t cut it! Stand-alone shelves work for renters; older homes often hide brick under plaster—a blessing if you own a hammer drill.
Lighting: East-facing windows = goldmine for most foliage; west-facing can scorch unless filtered through sheers.
Humidity/airflow: Ferns love steamy bathrooms—but avoid direct AC blasts; your monstera will protest by browning edges.
Access matters: If you need acrobatics to water top rows, rethink placement!
The Six Systems I’ve Used (Wins & Fails)
- Individual Pots on Rails/Shelves – Classic IKEA hack; cheap but surprisingly stylish when grouped in threes/fives.
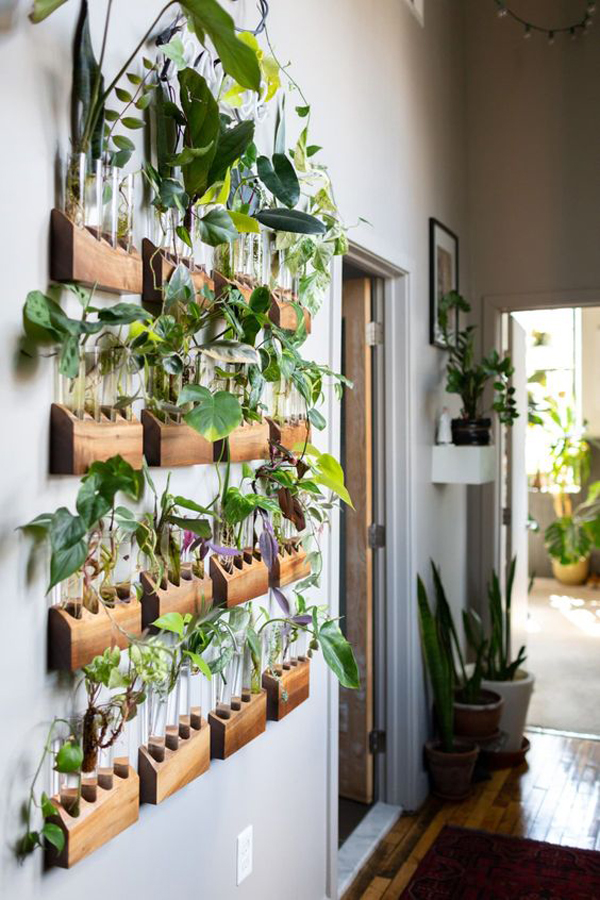
- Pocket Panels – Fabric-felt options are forgiving for beginners; herbs love these.
- Modular Kits – WallyGrow has never failed me (even survived three moves).
- DIY Pallet Gardens – Rustic charm without breaking the bank (but line pallets thoroughly! Water stains haunt careless prep).
- Hydroponic Panels – Click & Grow saved my sanity during travel-heavy months… but expect higher upfront costs.
- Staggered Shelving Rows – For commitment-phobes or serial rearrangers; lets you shuffle pots seasonally.
If you’re curious about the nitty-gritty of building your own setup, check out the step-by-step DIY indoor plant wall guide for practical instructions and pro tips.
Plant Pairings from Experience
Forget generic lists—here’s what actually survives inside real homes:
- Low light: Snake plant (indestructible!), pothos (“the comeback artist”), ZZ plant (“set it and forget it”)
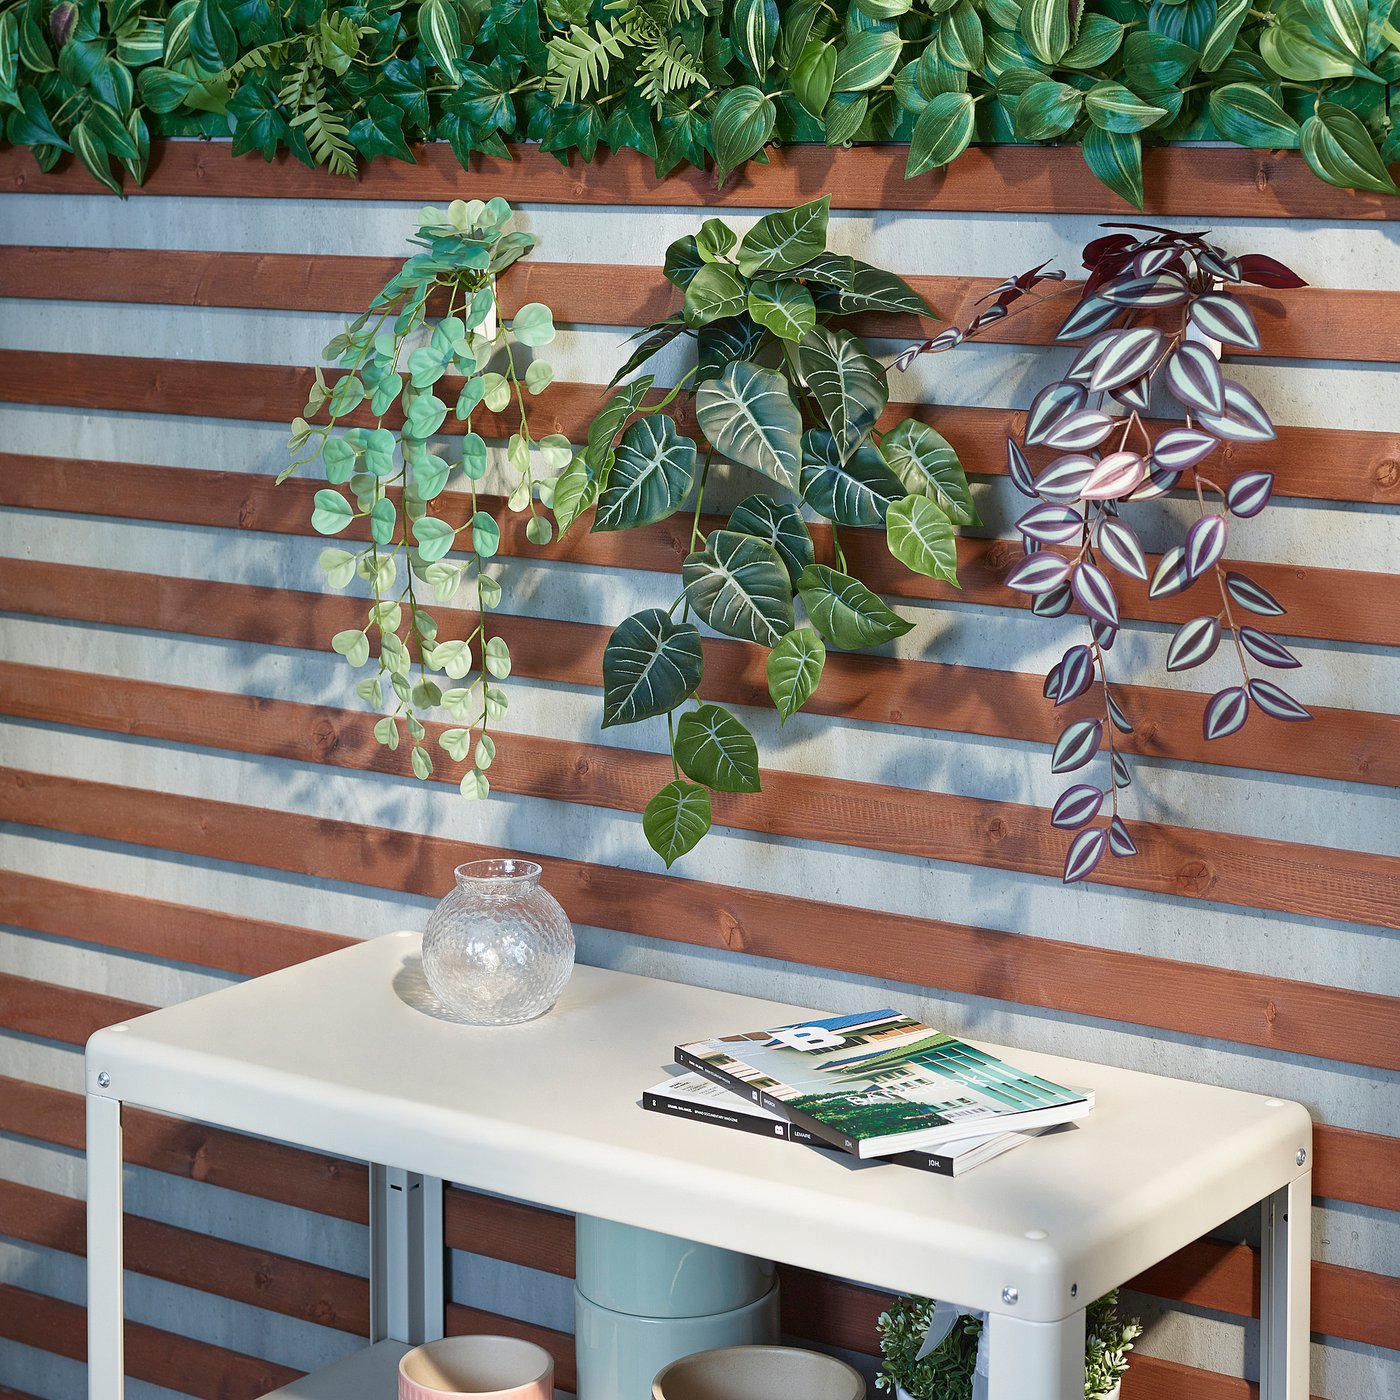
- Medium-bright: Peperomia (“petite but mighty”), ferns (“mist often!”), heartleaf philodendron (“trailing champion”)
- High light: Spider plant (forgives neglect), succulents (“only if natural light is strong”), kitchen herbs (“rotate frequently”)
Insider tip: If pets roam freely? Boston fern never triggered trouble in my household.
If you want more inspiration for easy-care greenery, see the best low-maintenance plants for indoor plant walls to get started with confidence.
Watering Wisdom Earned by Error
You will overwater—at least once! My early disasters taught me this mantra:
“Less is more indoors.”
Manual watering keeps control but needs discipline; self-watering reservoirs bridge gaps during holidays; drip lines suit techies willing to tinker.
3. From Idea to Reality: The Method Behind Memorable Walls
Let me walk you through the process as I’ve refined it over years—true confessions included.
Step 1: Gather Real Inspiration
Skip Pinterest overload paralysis by limiting yourself to five favorite photos—print them out! Lay them side-by-side on your project table so your vision stays focused when shopping starts feeling overwhelming.
Step 2: Measure With Ruthless Honesty
Tape measure in hand, map out potential “plant zones.” Mark outlets/windows using sticky notes—you’ll thank yourself later when planning irrigation/lights.
Back in 2019, my biggest lesson was skipping this step—and ending up with shelves that blocked half my window!
Step 3: Choose Wisely Based on Lifestyle
Ask yourself:
- Do I move often? Opt for easy-to-remove rails/shelves.
- Am I accident-prone? Modular kits are safer than balancing pots atop precarious ladders!
- Is this wall near electronics? Waterproofing becomes non-negotiable (a $30 plastic membrane beats $800 repair bills).
Cost breakdowns by system (from experience—not manufacturer estimates):
| System | Easy DIY Cost | Pro Install |
|---|---|---|
| Rails/Shelves | $50–$150 | $300+ |
| Pocket Panels | $40–$250 | $400+ |
| Modular Kits | $150–$500 | Varies |
| Hydroponic Panel | $300–$1000 | $2000–$3500 |
Step 4: Select Plants & Supplies Thoughtfully
I always buy an extra liner or pot—someone inevitably gets rootbound sooner than expected! Shop local nurseries for starter plants—they bounce back faster than mail-order ones battered by shipping woes.
Must-haves:
- Potting mix + perlite blend
- Mounting hardware rated +20% over target weight
- Waterproof backing material
- Drip trays if indoors near wood floors
Pro tool tip: A basic moisture meter ($10 online) changed everything for me—I no longer kill calatheas out of guesswork!
Step 5: Secure Everything Like You’re Childproofing
Stud finders save marriages and walls alike! Always anchor heavy features into studs or use heavy-duty toggle bolts rated above weight load—including soil plus water weight post-watering.
If working solo, lay planters out on floor first to preview arrangement—the “gallery method.”
Step 6: Arrange Plants Intuitively
Start bottom-up; put thirsty/bushy species lower where runoff collects naturally. Place trailers like string-of-hearts high so they cascade downward over bolder leaf shapes below—texture contrast creates designer polish every time.
My personal rule: If it looks odd now…reshuffle before adding soil!
Step 7: Dial In Lighting For Success
When winter darkness hits Toronto each November, my LED grow bars earn their keep—clip-ons do wonders for shadowy corners otherwise doomed to stagnation.
Set timers for consistency (~12 hours/day); don’t rely solely on memory.

If you’re unsure how to get the most out of your space’s natural and artificial light, don’t miss these lighting tips for thriving indoor plant walls to help your green wall flourish year-round.
4. Avoiding Classic Mistakes (And How Mine Turned Into Learning)
Let’s get real about failures:
Overwatering Fiasco #3
My third-ever attempt featured thriving pothos… until fungal gnats took over from soggy soil left unmonitored during vacation week.
Lesson learned? Stick finger into soil before watering again—it should feel dry at least halfway down!
Wall Collapse Panic
In Paris ‘17 rental apartment, mismatched anchors sent two shelves plummeting mid-dinner party—ceramic shards everywhere!
Lesson learned? Spend double time on secure mounting…and test weight BEFORE planting anything precious.
Mixing Divas With Drought Lovers
A rookie error grouping thirsty calatheas with drought-tolerant sansevieria led to serial casualties.
Lesson learned? Only housemates with shared water habits go together.
Skipping Barriers = Mold City
First studio flat saw telltale dark stains spreading behind felt pockets within weeks due to lack of waterproof backing behind planters.
Lesson learned? Always install plastic/membrane behind any system mounted directly onto finished walls.
5. Advanced Moves Only Years Will Teach You
Here’s where seasoned plant parents shine:
Integrate Smart Tech
Wi-Fi enabled timers paired with drip lines meant I could trek across Patagonia while philodendrons flourished unharmed back home—a true revelation after years fretting about missed waterings!
Go Hydroponic For Zero Mess
Click & Grow wall farms allowed salad greens all winter long—with NO gnats ever since switching from soil-based systems in kitchen areas prone to splashing messes.
Make It Edible AND Beautiful
Why not combine function + form? My proudest creation was turning a sunny breakfast nook into a living salad bar with alternating rows of basil, parsley, strawberries—even dwarf cherry tomatoes clipped fresh each morning.
Layer Like An Interior Design Pro
Incorporate upright palms behind low-sprawling ferns with pops of pink bromeliads tucked throughout—it draws eyes upward AND reduces evaporation below bigger canopy leaves.
6. Tools & Resources That Actually Save Headaches
Over dozens of builds—and hundreds spent testing silly gadgets—I stick by these essentials:
- Cordless drill (+ stud finder!)
- Pruning shears reserved ONLY for houseplants = fewer diseases spread between cuts
- Full-spectrum LED grow bar (Sunblaster T5HO)
- Moisture meter probe ($10 Amazon special)
- Waterproof plastic roll from Home Depot ($15 covers most projects)
- Digital timer plug-in smart switch—for peace of mind during travels
For supplies:
WallyGrow Eco Planters remain unmatched for value/durability;
Florafelt panels bring pro-level results;
Local nurseries almost always beat big-box stores on starter plant quality/variety;
Online deals peak every spring around Earth Day!
If you’re deciding between materials or unsure which planters suit your space best, this guide to choosing the right planters and materials for indoor plant walls breaks down the options for every style and budget.
7. True Stories From Real Homes — Not Just Instagram Highlights
Julia’s Brooklyn Rental Herb Wall
She texted last March in panic after basil wilted overnight near drafty window… solution was moving pocket panel two feet away from glass plus adding nightly misting ritual—a tweak that turned struggling stems lush within weeks.
Cost breakdown? Under $40 including temporary hooks/pots snagged secondhand at Housing Works thrift shop.
Caleb’s Home Office Green Backdrop
After countless Zoom calls against bare beige walls left him uninspired—and coworkers unimpressed—we installed three rows of modular eco-planters anchored into studs above his desk nook alongside full-spectrum lighting set via Alexa routines.
Result? Not only did productivity soar…but guests now ask if he works “in some cool WeWork location.”
Sophie’s Statement Living Room Jungle
Her biggest regret was skimping on initial waterproof lining behind her DIY pallet build—a fixable issue once caught early thanks to regular inspection/maintenance built into her monthly cleaning calendar.
Manoj's Automated Smart Garden
Reluctant at first about hydroponics’ upfront cost (~$550 Click & Grow panel kit), he hasn’t lost a single herb since setup last fall—even after three business trips abroad.
8. Troubleshooting Like A Seasoned Gardener
Over time you'll see familiar faces among problems—the secret is acting fast:
| Symptom | Root Cause | Solution |
|---|---|---|
| Yellow leaves | Too much water | Check drainage holes; cut back frequency |
| Wilting | Air too dry/not enough water | Mist daily esp near heaters |
| Crisp tips | Low humidity | Group plants OR add pebble tray |
| Spots/webbing | Spider mites/pests | Treat immediately w/neem spray |
| Mold smells | Poor ventilation | Open windows/use fan weekly |
Best advice ever given me by an old nursery owner?
“If something dies…replace it without guilt! Even pros lose leaves now and then.”

For ongoing care and troubleshooting, see the full guide on how to care for and maintain indoor plant walls to keep your vertical garden thriving season after season.
9. Ten Steps To Your First Show-Stopping Plant Wall
Here’s how I'd tackle any new build today:
1️⃣ Pinpoint style inspiration—not just any trend but what YOU want long-term
2️⃣ Take precise measurements twice before buying anything!
3️⃣ Pick structure/system fitting lifestyle AND skill level
4️⃣ Decide how/where light will reach every row—not just top shelf!
5️⃣ Select beginner-friendly plants matched by care needs
6️⃣ Stock up all supplies/tools ahead so momentum doesn’t stall mid-project
7️⃣ Prep surfaces thoroughly including waterproofing ANY area exposed to moisture/drips/water changes
8️⃣ Anchor framework solidly—you want zero midnight crashes!
9️⃣ Arrange/pot thoughtfully; group species visually AND based on sunlight/thirst levels
🔟 Set recurring reminders/calendar events post-installation so maintenance becomes routine not chore
Bonus tip: Celebrate progress often—even tiny new leaf unfurlings deserve photo documentation!
10. Taking Pride In Progress — The Long View
What no one tells you upfront is this: Your plant wall will change with seasons…and so will you as its caretaker.
Some months it'll burst forward spectacularly—as mine did during summer ‘21 when south-facing window suddenly yielded blooms everywhere after months looking half asleep. Other times you'll troubleshoot yellow leaves or scold fungus gnats—but that's part of nurturing something alive right inside your home instead of outside it.
Try swapping out one row each quarter for seasonal color shifts—or join local swap groups who trade cuttings/community wisdom regularly online (#houseplantclub changed so much about how I approached care).
Document growth stages through photos/journals—you’ll inspire others still staring at blank walls unsure where to begin.
Remember above all else: Each mistake means next season goes better…and every thriving vine across those newly-green walls whispers proof you've brought life indoors not only beautifully—but bravely too.
So grab that measuring tape tonight—the future urban jungle begins wherever you're ready enough to start building yours today.


