Why Pot Drainage Holes Matter: Prevent Root Rot and Save Your Plants
Let’s rewind to a few years ago, when I first got swept up in the houseplant craze. My apartment was pretty basic—a little sunlight here, a lot of chipped paint there—but I figured a jade plant or two could make it feel like home. What I didn’t expect was that my biggest battle would be with pots, not pests.

Cue me in the aisle of an artsy ceramics shop, holding a gorgeous navy-blue planter. No hole on the bottom. The shopkeeper—an obvious plant enthusiast with soil under her nails—saw me hesitating and said, “Just add pebbles for drainage. Works fine.” So I paid $35 for the pot and another $6 for a bag of pebbles.
I wish someone had told me then: most plant advice gets way too technical—and sometimes, flat out wrong. If you can’t remember what perlite does or which drill bit is best for porcelain, you’re in good company. Nearly every plant parent starts here.
Here’s what I learned (the hard way) about drainage holes—and how I keep things easy now:

The One Rule That Actually Matters
Every expert has a system: triple-watering schedules, moisture meters calibrated to decimal points, elaborate substrate blends… but if your pot doesn’t have at least one decent hole in the bottom? None of that matters.
My poor jade plant—a survivor by reputation—sat in waterlogged soil above those decorative pebbles and rotted quietly all summer. The pebbles did nothing except ensure my carpet got muddy when I finally tipped it out.
The real secret:
You don’t need fancy tools or advanced knowledge. You just need water to escape somewhere. That’s it.

Drainage Made Ridiculously Simple
Here’s what works, after trying every convoluted hack:
1) Use What You Already Have
Ninety percent of store-bought plants come in ugly plastic nursery pots—with holes already punched in the bottom (usually three). Before you repot into something stylish, ask yourself: does this new container have holes? If not—just drop the nursery pot right into your decorative one. Take it out to water; slide it back when dry.
No drills, no drama.
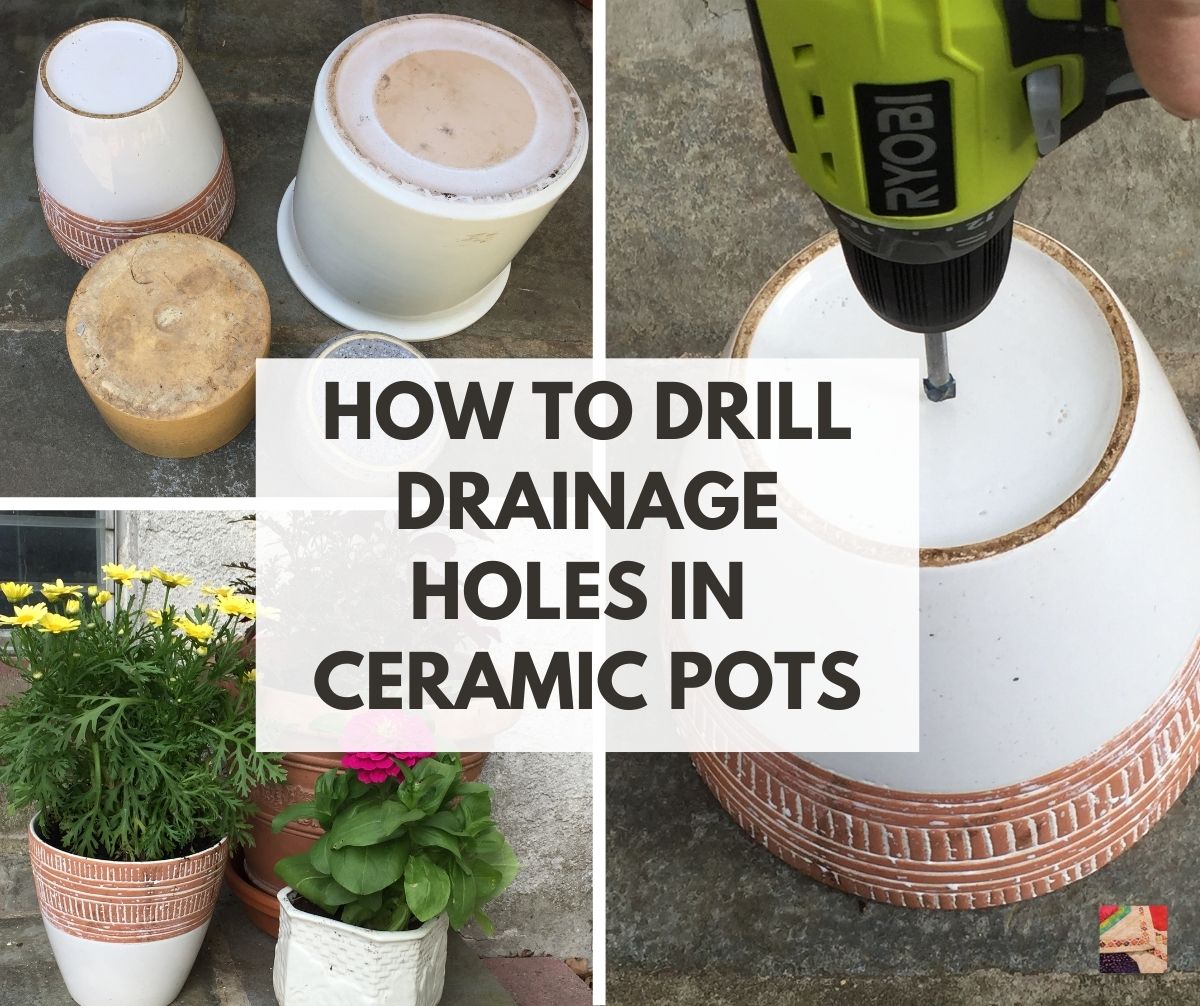
2) Drilling Without Fear
When you want to commit fully—and yes, this took me two ruined pots and one minor thumb injury to learn—here’s the actual low-stress technique:
- Ceramic & Terracotta: Wrap masking tape where you’ll drill (stops cracks). Start with the smallest masonry bit you’ve got—not bigger than your pinky nail.
- Plastic: Even a heated skewer or an awl works if you don’t own power tools.
Keep your expectations low for your first try—I’ve made more lopsided holes than I care to admit.
3) Repurposed Planter Tricks
Got yogurt containers? Poke four holes with scissors—instant herb planters that work better than anything from a catalog.
4) “Don’t Overthink It” Cachepot
Can’t bear to poke Grandma’s teacup? Use it as-is; just keep your plant living inside its practical plastic pot within. Looks great on shelves and lets water drain away somewhere safe—the sink or even outside on your stoop.

Debunking Overcomplicated Advice
Forget gravel layers unless you like wet feet on roots (imagine standing barefoot in cold puddle water—that’s what plants feel). Water doesn’t magically leap over rocks; it sits on top. If there are no holes...you’re just making mud pies with expensive planters.
Moisture meters help if you’re nervous, but honestly? Stick your finger an inch down into the soil—it should feel barely damp before watering again.

Real Stories From My Plant Graveyard
- My first snake plant lasted five weeks because I trusted “decorative stones” instead of drilling.
- A friend named Tina bought three succulents in thrifted mugs… only survived after she started jabbing small screwdriver holes through their bases. Now she’s known as “the mug gardener” around her building.
- One neighbor uses takeout soup containers for basil starts each spring. She pokes five quick holes using her embroidery scissors while watching TV!
All these stories share one moral: simple fixes work best—and learning by doing beats perfection every time.
Quick Troubleshooting Checklist
- Already potted up without drainage? Water less until you can fix it—or repot sooner rather than later.
- Worried about mess indoors? Saucers under pots save floors and window sills from streaks.
- Scared of drilling glass/ceramic? Practice on something cheap first—or just stick with double-potting until confidence builds.
- Soil turning soggy anyway? Check that roots aren’t blocking drainage; tease them loose at next repotting session.
Why This Matters (and Why Experts Forget)
Plant care shouldn’t feel like prepping for an exam—it should be forgiving and fun. Most experts have forgotten that not everyone wants shelves full of gear or hours spent researching substrata ratios online.
If you get drainage right—even just sticking with nursery pots tucked inside pretty cachepots—you’ll avoid ninety percent of beginner mistakes without ever needing special skills or expensive supplies.
Every lush windowsill garden grew from one simple truth: let excess water out, and let air flow reach those roots.
Your Next Steps—No PhD Needed
- Flip over every pot tonight—you only need eyes and curiosity.
- Rescue any “closed-bottom” cuties by double-potting or gently drilling (with tape if ceramic).
- Try making a recycled seedling tray from yesterday’s yogurt cup—it’ll outperform store displays!
- Share this tip with one new plant parent today—they’ll thank you months from now.
- Celebrate tiny wins! Every healthy leaf = proof simple solutions work best.
I still keep my blue ceramic misfit as a reminder: ignore over-complicated advice, trust what makes sense, and never underestimate the power of one little hole at the bottom of things—even (especially!) if nobody else can see it but you and your thriving plants.


