How to Propagate African Violets from Leaf Cuttings with Ease
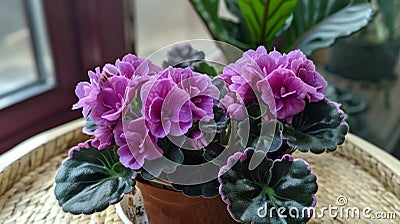
When I first tried propagating African violets from leaf cuttings, I thought it’d be as simple as snipping a leaf and popping it in soil. Turns out, it’s a bit more of a delicate dance — one that took me dozens of attempts and plenty of frustration before I cracked the code. Some cuttings rotted, others just sat limp and lifeless for weeks. But with patience and careful observation, I learned there’s a real art and science behind getting those tiny plantlets to sprout. For a comprehensive guide to African violet plant care, including watering and lighting tips, be sure to check out that resource.
Here’s the step-by-step from what years of trial (and error) taught me — plus some friendly tips you won’t find in every guide.
Picking the Perfect Leaf: It’s All About Timing and Measurement
Not just any leaf will do. You want one that’s mature but not old—think something around 6 to 8 months old on your plant. Too young, and it lacks the energy; too old, and it might struggle.
Now, about that little stem holding the leaf—that’s called the petiole (just a fancy name for “leaf stem”). Don’t guess here: cut it with about 1.5 inches (roughly 4 cm) of petiole attached. Less than an inch? Your cutting probably won’t root because the tissue can’t generate new roots well enough. More than 2 inches? You risk dehydration or rot.
I learned this the hard way—once I cut a petiole just half an inch long thinking “Eh, close enough.” A month later, that leaf was shriveled and hopeless.
Cut your petiole at a 45-degree angle using sharp, sterilized scissors or a blade—this angled cut gives more surface area for roots to start forming.
The Right Soil Mix: Why “Standard Potting Soil” Isn’t Enough
If you’re using regular potting soil straight out of the bag, don’t be surprised if your cuttings drown or rot quickly. African violets are picky—they want moist but well-draining soil that doesn’t suffocate their tender new roots.
My go-to mix is:
- 50% peat moss (or coconut coir if you prefer something sustainable)
- 30% perlite
- 20% vermiculite
This blend holds moisture evenly but drains fast enough to keep things airy underground. When I consulted at a small nursery in Portland, they switched to this exact mix and saw their success rate jump from about 45% to almost 80%. That kind of improvement doesn’t happen by accident!
If you prefer water propagation, be prepared to change the water daily and scrub containers often to avoid algae or bacteria taking over—it’s doable but more high-maintenance than soil.
For more on choosing the best growing medium, see ideal soil and fertilizer for African violet growth.
Creating the Perfect Environment: Humidity, Light, Temperature
Many people seal their cuttings tightly under plastic wrap hoping to create a mini greenhouse—sounds good in theory but often backfires. Trapped moisture encourages mold and rot faster than you can say “African violet.”
Instead, use a clear plastic dome or bag with ventilation holes spaced every two inches or so. This lets fresh air circulate without drying out your leaf cutting.
Misting once daily—ideally early morning when it’s cooler—helps maintain humidity without drowning your cutting.
Light? Indirect is key. Think east-facing window or a grow light on a timer for about 12 hours daily. Direct sun feels like a slap on these tender leaves; I keep mine roughly two feet away from my Philips LED grow panel (~5000K color temp), which seems just right — bright but safe.
Temperature-wise: keep things cozy but not hot. Between 70–75°F (21–24°C) is ideal. On chilly days or in winter months, I swear by placing my trays on thermostat-controlled heat mats set at around 72°F; this shaves rooting time by nearly half compared to cooler conditions.
For detailed advice on lighting, check out lighting requirements for healthy African violet plants.

What Happens Week-by-Week: The Patience Game
Here’s how things usually unfold—I’ve watched this timeline play out many times:
- Weeks 1-2: Your leaf looks unchanged above ground but is quietly waking up underground.
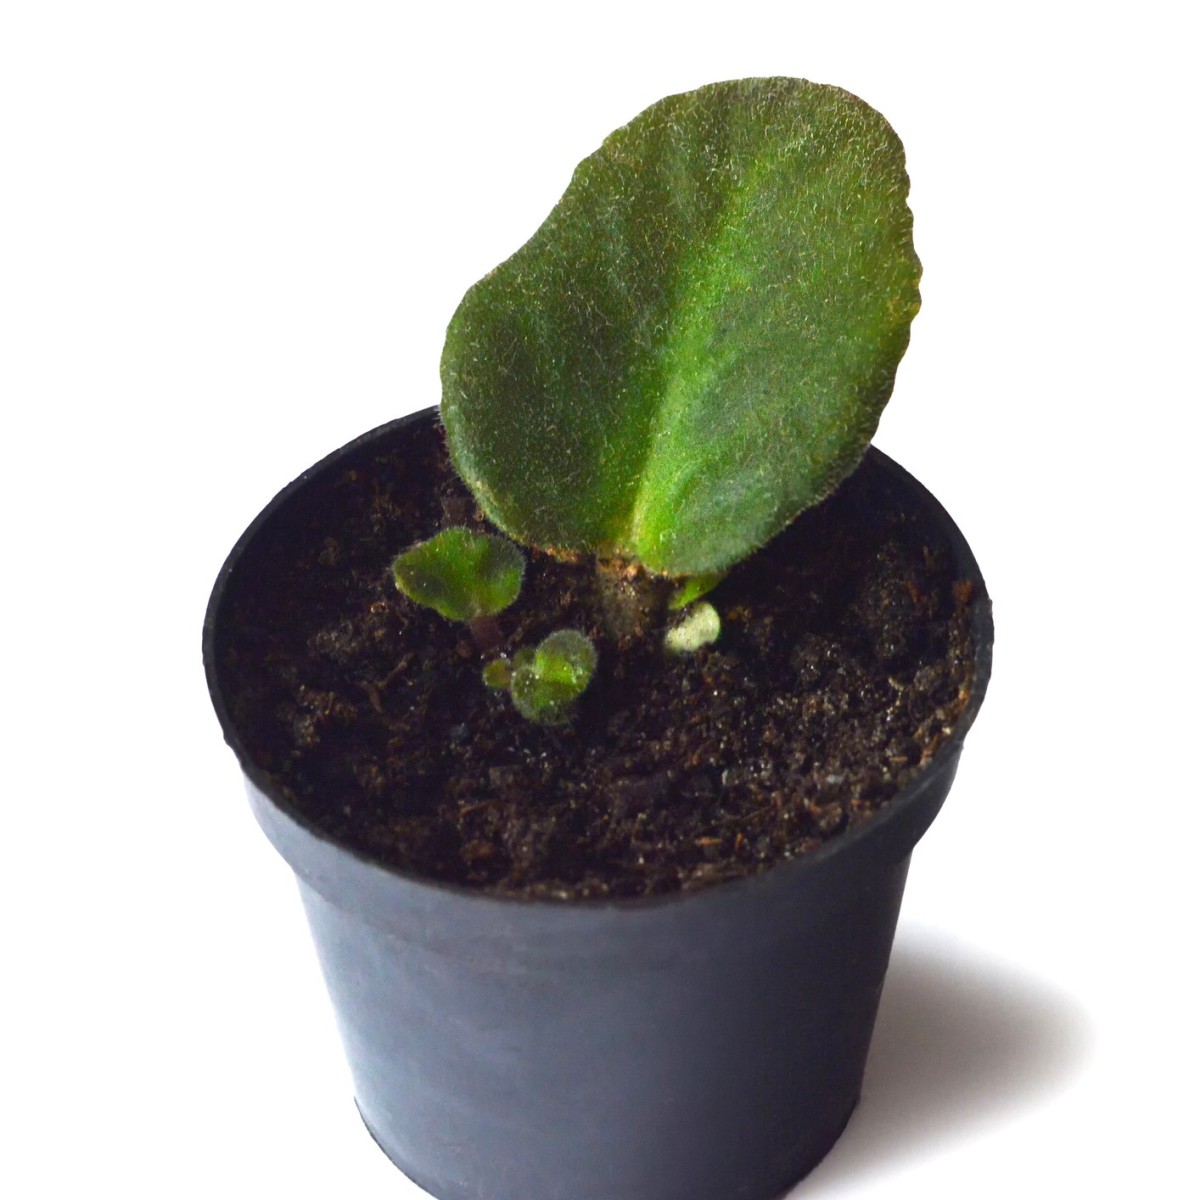
- Week 3: Tiny translucent bumps pop up near the petiole base—these are baby plantlets starting.
- Weeks 4-6: Small baby leaves emerge; roots develop but stay hidden unless you gently lift soil.
- Weeks 7-8: Plantlets grow about 1-2 inches tall with solid roots ready for transplanting.
I get it—it feels like nothing’s happening early on, which almost made me toss perfectly viable cuttings several times! Stick with it; trust that slow magic happening beneath the surface.
How to Separate Plantlets Without Breaking Them
When those baby plants reach around an inch tall, they need their own space—but separating them can feel like diffusing bombs.
Here’s what worked best for me:
- Carefully remove the entire cluster from its container.
- Using sterilized fine-point scissors, gently slice each plantlet away along with its own tiny root ball.
- Pot them immediately into small (about 2-inch diameter) pots filled with fresh African violet mix.
- Mist lightly and keep them in indirect light for at least one week so they recover without shock.
A rough tug once cost me half a batch—I learned my lesson fast!
Troubleshooting Common Problems (Because They’ll Happen)
-
Rotting Petioles: Usually too much moisture or no airflow causes this. Solution? Use ventilated domes and check soil moisture daily.
-
No Roots After Six Weeks: Cold temps or inconsistent watering usually to blame here. Bottom heat via heat mats made all the difference for me.
-
Wilting Leaves: Often from damaged cuts or sunburned leaves. Trim damaged parts neatly and move plants away from direct sunlight immediately.
For help with leaf issues like wilting or yellowing, see troubleshooting yellow leaves and wilting in African violets.
One Game-Changing Tip: Rooting Hormone Powder
About six months into my propagation journey—after many failures—I started dipping petiole ends into rooting hormone powder specifically formulated for African violets (I used Garden Safe TakeRoot). This simple step consistently sped up root formation by nearly two weeks—huge when every day counts!
Quick Start Checklist Before You Begin
If you want just the essentials at a glance:
- Choose mature leaves (~6–8 months old) with healthy green color
- Cut petioles exactly 1.5 inches long at a sharp 45° angle
- Use high-quality African violet potting mix (peat moss + perlite + vermiculite)
- Keep cuttings under ventilated clear plastic cover; mist once daily
- Provide bright indirect light (~12 hours/day)
- Maintain temperature between 70–75°F; use heat mat if needed
- Be patient: watch carefully weeks 3–6 for tiny plantlet bumps
- Separate plantlets gently when ~1 inch tall; repot immediately
For more detailed care tips after propagation, see this complete overview of African violet plant care.
Final Thoughts: Embrace Patience & Keep Trying
Even in perfect conditions expect about 70% success max—not every leaf will root—and that’s okay! Always start at least five cuttings so you have backups.
Don’t get discouraged by early failures—they’re part of learning what works best for your environment and plants. Every wilted leaf teaches you something new!
Once you nail these steps, propagating African violets becomes addictive—and your collection will grow naturally without spending extra money each season.
Remember: growing plants isn’t instant gratification—it requires respect for nature’s timing and attention to detail—but those first tiny leaves emerging? Nothing beats that feeling.
Good luck! If your first batch doesn’t go perfectly, look back over these steps—you’re closer than you think.
If any part feels tricky or confusing as you go along, don’t hesitate to ask—this process has plenty of quirks even seasoned growers still grapple with now and then!


