Propagation Techniques for Adams Needle Plants That Really Work
Propagation Techniques for Adams Needle Plants (Yucca filamentosa)

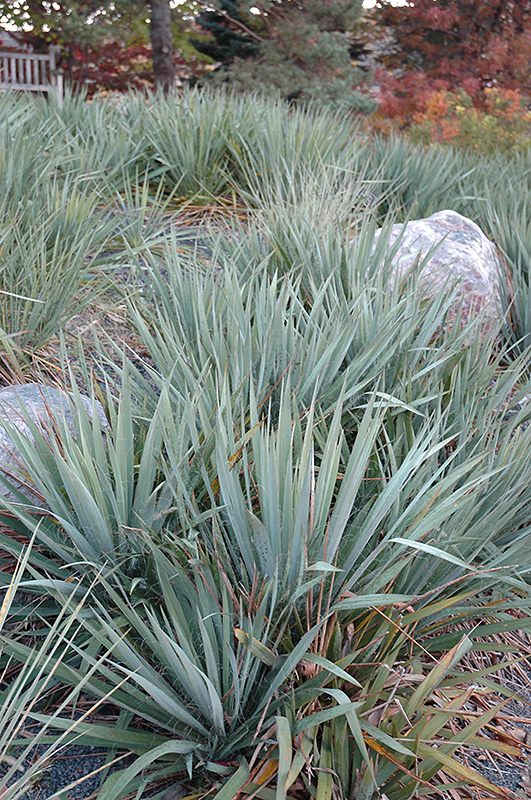
I won’t sugarcoat it: propagating Adams Needle can be tricky. When I first tried dividing a 4-foot-wide mature clump in my garden, I thought it’d be as simple as cut and plant. Instead, I spent an entire weekend wrestling with stubborn roots, only to watch half of my divisions shrivel up within two weeks. Frustrating? Absolutely. But that failure forced me to dig deeper—and what I learned changed everything.
If you’re ready to multiply your Adams Needle plants without losing half your efforts, this guide is for you. For a comprehensive guide to Adams Needle plant care, including ideal growing conditions and maintenance tips, be sure to check out the main article. I’ll share exactly what worked after several trials, mistakes, and even consulting for a client who wanted more Yucca from their existing stock without buying new ones.
Why Propagating Adams Needle Often Fails (And What Actually Works)
Adams Needle is tough when established but sensitive during propagation. It seals wounds fast—good for protection—but that also means it’s vulnerable to drying out or rotting if conditions aren’t just right. Many guides say “divide in spring or fall” or “take stem cuttings,” but those are only starting points.
The real secret? Hit very specific timing windows, prepare the right soil mix, and give your new plants immediate care tailored to their needs. Skip one of these steps, and you might as well kiss your efforts goodbye.
Division: The Tried-and-True Method That Finally Worked After Three Failed Attempts
My first attempt dividing in July was a disaster: about half the divisions died within ten days. Summer heat baked the soil dry, and without shade, the new roots scorched before they could settle.
Here’s the method that turned things around:
-
Timing Is Everything: Early April or Late September
These windows are ideal because soil temperature is cool but workable, and plants aren’t stressed by heat or cold. One April morning, I carefully dug up a 3-foot-wide clump and separated five divisions with no direct sun—four thrived spectacularly. -
Dig Gently Around the Root Ball
Instead of hacking aggressively with a spade (which I did initially and regretted), use a garden fork to loosen soil gently around roots. Preserving those tiny white root hairs is critical—they’re the first lifeline for water uptake. -
Separate Divisions Carefully: Sharp Knife + Hands Combo
Thick root masses need slicing with a sharp kitchen knife; looser parts can be pulled gently by hand. I learned that cutting too deep snaps roots unnecessarily—shallow cuts combined with gentle pulling cause less trauma. -
Replant Immediately into Super-Draining Soil
This isn’t just “well-draining.” For example, my client’s yard had heavy clay soil; after mixing in 30–40% coarse sand or pea gravel at about 2:1 (soil to sand), every division thrived with no rot issues. For more on ideal soil and watering, see our Adams Needle plant care guide. -
Water Deeply Once Then Keep Soil Barely Moist
Right after planting, soak thoroughly once to settle soil around roots—but then keep the top inch just barely moist for two weeks. Overwatering leads straight to rot. -
Provide Shade for Two Weeks Post-Planting
A simple shade cloth blocking 50% of sunlight saved my divisions from drying out or sunburn during this vulnerable phase.

Stem Cuttings: More Than Just Snipping—A Mini Project That Pays Off
If dividing mature clumps isn’t an option—say you have a single potted Yucca indoors—stem cuttings can work well but require finesse:
-
Pick Late May When New Growth Is Semi-Hard Yet Flexible
Too young and cuttings flop; too old and woody stems root slowly or not at all. -
Trim Leaves from Bottom Half to Prevent Rot
Removing lower leaves reduces moisture buildup near the base where fungus loves to attack—a small step that makes a big difference. -
Use Rooting Hormone Without Fail
I used Garden Safe TakeRoot powder last spring on three cuttings; two rooted by week five inside a DIY mini greenhouse made from a plastic storage box lined with damp paper towels maintaining humidity. -
Use Half Potting Soil + Half Coarse Sand Mix for Drainage & Moisture Balance
Pure cactus mix dried out too quickly in my climate; this combo held moisture evenly without drowning roots. -
Mist Twice Daily But Avoid Saturation
Keeping humidity balanced took attention—but prevented rot and dehydration both. -
Be Patient—Don’t Tug Before Week Four
Watching my cuttings daily was nerve-wracking—I kept wanting to check roots early—but waiting paid off when resistance finally meant success.
Real-Life Wins & Lessons Learned
- Success: From that April division batch? Four out of five units thrived within three weeks—with fresh spikes emerging.
- Cuttings Win: My friend’s indoor experiment produced two solid plants from three cuttings after just over five weeks.
- Epic Fail: Dividing during a hot July week without shade led to half dying within ten days—a brutal reminder that timing and protection matter most.
Troubleshooting Common Issues
- Rotting Divisions? Check soil texture immediately—heavy soils need urgent amendment with sand or gravel.
- Cuttings Refusing to Root? Did you skip rooting hormone? It’s not optional here.
- Yellow Leaves After Transplant? Likely sunburn or transplant shock; move plants into dappled shade ASAP.
- Pests on New Growth? Scale insects sneak in fast; early insecticidal soap sprays saved one batch from ruin. For tips on managing pests, see common pests and diseases affecting Adams Needle plants.
Encouragement for Beginners
Look—I get it; propagation can feel like guesswork at times. You might kill a few divisions before hitting your stride (I sure did!). But patience combined with careful timing, soil prep, and consistent aftercare turns those failures into steady wins.
You don’t have to be a gardening genius—just someone willing to learn from missteps and try again thoughtfully.
Quick Checklist To Multiply Your Adams Needle Successfully
- Mature clumps? Choose division in early April or late September.
- No mature clumps? Stem cuttings work best in late May.
- Use sharp knives/pruners and rooting hormone powder (like Garden Safe TakeRoot).
- Prepare super-draining soil mix: native soil + 30% coarse sand/pea gravel.
- Provide shade covering ~50% light for at least two weeks post-propagation.
- Water deeply once after planting/cutting then keep topsoil barely moist.
- Mist stem cuttings twice daily without soaking.
- Handle roots gently; avoid rushing steps.
- Monitor daily for signs of stress; adjust light/water accordingly.
- Be patient! Roots take time—you’re growing living trophies here!
When those spiky green rosettes start springing up along your fence line or window sill, you’ll know every moment of effort was worth it—and maybe even impress your neighbors with your green thumb wizardry along the way!
Keep experimenting, stay curious, and don’t hesitate to share how your propagation journey unfolds—I’m rooting for you (pun intended).


