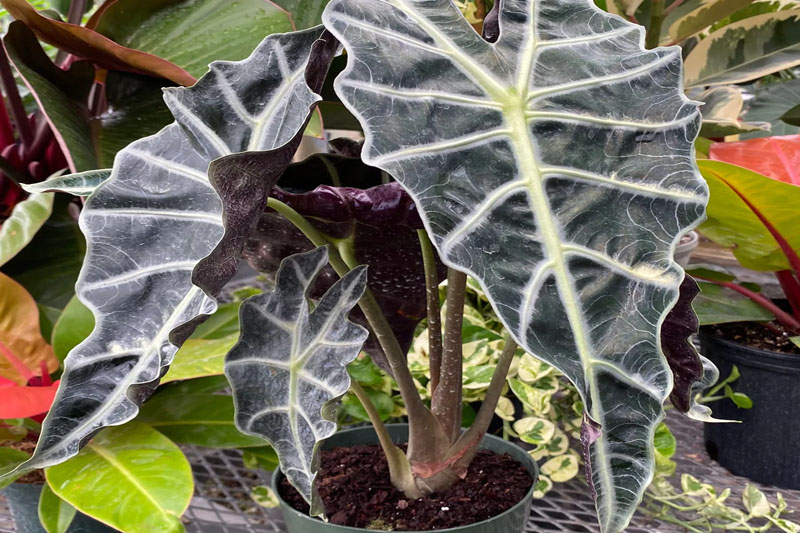
Master African Mask Plant Propagation: Grow Your Green Haven Today
I used to think propagating my African Mask Plant (Monstera adansonii) was as simple as snipping any healthy-looking vine, dunking it in water, and waiting patiently for roots. Spoiler alert: that’s a rookie mistake. After killing three cuttings in a row, I realized the trick isn’t just cutting—it’s knowing exactly where and how to cut, and then treating each cutting like a fragile little plant with its own quirks. For a comprehensive guide to African Mask Plant, understanding the plant’s growth habits is key.

Here’s something almost no one tells you upfront: If your cutting doesn’t have a node and an aerial root, you’re basically tossing a lifeless stick into water and hoping for magic. Watching limp stems rot away while wondering why everyone online made it look so easy was frustrating, to say the least.
Rethinking Propagation: The Node and Aerial Root Are Your Best Friends
Forget the vague advice to “just take stem cuttings.” The real game-changer is targeting that tiny bump on the vine called the node—the spot where leaves attach and roots want to grow. It’s like the plant’s root factory. And if there’s an aerial root nearby (those tiny hair-like things), consider it your golden ticket.
For example, I once took a 4-inch stem that looked perfect but didn’t have a node. Six weeks later? No roots. Total waste of time. Then I grabbed another cutting just below a node with a tiny aerial root—boom! Roots popped up in exactly 15 days.
So next time you’re ready to snip, look closely for:
- A visible node (small swollen bump)
- An aerial root near or right at the node
Without both, you’re basically playing gardening roulette.
Water vs. Soil: Pick One—and Stick With It
You might hear “just put it in water or soil,” but switching back and forth? That kills your chances.
Water propagation tips:
- Wait until roots are at least 2 inches long before moving to soil.
- Change water every 3 days like clockwork—no skipping! I once got lazy and left water for 10 days; cuttings turned slimy and stinky fast. Lesson learned: fresh water = happy roots.
Soil propagation tips:
- Don’t use regular potting soil; it holds too much moisture and causes rot.
- Use a mix heavy on perlite or orchid bark for drainage—something like 70% peat moss + 30% perlite works great.
- Keep humidity high with a mini dome or plastic bag (poke holes for airflow).
- Keep soil barely moist—not soggy!
My friend’s first attempt with regular soil failed in 10 days flat. We switched her to a peat-perlite mix plus humidity dome—and four weeks later, roots flourished. For more on the best environment, check out our guide on ideal lighting and soil conditions for African Mask Plant growth.
Light: Bright Indirect Is King (Not Direct Sun)
I’ve seen people swear by bright, even direct sunlight to speed rooting—but honestly? That’s more likely to fry your delicate cuttings or dry out their growing medium before roots establish.
Bright indirect light is what your cutting craves.
One summer afternoon, I accidentally left mine on my south-facing windowsill—the leaves crisped brown within hours! Moving it back near an east window with filtered light brought it back from the brink after trimming burnt leaves off.
What I Learned From My First Failed Attempts
Before getting this right, here’s what I did wrong:
- Snipped random vines without nodes → zero roots (big surprise).
- Left leaves underwater → instant rot.
- Used dirty scissors → bacterial infections killed new roots.
- Ignored humidity → slow rooting, leaf drop.
The breakthrough came when I combined these habits:
- Sharp, sterile pruners (I swear by Fiskars).
- Selecting stems with visible nodes + aerial roots only.
- Cutting cleanly just below nodes.
- Removing lower leaves so none sit underwater.
- Changing fresh filtered water every 3 days for water propagation.
- Keeping consistent warmth around 72°F (22°C).
- Bright indirect light + daily misting or humidity dome when propagating in soil.
Three weeks later? Thick white roots showed up, new leaves unfurled—success!

Real-Life Success Story: From Frustration to Thriving
Here’s my exact story: After four failed cuttings over two months—all missing those crucial nodes or drowned leaves—I finally took a 5-inch stem with two nodes and an aerial root from near the base of my Monstera adansonii.
I snipped just below the lower node using sterilized Fiskars shears, stripped off the lowest leaf touching water, placed it in filtered spring water near my north-facing window (~70°F), and faithfully changed the water every three days.
What happened next?
- Day 7: Tiny white nubs appeared at the node.
- Day 15: Roots about 1 inch long.
- Day 21: Roots thickened past 2 inches.
- Day 22: Potted into peat-rich soil mix with perlite (70/30), kept under humidity dome.
- Week 4 post-potting: New aerial roots sprouted on the potted cutting itself!
Today? That plant has doubled in size and looks healthier than ever—all because of those little details most people skip over casually.
Air Layering: When It Makes Sense
Air layering sounds fancy but is perfect when you want new plants without sacrificing entire vines.
Here’s how I do it:
- Find a healthy stem still attached to parent plant.
- Slightly nick just below a node without cutting through completely.
- Wrap moist sphagnum moss tightly around wounded area.
- Seal with cling wrap; poke tiny holes for airflow.
- Check weekly; after about 4 weeks thick roots grow through moss.
- Cut below root zone and pot up gently—no shock!
This saved me when I wanted multiples without losing long trailing vines—a total win-win!
Quick Troubleshooting & Encouragement
Feeling stuck? Here are some common hiccups:
| Problem | Cause | Fix |
|---|---|---|
| No roots after 3+ weeks | Cutting lacks node/aerial root | Choose stems with visible nodes + aerial roots |
| Leaves turning yellow/brown | Leaves submerged or too much sun | Remove lower leaves; move cutting to bright indirect light |
| Slimy/mushy stems | Water not changed regularly | Change water every 3 days; keep environment clean |
| Slow rooting | Low humidity or temperature | Use humidity dome; keep temps ~70–75°F (21–24°C) |
Remember: propagation is part science, part patience, part TLC—and sometimes downright frustrating! It’s normal to feel stuck or impatient before those first roots pop up. For more on keeping your plant healthy, see common pests and diseases affecting African Mask Plants.
What To Tell Your First-Time Propagator Friend
If you’re just starting out:
Don’t blindly “cut and dunk.” Find nodes with aerial roots first—that one step alone saves endless frustration!
Treat each cutting like your newest baby—fresh water changes, trimmed dead leaves, stable warm indirect light—and be patient exactly three weeks before panicking or trying again.
Think of those three weeks like babysitting toddlers—you check often but don’t smother them with fussing or overwatering.
Getting African Mask Plant babies isn’t luck—it’s careful science mixed with gentle TLC informed by trial and error. Want faster results than average advice promises? Invest effort upfront choosing exactly where you cut—and how you care for those vulnerable cuttings during their critical early stage.
Grab your sterile snips now—the next healthy vine on your plant could be tomorrow’s thriving Monstera superstar! And hey, if all else fails… well, at least you tried — because even green thumbs had their ugly baby steps before they got there!


