Quarantine New Plants Like a Pro: Boost Their Health and Growth Fast

No one ever forgets their first quarantine lesson. Mine came in 2011—the year I scored a nearly flawless variegated pothos straight off the back of a delivery truck. It looked perfect at checkout, but by week two, I was plucking tiny thrips out of crevices with tweezers under my reading lamp. That was the day I stopped trusting “looks healthy” as a safety guarantee and got serious about isolation.
Here’s what experience has taught me (often the hard way):
Quarantine Is Less About Paranoia—More Like Plant Insurance
At least once each year, a plant that looked spotless slips something into my home: last April, a shipment from a reputable online vendor arrived with not-so-visible fungus gnats curled in the potting mix. Had I skipped my makeshift quarantine—a plastic bin with ventilation holes and a cheap LED panel clipped to the rim—those gnats would have found every moist pot on my desk.
It’s never about whether you trust yourself or your source; it’s about accepting that nature always hides surprises.
Secret from the trenches:
Growers at commercial greenhouses live by “trust but verify.” Their intake rooms look like sci-fi airlocks for a good reason; even one missed outbreak costs them thousands. At home? A $10 clear storage tote, some duct tape screens for airflow, and any south-facing corner get 90% of the job done.
What “Quarantine” Actually Looks Like:
Forget fancy plant tents or quarantining across ZIP codes. In three different apartments over eleven years, here are solutions that worked better than any Pinterest-perfect setup:
- My go-to move: Place new plants on a cheap baking rack in the bathtub (shower curtain closed for true separation). If light is an issue, clamp an LED lamp directly above.
- No spare bathroom? Stack your main collection on one side of any room; park newcomers six feet away behind a temporary barrier (a sheet works if you need improvisation).
- For small plants: Storage bins with mesh inserts allow air exchange and let you visually inspect daily without ever moving them close to others.
- Personal must: Colored sticky traps around quarantined zones—if they’re black after five days, something is definitely hiding out.
Myths Dissected by Years-On-The-Ground Reality
“If it looks fine, it’s fine.”
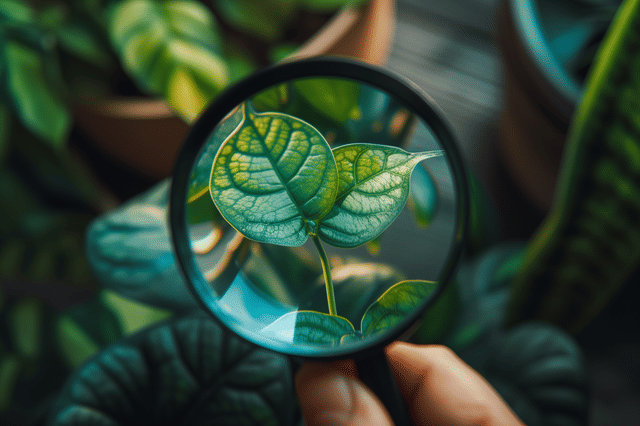
The best camouflaged pests (spider mites and thrips) can be microscopic initially. Two-watt inspection tip: Hold leaves toward any bright light and look for movement. Flicking dark specs with a painter’s brush will reveal if they scuttle—a dead giveaway.
When in doubt? Out comes my 10x jeweler’s loupe. It cost $12 and has saved at least four plant groups since 2017.
“I don’t have tools or space to do this.”
Neither did I when sharing 450 sq ft with ten ferns during grad school. Back then, ‘quarantine’ meant an airtight IKEA bag propped open with chopsticks and rotated every morning so humidity didn’t skyrocket. Real-world hack: Your imagination beats square footage every time.
The Process—from First Kick to Successes After Stumbles
Step 1:
As soon as new plants cross your threshold—even before unboxing if possible—I set them directly into quarantine spots without touching other surfaces. No pit stops on the coffee table.
Step 2:
Mimic their final destination’s light and temp; sudden drops stress even robust species like sansevieria—you’ll see leaf curling or splotching within days if conditions are poor.

Step 3:
Day one: Inspect roots (pulling out if safe), stems, soil surface; dust away topsoil searching for movement or white patches.
The next fourteen days: Re-examine every three days using both natural sunlight and artificial torchlight.
Major secret: Keep notes! A quick log (“Day 8—found residue near stem base”) catches slow-moving outbreaks early.
Step 4:
Isolate tools used on new arrivals—I use colored washi tape to mark scissors/pots/cans destined only for quarantine duty.
Disinfect afterward using rubbing alcohol wipes, especially before moving between areas.
Step 5:
If trouble appears—even just two aphids—it’s immediately soap spray (homemade works: 1 tsp Castile soap per quart water), then repeat treatment every three days until all clear through a full cycle.
Root issues? Pull affected plants entirely from soil and switch to water propagation until certain pests/fungus are gone.
One winter I lost four mature philodendrons because I trusted only surface-level checks; now my rule is double-check everything below soil line before release from quarantine.
Step 6:
After reintroducing former quarantiners to my main shelf, monitor both old favorites and newcomers daily for another week—any brown tips or fuzzies jump right back into isolation until fully sorted out.
When Quarantine Saved Decades’ Worth of Plants
In late summer 2020 I broke cardinal rule #1—trusting a friend’s hand-me-down calathea because “it never had issues.” Within seven days flea beetles spread from its hidden roots onto one Maranta cutting … which can go from cheerful to dead in just three weeks under attack. Had those not been behind closed doors in our laundry room post-move-in, it would’ve been game over across fifteen houseplants collected since my twenties.

Or take Lena—a collector who thought her metal windowsill planter was pest-proof until miniature white flies emerged after integrating nursery stock too soon. By week four she’d started over from scratch because nothing stayed separated long enough during their flight stage—a mistake she swore never to repeat (and neither will you).
Solving Real-Life Space/Time Problems
- If there’s truly no spare location? Shunt everything established together tightly—the more distance between main group/quarantined zone the better.
- When pests emerge mid-quarantine? Don gloves; manually remove visible bugs first before spraying. Re-treat consistently! Skipping follow-ups is where most home cures fail.
- Unsure what damage looks like? Download Plantix app or join r/houseplants on Reddit—crowdsourcing opinions saved me hours deciphering leaf spots more than once!
Why This Isn’t Optional—and How To Make It Automatic
Every plant tells your story—and protecting them is part science, part habit-building:
- Put reminders on your phone (“Inspect pots!”), especially when new arrivals land during busy life stretches.
- Create quarantine kits: spray bottle + loupe + sticky traps + dedicated towel = $30 investment saving hundreds over time.
Truthfully, some of my collection survivors are only still here because past mistakes drilled respect for these routines deep into muscle memory!
Two-three weeks feels like forever when excitement is high—but after witnessing how fast things unravel when shortcuts win out? You’ll appreciate these extra steps as nonnegotiable safeguards against heartbreak.
Set up your spot tonight—even if it means shifting books aside or improvising with kitchen racks—and make regular check-ins part of your weekly ritual. Take pride knowing each pest-free integration builds confidence alongside your thriving collection—something I value more deeply today than any single rare variegated find.
And any time odd spots show up (or mysterious webs), remember—the best growers lean hard on shared knowledge inside forums and local shops alike. It’s practical experience plus community wisdom that carries us past every hidden threat waiting beneath an otherwise picture-perfect leaf.
Cheers—and trust that isolation isn’t just good practice; done right, it makes you unstoppable as both collector and caretaker.