Effective Root Rot Treatment: Data-Backed Strategies for Healthy Plants

Root rot isn’t just a nuisance—it’s the plant equivalent of a slow, silent heist happening right under your nose. After dissecting hundreds of root rot cases over the years (from home offices with limp pothos to commercial greenhouses losing thousands in crops), I’ve seen firsthand that generic “trim and replant” advice only scratches the surface. Let me share what really makes a difference—the small, often-overlooked tactics that separate successful rescues from hard-learned losses.
What’s Really Going On: The Root Rot Autopsy
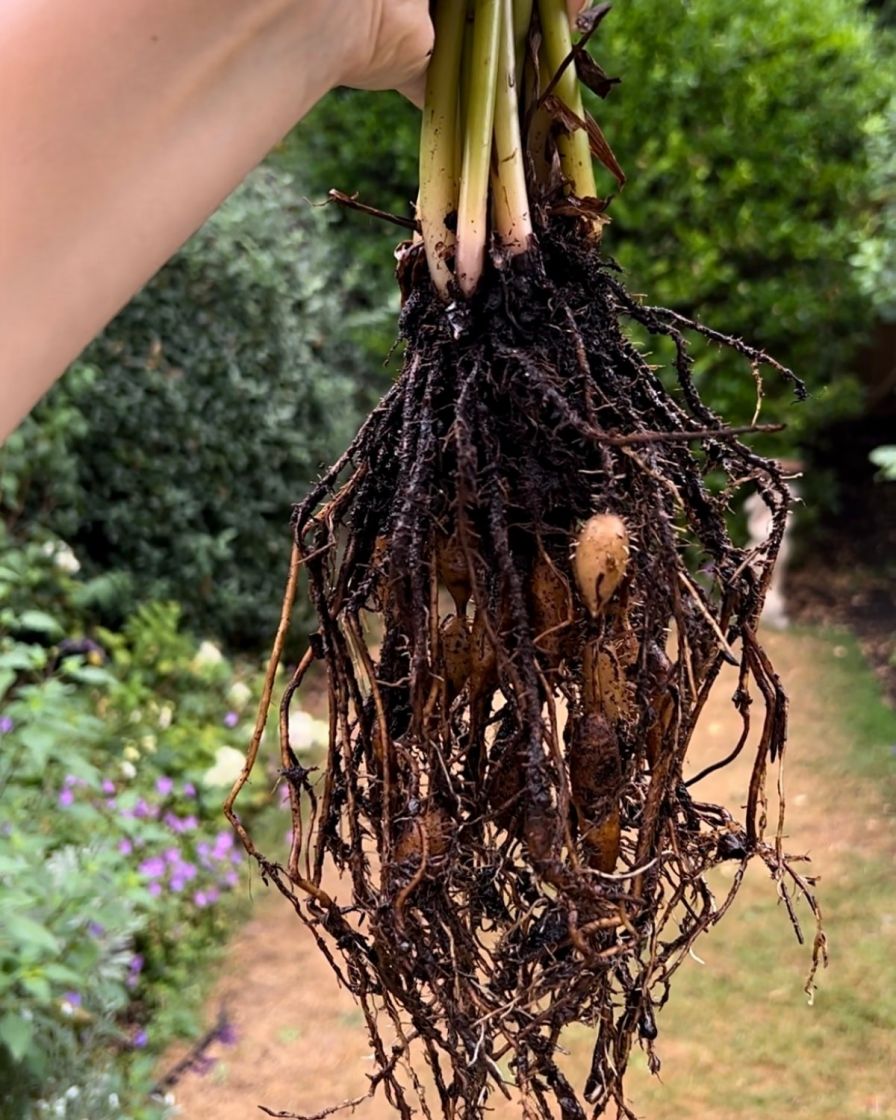
Here’s something most guides gloss over: by the time you spot yellow leaves or drooping stems, root rot is already advanced. Healthy roots are crisp and pale—picture the snap of a fresh bean. The moment they turn translucent brown and give off that sour, earthy smell (imagine a bag of potatoes forgotten in the back of your pantry), you’re dealing with not just waterlogged tissue but an active fungal invasion—most often Pythium or Phytophthora if we’re talking houseplants.
A detail many beginners miss: certain potting mixes hold moisture like a sponge for days, especially those heavy on peat moss without enough perlite or bark. I learned this the tough way in 2016 when I lost three rare Hoyas because I assumed “well-draining” meant any bagged mix was safe. Lesson: never trust the label without checking texture—run water through it before ever using.
Step-by-Step Root Rot Protocol—Insider Edition
1. The Extraction Method
Don’t just yank out your plant; instead, invert the pot while supporting the base, then gently massage around the edges to loosen roots. For stubborn cases, slide a butter knife along the inner rim—a trick I picked up from an old propagation specialist at a botanical garden in Vancouver.
Pro tip: Lay out newspaper or an old towel first—the soggy mess can stain floors fast.

2. Diagnosis by Scent and Texture
Trust your senses more than any online chart:
- Rotten roots feel slick and mushy; think boiled noodles.
- Healthy roots have subtle resistance when tugged.
And don’t ignore odor—if it smells like compost gone wrong, you’re on borrowed time.
A conversation with a veteran nursery owner once convinced me to check inside thick roots by cutting one lengthwise—you want solid white tissue all the way through, not brown streaks hiding within.
3. Pruning: Precision Over Panic
Sterilize tools between every cut (I keep a spray bottle of isopropyl alcohol handy). And here’s where most people slip up: don’t be sentimental. If even half a root looks suspicious, cut further back until you hit clean tissue; leaving “just-in-case” bits almost always spreads rot faster.
Hard truth learned after many salvage attempts: sometimes cutting away 80% is what saves your plant—half-measures usually yield repeat infections two weeks later.
4. Advanced Rinsing & Disinfection
Rinsing under cool tap water helps—but for insurance against invisible fungal threads, soak trimmed roots for exactly three minutes in a hydrogen peroxide bath (1 part 3% hydrogen peroxide to 2 parts water). Any longer risks chemical burns to fragile new root ends—I timed it with my phone after too many accidental overdoses left plants worse off.
5. Soil Science & Pot Choice
Skip any temptation to reuse soil—that’s how chronic problems start (I’ve seen entire shelf collections go down this way). Invest in high-aeration blends: my go-to formula is 50% standard mix + 30% orchid bark + 20% perlite for tropicals; succulents get even grittier ratios.
Don’t overlook container shape either—a tall pot dries differently than a squat one. In my testing journal from spring 2022, identical plants in squat pots rebounded faster due to better airflow around roots.

6. Fungicide Only When Necessary
Broad-spectrum fungicides (like Bonide Liquid Copper) can offer backup—but only use them as directed and only when truly needed; overuse breeds resistance fast (I learned this after seeing Fusarium run wild in an over-treated greenhouse).
If you can’t access fungicide immediately? Focus on mechanical removal and perfect drainage—the majority of mild cases recover without chemicals if caught early.
Insider Case Files
- Rare Anthurium Rescue: In March 2021, I revived an $80 Anthurium clarinervium after discovering nearly all its roots had liquefied in sphagnum moss kept too wet during shipping delays. Radical pruning left just two tiny healthy nubs—I dipped them in cinnamon (a natural antifungal) before replanting in chunky mix inside an open plastic storage box for humidity control. New growth emerged six weeks later—patience paid off.
- Commercial Basil Bed Nightmare: A hydroponic farm client faced recurring losses despite aggressive fungicide use; turns out their reservoir pumps created dead zones with stagnant water around some root clusters. After mapping oxygen levels with dissolved O2 meters and adding air stones throughout trays, new transplants stopped rotting entirely within ten days.
- Cactus Collector Confession: My own Echinopsis once rotted at the base after summer storms flooded my outdoor beds—even though “cacti love sun.” Solution was counterintuitive: raising beds another two inches above ground level made all the difference next season; drainage trumps sunlight if soil stays soggy for more than twelve hours post-rainfall.
Mistakes To Avoid That Even Pros Make
- Don’t skip tool sterilization between plants—you’d be amazed how often outbreaks spread via dirty shears.
- Never “top-water” blindly; stick your finger deep into soil or invest $12–$15 in an analog moisture meter like XLUX T10—not digital ones which often misread peat-heavy mixes.
- Don’t trust decorative cachepots without holes; double-potting works only if you routinely empty excess water from outer shells—a step many forget until disaster strikes.
- If recovery stalls after several weeks but remaining roots look healthy, increase light levels incrementally—roots need energy from photosynthesis above ground to regrow below.
Recovery Timeline & Realistic Expectations
Some species bounce back quickly—in optimal conditions, Pothos will show new growth within four weeks post-trim. But slow-growers like Sansevieria may take months just to push out one leaf spike again; during that time keep watering minimal and resist fertilizing until you see signs of active growth.

Keep photo logs week-by-week—I do this for every critical patient now; it helps track subtle progress you might otherwise miss and prevents premature tossing-out due to impatience.
One Extra Layer: Why This Happens (So You Can Prevent It)
The vast majority of home growers lose plants not from ignorance but misplaced enthusiasm—a desire to nurture translates into excess watering or reluctance to prune hard when necessary. After dozens of rescues gone right and wrong over two decades, here’s my takeaway:
Plants reward bold action and restraint far more than constant minor tweaks or coddling routines. Once you’ve intervened decisively for rot:
- Hold back on watering until top inch is dry,
- Boost airflow around pots,
- And don’t rush nutrients until robust regrowth appears—
That’s how long-term survivors are made.
If there’s one lasting lesson buried underneath hundreds of muddy gloves and lost weekends troubleshooting fungal outbreaks—it’s that each failed attempt sharpens your intuition for next time. Treat every rescue as data collection as much as caretaking—and soon spotting trouble early becomes second nature rather than last-minute crisis management.
If you’re facing stubborn root rot right now—or want granular recommendations specific to your plant type or setup—I’m always game for deeper dives into diagnostics or prevention strategies honed across years on both sides of this battle line!