Step-by-Step Guide to Propagating Aloe Vera Plants Easily
When I first tried propagating aloe vera, I thought it would be as simple as digging up a pup and planting it. Spoiler alert: it wasn’t. My first few attempts ended in shriveled, mushy little offsets that looked like they’d survived a desert drought—but not well. It took me three tries and plenty of trial and error before I figured out the secret sauce. The biggest culprit? Rushing through the callousing stage—the crucial drying time that lets the cut end heal before planting. For a comprehensive guide to aloe vera plant care and growth tips, be sure to check out our main article.
If you skip or skimp on this step, your otherwise healthy-looking pups will turn into sad, rotting failures faster than you can say “succulent.” This guide isn’t just about what to do—it’s about what not to do if you want your aloe babies to thrive.
Why Callousing Is Your Aloe Pup’s Lifeline
Think of aloe pups as little clones growing from the mother plant. When you cut them off, their ends are fresh wounds. Planting them right away traps moisture around that wound, inviting rot—and no one wants that.
Letting the cut end dry for 1-2 days until a firm callous forms is non-negotiable. I know it feels like waiting is pointless—“It’s just a small cut, how bad can it be?” I thought that too, until my first pup turned brown and mushy within days.
That callous isn’t just a step—it’s the difference between life and death for your new plant.
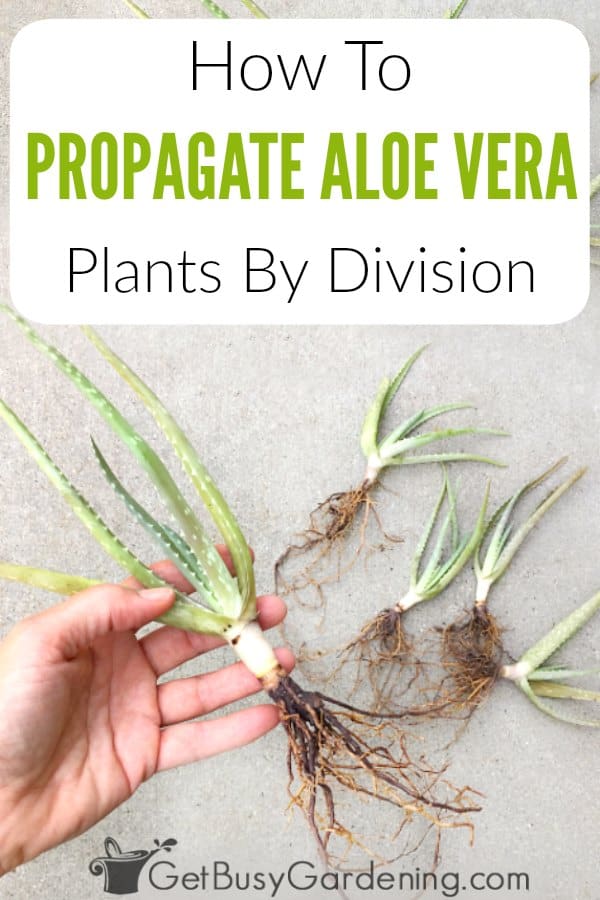
Step 1: Find the Right Offset (Pup)
Not all pups are worth the trouble. Look for offsets at least 3-4 inches tall with their own roots poking out. I once grabbed a smaller pup without roots because it looked healthy above ground—it wasted away entirely within two weeks.
Check for firm, plump leaves—avoid any with soft spots or discoloration. Roots should be white-ish and firm, not dry or rotten. Sometimes they hide beneath soil, so gently brush dirt aside before deciding.
Step 2: Prepare Like a Surgeon
Use a razor-sharp knife; I prefer a small Japanese-style paring knife. Sterilize it every time with 70% isopropyl alcohol to prevent infections that can kill pups or slow down recovery of your mother plant.
Set up your workspace on newspaper or an old tray—aloe sap is sticky and can get everywhere.
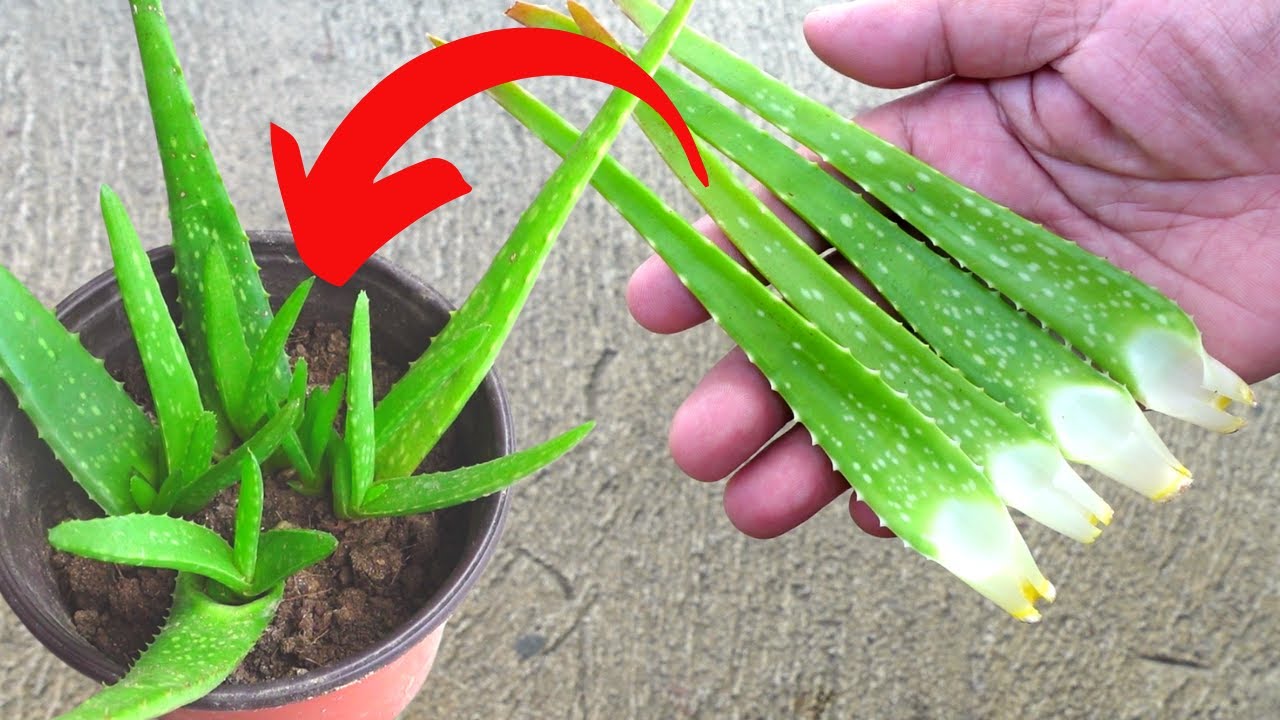
Step 3: Detach With Care
Don’t yank the pup off—that damages roots and stresses both plants. Instead:
- Dig gently around the base with a small trowel until you see where roots connect.
- Use your sterilized knife to make a clean cut, preserving as many roots as possible.
If roots snap off, your pup will struggle to establish itself.
Step 4: The Unsexy But Essential Drying Phase
This is where patience pays off big time: place the pup somewhere dry, shaded, and well-ventilated for exactly 48 hours (two full days). Avoid direct sunlight—too much heat dries out the pup excessively.
Skipping this step was my downfall early on—I watched my pup develop soft brown spots within days; classic rot setting in.
If you live in humid climates (Florida summers, anyone?), drying might take closer to 3 days—don’t rush it.
Step 5: Soil That Breathes
“Use cactus soil” is common advice but often vague. Here’s what works best based on my experience:
- 2 parts standard potting soil
- 1 part coarse builder’s sand (not beach sand—salt content kills roots)
- 1 part perlite or pumice
This mix drains quickly but still holds enough moisture for root growth without drowning them in soggy soil.
I once planted pups in pure potting soil alone—soil stayed wet for days and nearly wiped out an entire batch.
Step 6: Planting With Precision
Plant just deep enough so the pup stands upright without support; burying deeper stresses it.
Firm soil gently around roots but don’t compact aggressively—that cuts air flow which roots desperately need.

Always use pots with drainage holes placed on saucers or trays to catch runoff—but never let pots sit in standing water.
Post-Planting Care: The Art of Waiting
This is where most people mess up by watering too soon. Resist watering immediately—even if soil looks dry!
Your pup needs about 7 days to settle before absorbing water actively through new roots.
After that week:
- Water sparingly—roughly every 10–14 days, depending on humidity and temperature.
- Overwatering kills more pups than pests or diseases combined.
Keep your aloe in bright indirect light—morning sun or filtered light through curtains works well. Too much direct sun fries tender leaves; too little stalls root growth altogether.
Watch for signs like wrinkling leaves (need water) or yellowing/soft leaves (too much water).
Real Talk: My Painful First Failures
Back in summer 2019, my first attempt was rough:
- Didn’t sterilize tools
- Didn’t let cuts callous
- Planted pups immediately
Within four days:
- Half shriveled brown at base
- Others showed no root growth after three weeks
Reading about fungal infections and root rot was eye-opening. So I changed everything:
- Sterilized knives every time
- Gave pups two full days drying indoors
- Used my custom soil mix with perlite
- Waited a full week before watering
Result? Survival rate jumped from under 50% to over 90%! Healthy pups started pushing new leaves within four weeks—a clear sign they’d really taken root.
What Most People Never Tell You About Aloe Propagation
Callousing isn’t optional—it’s essential for success.
Timing matters more than you’d think: early spring or late summer are best because aloe grows actively then; offsets root faster and stronger during these periods.
Trying propagation mid-winter? Expect slower results and higher failure rates unless conditions indoors are perfect (warmth + light).
Also, don’t underestimate soil texture:
- Fine potting mix alone = root suffocation waiting to happen.
- Adding grit (sand + perlite) keeps airflow high—your aloe’s roots crave oxygen almost as much as water!
For a complete overview of aloe vera plant care and propagation, including seasonal tips and healing properties, refer to our main article. To learn more about the many uses and benefits of aloe, see our article on the top health benefits of aloe vera gel.
When Things Go Wrong: Troubleshooting From Experience
Pup shrivels during callousing:
Air too dry? If near AC vents or heaters, lightly mist nearby—not directly on cut ends—to keep humidity balanced without soaking them. Too much airflow dries them out faster than they heal.
No root growth after weeks:
Check light levels—too dim slows things dramatically. Also reduce watering frequency; soggy soils discourage rooting.
Mother plant wilts after pup removal:
You may have damaged roots too close to main crown; next time leave more buffer space when cutting offsets.
The One Thing I’d Tell Anyone Starting Out
Don’t rush anything—not cutting, not drying, not watering—even if impatience screams otherwise. Aloe propagation is as much about patience as gardening skill.
Treat each attempt like an experiment rather than guaranteed success; learn something new every time things go wrong—it will pay off quickly.
If you follow these steps carefully—and embrace mistakes—you’ll be rewarded with thriving aloe babies ready to brighten your home or gift away within weeks.
Quick Recap Checklist:
- ✔️ Choose pups at least 3–4 inches tall with visible roots
- ✔️ Sterilize your cutting tool with alcohol before each use
- ✔️ Detach pups gently using clean cuts preserving roots
- ✔️ Let cut ends dry & callous for 48 hours in shade/ventilation
- ✔️ Use well-draining soil mix: 2 parts potting soil + 1 part builder’s sand + 1 part perlite/pumice
- ✔️ Plant shallowly; firm soil gently around roots without compacting
- ✔️ Wait 7 days post planting before watering lightly every 10–14 days thereafter
- ✔️ Keep plants in bright indirect light — avoid harsh direct sun initially
Remember: patience wins here more than skill alone!
Happy propagating—and don’t forget to enjoy those tiny victories along the way!


